What is ‘Question Level Analysis’?

An article by Richard James Rogers (author of The Quick Guide to Classroom Management).

Dr. Curry was a friendly, but direct, man.

On one sunny afternoon in the newly-built science labs at St. Richard Gwyn RC High School, Flint, he called me to the back of the class to discuss my progress in the subject. This was a strategy that was being implemented school-wide, with every ‘A2’ – Level student (we were in our final year of high school).

Giving feedback

Dr. Curry must have made me think that day because I remember what he said:

“You’re still waffling too much in exam questions, Richard, but it’s better than when you were doing GCSEs”

I hope I won’t waffle too much in this blog post.

Thought results in memory 

Daniel Willingham sums up what I experienced best in possibly one of the most influential texts on pedagogy out there: ‘Why Don’t Students Like School?’

Memory is the residue of thought

This quote often comes up in my thoughts as I go about my day as a teacher. I think about the thousands of lessons I was taught as a kid in primary and secondary school. In terms of content, I think I can remember upwards of 70% (as proven by my exam scores over the years). In terms of impressions and actually thinking back to a specific lesson and ‘remembering’ what happened: that’s got to be less than 1%.

img_0009-1
An AMAZING book!

Dr Curry’s analysis got me thinking about myself, and how I had evolved as a student over the years. It was a good tip, and it helped, but is there a way to make a one-to-one meeting like this even more specific (and is it beneficial)?

Command terms frequency analysis

Whole-class feedback can be powerful, especially when there are obvious patterns of weakness showing-up. This is where an early-technique of mine can be really helpful: analyzing the command terms in different tests and assessments.

Discussing homework

Command terms are those words that tell you what to do in a question. Examples include:

  • Describe
  • Annotate
  • Explain

What I found helpful in the early part of my career was counting the command terms used in different tests, and then seeing which students scored poorly in tests where a clear skew of command terms was apparent. This gave me some means of specific advice that I could pass on to my learners:

If we look at the table above, for example, we can see that the different tests contain different numbers of command terms. Let’s say that I have a student: ‘Student A’, and Student A does okay in test 1 in November; as expected in the December test, but slumps in the January test. What does a teacher do in that situation and why has this happened?

As we can see from the frequency analysis above, it may not be the case that Student A simply didn’t revise enough (a common misconception that teachers have).

chatting in class

We see that the January test required many more explanations and calculations that any of Student A’s previous tests, and her poor score could just be because she hasn’t had enough practice in completing these kinds of questions.

Armed with this kind of data, teachers can have very meaningful and powerful one-to-one conversations with students: highlighting specific areas of weakness and providing guidance on how to best tackle specific command terms.

This process can be a little tedious, however, and focuses only on skills (not content).

So……..is there a way to make this process better?

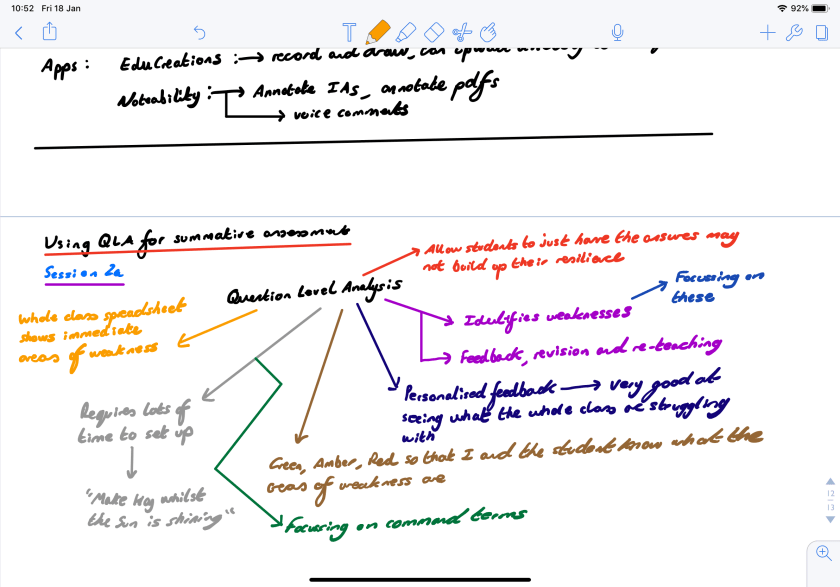
Thankfully, the answer is yes!: it’s called Question Level Analysis or QLA.

Students assess, think, share and discuss: productive QLA

Taking the command terms frequency analysis to the next level (which is a great ‘whole-class snapshot tool’) we can now get the students to analyse their own responses to specific questions and then think carefully about how to fix any problems they’ve had (creating memory in the process).

jenga

The method I like to use (because of its simplicity and ‘hands-on’ approach for the students) is as follows:

  1. Share an editable spreadsheet with all of your students (such as a Google Sheet®). Make sure the command terms are filled in for each column heading.
  2. Get your students to fill in their names and colour in the boxes with a colour that recognizes levels of understanding (e.g. green, amber and red)
  3. You could do this as a ‘per test’ format or cumulatively over the course of a year, examination course or even the entirety of a child’s schooling:

4. Pair the students up (or group them) according to weakness-matching. For example, student B can help student G with the calculations questions, and student G can help student B with the ‘describe’ questions.

5. Once the kids are paired up, give them the chance to explain to each other how to answer the specific questions that they scored poorly on. Ideally, this should be done before any mark-scheme or model answer sheet is given to the students, as this will cause deep-thinking to take place, which should result in secure memory of the concepts being learned in the process.

poll-everywhere

6. Rotate students around a few times: this will get those who’ve just learned something new to teach it to another student (you’ll have to explain this concept to the class)

6. Once the process has finished, feel free to give the mark-schemes to the students: they’ll need them when doing their own revision before the final exams. Sometimes students make messy notes when they are peer-teaching each other like this, so be sure to tell them to keep their corrections tidy and clear as they’ll need to refer to them as part of their revision at some point in the future.

Q & A

Teacher actions during the QLA process of peer-teaching

  • Sit-in on different pairs of students and listen to how the conversations are going
  • Call individual pairs to your desk and ask probing questions about areas of weakness
  • Mark questions in front of the students in cases where complete misunderstanding has taken place
  • Sit with very weak students and provide extra-guidance
  • A possible twist: pair some very strong students up and get them to create a website, blog or infographic that teaches all of the students the content in the exam

I’ve been fortunate enough to use QLA successfully in my teaching over the years, and I saw it in action at Harrow International School at a CPD course I went on last weekend. I can tell you firmly and confidently: it works!

img_0262
Discussing QLA with Harrow International School staff last week 

IMG_5938

richard-rogers-online

We welcome you to join the Richard Rogers online community. Like our Facebook page and follow us on Twitter for daily updates.

Latest hybrid

3 Cool Education Apps to use in 2019

An article by Richard James Rogers (author of The Quick Guide to Classroom Management).

Technology is supposed to be helpful, but sometimes it makes me mad. When I can’t change the text color on a blog post because the iPad doesn’t support it, or when my PC auto-updates when all I want to do is switch it off, I find myself losing faith in the power of technology.

A bright light of hope was shone my way these past two days, however, when I attended an excellent Science JAWs (Job-alike Workshop) event at Harrow International School, Bangkok.

richard rogers harrow.jpg
Learning about EdTech with colleagues at Harrow International School, Bangkok, Thailand. I’m the one in the polo shirt ;-D

I had the chance to rigorously test out the apps I’m about to show you and, I can tell you: they really do make life easier (and they can do some cool things too!).

So here’s my list of what I believe to be the most useful apps I tested during this event. I’ll definitely be using them with my students and in my teaching. Enjoy!

1. Nearpod

Where you can get it and use it: App Store, Google Play, Microsoft Store, Chrome Web store and on the web at Nearpod.com

Cool Feature #1: You create a slideshow on Nearpod. Your kids login with a code that Nearpod generates (they don’t need to sign up, which saves tons of time) and, boom!: the slideshow will play on every student’s device. When the teacher changes a slide, then the slide will change on the kids’ screens.

img_0009-1
“An AMAZING Book!”

You can choose to show the slideshow on a front projector screen/smartboard, or simply walk around the class with your iPad or laptop as you’re instructing the kids.

Cool feature #2: Put polls, questions, quizzes, drawing tasks, videos, 3D objects, web links and audio segments into Nearpod presentations to make the experience fully ‘interactive’.

When I tested Nearpod at Harrow I thought it was super-cool because I could write an answer (as a student) and it would show on the front-screen as a sticky-note with everyone else’s. Chelsea Donaldson shows this excellent image of what I experienced over at her blog:

As you can see, other kids can click ‘like’ and can comment on the responses, making this an ultra-modern, ‘social-media’ style education tool.

Another feature I loved was ‘Draw it’. It’s similar to ‘collaborate’ (the feature above with the sticky-note answers), but this time the students either draw a picture or annotate a drawing you have shared.

I can see this being great for scientific diagrams and mathematical operations.

Students can use a stylus/Apple Pencil, their finger (if it’s a non-stylus tablet or phone they are using) or even a mouse to draw the picture. Once drawn, the pictures will show up on the teacher’s screen together, and this can be projected if the teacher wishes.

Cool feature 3: Virtual reality is embedded into Nearpod (and I need to learn a lot more about it!).

I don’t understand it fully yet, but Nearpod themselves say that over 450 ready-to-run VR lessons are ready on their platform, including college tours, mindfulness and meditation lessons and even tours of ancient China!

Now that sounds cool!

My thoughts about Nearpod

I like apps that are quick, useful and free/cheap to use.

Nearpod ticks all of those boxes.

The features that I tested which were super, super cool include:

  • Kids log in with a code and your presentation appears on their screens. When you change a slide, the slide changes on their devices!
  • You can put polls, drawing tasks and questions into your slides and it’s all fully interactive. Kids’ answers will appear on the projector screen for all to see (if you wish), or simply on the teacher’s screen (for private viewing).

I love this app and I look forward to using all of its features with my students.

2. Noteability

Where to get it: App Store, Mac App Store

Cool feature #1: Noteability has allowed me to make the most amazing notes and save tons of paper and paper-notebooks in the process. Just look at these beautiful notes I made during my Science JAWs training this weekend:

As you can see, you can select a wide variety of colors and make beautiful notes, Mind-Maps, concept-maps, flow charts, diagrams and more.

I use this feature of Noteability to:

  • Plan things in my daily life (such as my blog posts, my weekend plans, my fitness plans, etc)
  • Write shopping lists
  • Write lesson plans
  • Take notes in school meetings

Cool feature #2: Noteability allows you to annotate PDFs with the Apple Pencil. This is absolutely brilliant and has allowed me to annotate my IB Diploma Chemistry coursework (Internal Assessment) quickly and clearly before uploading the coursework to the IBIS system.

I can see this feature becoming really useful for schools that want to save paper and for teachers that want to annotate coursework, homework or classwork and then send it back to the student in some way (e.g. by e-mail, through Google Drive or through Google Classroom).

Take a look at this IB Chemistry coursework annotation I recently did with Noteability and the Apple Pencil:

Another way to use this feature is to get the kids to scan their classwork, homework or past-paper answers and then annotate each other’s work with the Apple Pencil. The teacher could also annotate it too:

Cool feature #3: Students can make revision notes, classnotes, homework assignments and submit work all through Noteability. Using the ‘split-screen’ mode on the iPad Pro they can even copy images and charts directly from a web-page they are reading at the same time:

For students, I can see Noteability being using in a range of creative ways:

  • Making revision notes
  • Annotating their own work, or each other’s
  • Creating assignments and presentations (Noteability allows users to copy content from the web seamlessly using ‘split-screen’ mode)
  • Making notes in class

There is the possibility that tablets may even replace traditional school notebooks in future too – removing the need for 11-year-old kids to carry really heavy bags around school all day (and this has already been linked to back problems).

My thoughts on Noteability

I mentioned this a few blog posts ago but I feel it’s worth a second shout-out.

I like this app because it has basically replaced all of my notebooks, and is an excellent planning, note-taking and annotation tool.

A big drawback of Noteability, at the time of writing, is that it is only compatible with iOS. Not all students use Apple devices, and schools won’t always fork-out money for them. However, I have found that my own personal investment in an iPad Pro, along with Noteability, has enchanced my life in many ways and has benefited some of my students as I have been able to annotate their work better than ever before.

3. Flipgrid

Where to get it and use it: Microsoft Store, App Store, Google Play Store and at flipgrid.com

Cool features: Flipgrid is a secure video-commenting/video-conferencing platform. Flipgrid’s mission is to “Empower student voice” and they’ve certainly achieved that with this app.

Basically, the teacher uploads a video of himself/herself asking a question, or posts a question, link, resource or video, and the students respond by taking videos of themselves responding to the material.

It’s super cool!

Once the students have uploaded their videos of themselves, other students can see them and watch them (and comment on them). They can even respond to videos with videos, so it really can get a discussion flowing!

Image courtesy of Flipgrid

Each video a student creates will receive feedback from other students and the class teacher, and the student who made the video can quickly see the feedback they’ve received.

I would recommend all tech-interested educators to check out Jess Bell’s guest blog post over at larryferlazzo.edublogs.org entitled ‘Getting Started with Flipgrid’.

My thoughts on Flipgrid

When I tested it this weekend at the conference it took me a while to figure out how to use it, and what its purpose was.

Once I’d signed up, however, the website directed me to lots of great help and resources. There’s a load of pre-made lessons and students can sign in with a simple pre-generated code (like Kahoot! and Nearpod) which saves tons of time.

Once you’ve signed up (it’s free) and you’re in on Flipgrid, your dashboard will look something like this:

As you can see: it has a very user-friendly interface.

Conclusion

EdTech is here, everyone, whether we like it or not.

I’m a big believer in using things that work: things that help. I don’t believe that technology can (or should) replace everything a teacher does traditionally (such as having a one-on-one conversation with a student), but I do believe that these apps I have mentioned have tremendous potential and should be capitalised on fully.

As always, please do be aware of how screen-time affects our students’ health (I wrote a blog-post about this here: Digital Disaster: Screen Time is Destroying Childrens’ Health). I wouldn’t advise that screens be used all lesson, every lesson, but we should use these apps at appropriate times to reinforce, teach and revise key concepts.

IMG_5938

richard-rogers-online

We welcome you to join the Richard Rogers online community. Like our Facebook page and follow us on Twitter for daily updates.

Latest hybrid

Using Tablets in Teaching

An article by Richard James Rogers (Award-Winning Author of The Quick Guide to Classroom Management and The Power of Praise: Empowering Students Through Positive Feedback)

Follow me on Instagram

I remember when the first iPad came out. As a chunky, cumbersome device that seemed to defy the goals of most other devices (maximizing, rather than minimising space), it lent itself mercilessly to all manner of jokes – many centered around sanitary towels.

In an educational context, however, school leaders and teachers were quick to see the benefits that tablets could bring to the classroom. They had large screens, longer battery life than smartphones and seemed more robust than laptops.

I’ve just purchased the latest generation of iPad Pro. It’s a beautiful device and I’m finding that it is helping me with a number of things in my job as a teacher.

I’d like to share my findings with you.

Parents’ evening

In the past I would bring student notebooks, data printed on paper and my own thoughts and suggestions to parents’ evening. This was inefficient, and involved quite a lot of heavy-carrying.

Now I use my iPad Pro and it’s brilliant:

  • I scan student work to my iPad using the CamScanner app (this is an app were you basically take a photograph and the iPad scans the photo like a document). I can then show the parents the student work on my iPad screen – I can even zoom in to show specific details.
  • With a simple ‘double-tap’ of the Apple Pencil on the home screen, I can open a notes page allowing me to write things down that I discuss with parents
  • My iPad can link to Google Sheets, so I can literally show the parents the latest assessment data for that class and discuss the progress of the student

Here’s a screen shot of some notes I made in a recent parents’ evening on the IPad Pro:

Some notes I made with a parent at a recent parents’ evening. As you can see, I’m still getting used to writing with the Apple Pencil.

Annotating student work

Probably the biggest way that the IPad Pro has helped me with my job is by allowing me to quickly annotate student work with the Apple Pencil, and then save that work as a pdf.

I teach IB Diploma Chemistry and one of the IB’s requirements is that student coursework be uploaded to their system in pdf format, and annotated if possible. Some teachers simply mark the work by hand and scan it, whereas others annotate the work with typed comments using Adobe Acrobat. I personally prefer the flexibility and depth of color of annotation that the Apple Pencil allows me. Just look at these examples below:

Where I see work annotation going in the future

I must admit that I am already amazed at the amount of printing and hassle that VLEs like Google Classroom have saved me. However, I see the ‘paperless’ classroom going a step further with tablets that have sketch capabilities, such as the iPad Pro. Students will be able to use these devices to annotate each other’s work (peer assessment) and annotate their own (self-assessment). The need for printing may be removed altogether, which saves trees and cuts costs.

But what about apps?

Ah yes, no good blog post about tablets would be complete without a list of favorite apps. Please allow me a moment on this.

Along with the advantages of using tablets that I’ve already mentioned, including the capability of students to annotate each other’s work, a number of great learning apps exist that can really take student achievement to the next level.

One of my favorites is the Gojimo app.

Gojimo contains question banks from a wide-variety of subjects and exam-boards (including IGCSE and A-Levels). It includes loads of multiple choice questions with model answers when kids get the questions wrong. There’s even a live-chat feature that students can use when they’re stuck.

I like using Gojimo on my iPad during private-tutoring/mentoring sessions. It’s a good way to get students focused and provides lots of source material for revision.

Another of my favorites, already mentioned, is the Noteability app:

I like this app because it has basically replaced all of my notebooks, and my wife is very happy about that!

I use Noteability for a wide-variety of things including:

  • Lesson-planning
  • Making notes in meetings
  • Annotating student work

For students, I can see Noteability being using in a range of creative ways:

  • Making revision notes
  • Annotating their own work, or each other’s
  • Creating assignments and presentations (Noteability allows users to copy content from the web seamlessly using ‘split-screen’ mode)
  • Making notes in class

There is the possibility that tablets may even replace traditional school notebooks in future too – removing the need for 11-year-old kids to carry really heavy bags around school all day (and this has already been linked to back problems).

Using Noteability to make classnotes in ‘split-screen’ mode

Conclusion

Tablets have the power to really take over many aspects of teaching, and this can save teachers and students time, energy, hassle and paper! I’ve only scratched the surface of what tablets can do in this short blog post (I haven’t talked about movie making with iMovie for example).

I’m glad I purchased my iPad Pro. It cannot replace all of the features of a laptop, but there are lots of cool things it can do!

IMG_5938richard-rogers-online

We welcome you to join the Richard Rogers online community. Like our Facebook page and follow us on Twitter for daily updates.

Latest hybrid