Success in high school is not just about hard work: it’s about working smart, using proven strategies that boost learning, memory, and motivation. Here are 10 powerful tips, distilled from years of classroom experience and research-backed methods, to help students achieve their full potential.
Tip 1: Use Retrieval Practice with the P.O.W.E.R. Method
Retrieval practice strengthens memory and deepens understanding. The P.O.W.E.R. method offers a step-by-step approach:
Prime the mind with mind maps and summaries.
Organize thoughts using mnemonics, diagrams, and structured notes.
Wrestle with challenging recall questions in a low-stakes environment.
Evaluate progress using self-assessment tools like traffic lights or digital journals.
Reinforce learning through hands-on, real-world tasks.
Clarity in teaching is essential. Share resources before lessons, use simple and organized slides, and avoid overwhelming students with too much or irrelevant information. Speak clearly and slowly, reinforce key terms, and use everyday language to explain complex concepts. Focused activities and careful resource selection also boost lesson effectiveness.
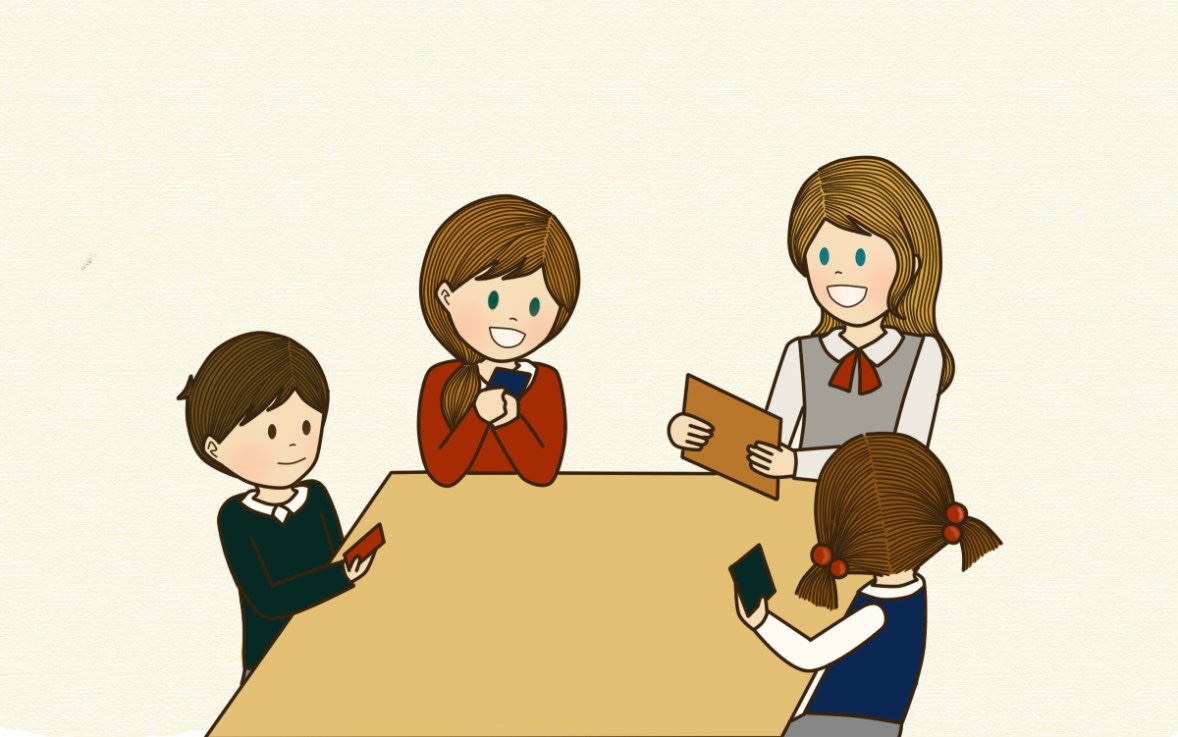
Variety in lessons keeps students engaged. Incorporate games like Splat, Mystery Word, Bingo, and True or False Walls to reinforce key concepts in a fun and interactive way. These activities not only motivate students but also enhance their recall and application of knowledge.
Learning journals promote reflection and metacognition. Students can track their progress, note areas for improvement, and set goals. Journals also provide valuable feedback for teachers and encourage ownership of learning.
Instead of focusing on one topic at a time (blocked practice), interleave different topics and question types. This improves problem-solving skills and helps students see connections between concepts. Interleaving has been shown to enhance long-term retention and adaptability.
QLA allows students to analyze their performance question by question, identifying specific strengths and weaknesses. This targeted approach helps students focus their revision on areas that need the most improvement, leading to more efficient study habits.
Encourage students to assess their own and each other’s work. This develops critical thinking, helps them understand marking criteria, and builds a deeper awareness of quality work. When done correctly, it empowers students to take responsibility for their progress.
Timely, specific, and actionable feedback is key to student improvement. Focus on what the student did well, what needs to improve, and how to move forward. Feedback should be an ongoing dialogue, not a one-time event, and should encourage growth mindsets.
Teach students how to structure their notes and study materials. Tools like mind maps, graphic organizers, and timelines make complex information easier to understand and remember. Organized learning enhances clarity and confidence.
Richard’s Award-Winning Book for High School Teachers
Tip 10: Motivate Students with Positive Reinforcement
Motivation is crucial for high performance. Use praise, rewards, meaningful goals, and real-life relevance to inspire students. Show them how their learning connects to their future ambitions, and create an environment where effort is recognized and celebrated.
These strategies, when combined, create a powerful framework for academic success. By embedding these tips into daily teaching and learning routines, students can build the skills, mindset, and confidence they need to excel.
Like what you see? 🎯 Check out my shop for unique merchandise and products that support this blog. Every purchase helps me keep creating content you love. – Richard
We welcome you to join the Richard James Rogers online community. Like our Facebook page and follow us on Instagram for the latest news, blog posts and commentary.
Unless you’ve been hiding in acave for the past five years, it’s highly likely that you have heard the phrase ‘retrieval practice’ being bandied about multiple times at educational seminars, Professional Development workshops and even in the departmental meetings you’ve attended at school. It’s one of those areas of pedagogy that has gotten educators excited due it’s evidence-based effectiveness, as well it’s inclusion, affirmation and promotion of metacognitive strategies (another hot topic in education).
It is my observation, however, that the majority of teachers are not 100% clear about what retrieval practice actually is – in part because some of the professional literature on the issue is conflicting, and also because as a concept it complexifies something rather simple (something that teachers have being doing for decades):getting students to reflect upon and use what they know.
In today’s blog post, I aim to provide my readers with the following:
A simple, understandable description of what retrieval practice is
A handy acronym (P.O.W.E.R.) that we can all use to remember the stages we need to follow as teachers when carrying out retrieval practice with our students
Some ideas on techniques and activities we can use in the classroom to facilitate good retrieval practice
Think ‘expression’ as opposed to ‘ingestion‘
I was most impressed with this great video by Unleash Learning which described retrieval practice as focusing on getting information out of students’ heads, rather than into students’ heads. This implies that retrieval practice only works if information has been put into the students’ heads in the first place – and this is true – retrieval practice is used as a follow-up when students have already been taught the information they need to know.
Retrieval practice is used as a follow-up at some point after a topic/unit has been taught.
Students should be encouraged to articulate what they have learned in some way, and then use what they have learned in some way (e.g., to answer an exam-style question). Retrieval practice places heavy emphasis on learning rather than assessing, although low-stakes assessments can be used as part of the retrieval process (see this blog post of mine on assessment ‘for’, ‘of’ and ‘as’ learning for more info on that!).
Give your students the P.O.W.E.R. they need to succeed!
So, let’s look at an easy-to-remember step-by-step process for facilitating retrieval practice in the classroom – the P.O.W.E.R. technique.
Prime (P): Prime the Mind
Start by priming the mind. Review essential concepts, key points, or summaries to prepare your students for the learning experience ahead.A great activity for this is Mind Map Mayhem: Encourage students to create colourful mind maps summarizing key concepts from the previous lesson. They can use doodles, arrows, and even emojis to make it visually appealing. This primes their minds for what’s to come!
At this stage, summaries do not need to be organized – they can be scattered and random, and do not necessarily need to be handwritten – a group discussion, quick verbal presentation to the class or even a bulleted list will suffice.
Organize (O): Organize Thoughts Actively
Encourage active organization of thoughts. Have your students organize information in their own words, creating meaningful connections and enhancing comprehension through an engaged approach. There are many tools that can be used for this, but my favorites are:
Mnemonics
Acronyms
Infographics
Graphic organizers
Google Slides, Docs, Sheets and Sites
Flow charts
Audio notes
It’s quite important at this stage that information follows the required pattern in which it needs to be retrieved in the final exams – e.g. the stages of cell division (in order), a timeline of King Henry VIII’s reign (in order), the points to raise in a written response to a language question (in order), etc.
Wrestle (W): Wrestle with Challenges
Yes! – we finally have a teaching acronym with ‘Wrestle’ in it (cue the giggles in teacher workshops all across the world from this point onwards). If nothing else, this wise choice of a word will help us all to remember that in this stage the students should tackle thought-provoking questions that demand active recall.
This step engages the mind in a mental wrestling match, strengthening memory and reinforcing the learning process.
The questions do not necessarily need to be provided in a mini-test or handout format (although you can go with that too), live quiz apps, verbal questioning, exam-style questions, past-papers, flash cards, quick writing exercises, worksheets and learning journals can all be used as tools to facilitate this process. At this stage, the questions should be low stakes, so that making mistakes is encouraged.
Evaluate (E): Evaluate Understanding
Promote self-evaluation to gauge understanding. Guide your students to reflect on their comprehension, identifying areas of strength and pinpointing topics that may require additional attention.
Check out my award-winning book for high-school teachers on Amazon. Purchases support the creation of my blog posts and podcast episodes.
A great technique that teachers have been using for decades for this is Traffic Lights. Provide students with red, yellow, and green cards. Ask them to hold up the corresponding card to indicate their understanding. Red for unclear, yellow for partial, and green for solid comprehension. It’s a quick and visual way to evaluate understanding.
Again, live quiz apps can be used for student self-evaluation, as well as self-reflection rubrics. Metacognitive tools, such as self-regulation checklists, are also great for this.
In my current practice, I like creating Google Sheets in which students can type in their reflections as they do them – essentially creating a long-term digital journal/record of their progress. The sheets are very simple – usually asking which questions the students got wrong, why they got them wrong, and what they should do next to improve further. When created on a Google Classroom assignment, one sheet is enough, as a copy will be made for each student if you select the correct option from the drop-down menu.
Reinforce (R): Reinforce Through Practice
Transition to reinforcement through practice. Engage your students in hands-on activities, be it additional past-paper questions, problem-solving scenarios, experiments, or real-world applications. This step solidifies knowledge and encourages practical application.
Practice makes perfect!
One activity you might want to try (if you’re looking for something unusual) is Escape Room Extravaganza. Create a virtual or physical escape room with challenges related to the lesson. Students work in teams to solve problems, unlock clues, and apply their knowledge. A QR-code treasure hunt may work well for this, for example. It’s a fantastic way to reinforce learning through collaboration and critical thinking.
Conclusion
Retrieval practice is essentially a way to build long-term memory of concepts, skills, ideas, key vocabulary, techniques and knowledge. At some point after a topic or unit has been taught to your class, use the P.O.W.E.R. strategy to get your students retrieving that prior knowledge – you’ll soon find that concepts will be generally better understood, performance in future assessments will increase and students will feel more confident articulating, processing and recalling the material they have covered.
Recommended further reading
Head over to retrievalpractice.org where you will find lots of free, downloadable pdfs containing tons of advice on how to implement retrieval practice in your lessons.
We welcome you to join the Richard James Rogers online community. Check out our official Facebook Page, Instagram and Podcast for regular updates.
Like what you see? 🎯 Check out my shop for unique merchandise and products that support this blog. Every purchase helps me keep creating content you love. – Richard
As we embark on our (hopefully) fulfilling journey of shaping young minds and fostering a love for learning, it’s crucial to navigate the realm of assessments with a clear understanding of the three fundamental pillars: Assessment for Learning (AFL), Assessment of Learning (AOL), and Assessment as Learning (AAL). These three components not only guide our teaching practices but also play a pivotal role in student growth and achievement.
Assessment for Learning (AFL)
Imagine a classroom as a dynamic ecosystem where both teachers and students are co-creators of knowledge. That’s the essence of Assessment for Learning (AFL). In this approach, assessments are viewed as tools for understanding where students are in their learning journey, identifying misconceptions, and tailoring instruction accordingly.
AFL is about ongoing, formative assessments that provide real-time feedback to both teachers and students. It’s not just about grades; it’s about fostering a growth mindset and creating a supportive environment where mistakes are viewed as stepping stones to success. Through quizzes, discussions, and other formative assessments, AFL helps us make timely instructional adjustments, ensuring that no student is left behind.
Some effective examples of AFL activities include:
Formative Quizzes: Create short quizzes or assessments that students can take during or after a lesson to gauge their understanding of key concepts. Use the results to identify areas that may need further clarification or reinforcement.
Peer Feedback Sessions: Organize peer review sessions where students provide feedback on each other’s work. This not only helps in assessing the quality of their work but also encourages collaboration and the development of critical evaluation skills.
Think-Pair-Share: Pose a question or present a scenario, and have students think about it individually first. Then, they pair up with a classmate to discuss their thoughts before sharing with the larger group. This encourages individual reflection and collaborative learning.
Exit Tickets: Use exit tickets as a quick assessment tool at the end of a lesson. Ask students to answer a few questions or solve a problem related to the day’s lesson. This provides immediate feedback on their comprehension and helps in adjusting future instruction based on identified needs.
Concept Mapping: Have students create concept maps to visually represent the relationships between different ideas or topics. This not only assesses their understanding of the material but also helps them organize and connect information in a meaningful way.
Assessment of Learning (AOL)
Assessment of Learning (AOL), often referred to as summative assessment, is what most of us are familiar with – the end-of-unit tests, final projects, or standardized exams. AOL is like taking a snapshot of what students have learned over a specific period. While AFL informs our day-to-day teaching, AOL provides a comprehensive overview of student achievement and allows for accountability at a broader level.
As teachers, AOL helps us evaluate the effectiveness of our instructional strategies and curriculum. It provides valuable insights into the strengths and areas that may need improvement. While it’s essential for reporting and grading purposes, AOL is most impactful when combined with AFL, creating a holistic approach to assessment.
Examples of AOL activities include:
Traditional Exams: Standardized written assessments that test a student’s knowledge and understanding of the material. This can include multiple-choice questions, short answers, essays, or a combination of these formats.
Project-Based Assignments: Tasks that require students to apply what they have learned in a creative or practical way. This could involve research projects, presentations, or hands-on activities that demonstrate their understanding of the subject matter.
Peer Assessment: Involving students in evaluating the work of their peers. This can be done through group projects, presentations, or other collaborative activities where students provide constructive feedback on each other’s performance.
Case Studies: Real-world scenarios or problems presented to students, requiring them to analyze, synthesize information, and apply their knowledge to propose solutions. Case studies encourage critical thinking and the application of theoretical concepts to practical situations.
Performance-Based Assessments: Tasks that assess a student’s ability to apply their knowledge and skills in real-world situations. This could include simulations, role-playing exercises, or any activity that requires students to demonstrate their competencies in a practical context. Performance-based assessments provide a more hands-on approach to evaluating learning outcomes.
Assessment As Learning
Now, let’s delve into the transformative power of Assessment as Learning (AAL). This approach is all about empowering students to take an active role in their own learning process. AAL encourages self-reflection, goal-setting, and metacognition, turning assessment into a journey of personal growth.
In an AAL environment, students become partners in the assessment process. They learn to monitor their progress, set learning goals, and reflect on their strengths and areas for improvement. By engaging in regular self-assessment, students develop a deeper understanding of their preferred learning modalities and strategies and become lifelong learners who take ownership of their education.
Some great examples of AAL activities include:
Self-Reflection Journals: Students regularly write reflections on their learning experiences, identifying strengths, weaknesses, and areas for improvement. This encourages metacognition and self-awareness. In my personal opinion, journaling really holds the key to transforming secondary education and should be much more widely practiced than it is presently. I have written an entire blog post outlining how to implement journaling in your subject area, here.
Learning Logs or Blogs: A continuous record where students document their learning journey, including challenges faced, new insights gained, and connections made with prior knowledge. This ongoing process helps them track their progress. Sometimes these are called ‘e-portfolios’, and Google Sites lends itself very well to this process.
Graphic Organisers: Students create visual representations of their understanding of a topic by connecting concepts and relationships. This not only reinforces learning but also allows them to see how different pieces of information fit together. An even better way to do concept mapping is to upgrade to Mind Mapping (a distinct process created by the late Dr Tony Buzan, with whom I was very lucky to enjoy a video call with several years ago). I’ve written an entire blog post about ways to organise information, which includes Mind Mapping, here.
Peer Teaching or Tutoring: Students take turns teaching a concept or skill to their peers. This not only reinforces their own understanding but also provides an opportunity to receive feedback and correct misconceptions. From an AAL perspective, this works best when both the ‘deliverer’ and the ‘receiver’ have already grasped the fundamentals of the topic being taught.
Goal Setting and Monitoring: Students set personal learning goals, breaking them down into smaller, achievable targets. They regularly assess their progress toward these goals, adjusting strategies if needed. This encourages a sense of ownership and motivation in their learning journey. Again, I believe this is best facilitated by the journaling process.
Striking a balance
While each of these assessment approaches has its unique role, the magic happens when we strike a balance between them. AFL guides our daily interactions with students, AOL provides a snapshot of their overall achievement, and AAL empowers them to become active participants in their learning journey.
So, fellow teachers, let’s embrace the ABCs of assessment with open arms. Let’s use Assessment for Learning to inform our teaching, Assessment of Learning to measure overall achievement, and Assessment as Learning to empower our students. Together, we can create classrooms where learning is a collaborative adventure, and assessment is a compass guiding us toward success.
Happy teaching!
We welcome you to join the Richard James Rogers online community. Check out our official Facebook Page, Instagram and Podcast for regular updates.
In the ever-evolving landscape of education, it is crucial for teachers to empower their students with not just knowledge, but also the tools to become self-regulated learners. Metacognitive strategies provide a powerful framework to cultivate students’ ability to think about their thinking, leading to enhanced learning outcomes. By explicitly teaching metacognitive skills, educators can help students become more aware of their learning processes, develop effective problem-solving approaches, and ultimately become lifelong learners. What follows next are ten practical ways to incorporate metacognitive strategies into your lessons and promote student growth.
#1: Set Clear Learning Goals
Begin each lesson by explicitly stating the learning objectives. Encourage students to reflect on what they already know about the topic and identify what they hope to achieve. This metacognitive approach helps students understand the purpose of their learning and fosters a sense of ownership over their educational journey.One creative way that I advise you do this is by using the Three As technique.
#2: Think Aloud
Model the thinking process by verbalizing your thoughts as you solve problems or analyze information. Demonstrate how to monitor comprehension, clarify doubts, and adjust strategies when faced with challenges. This modeling helps students develop metacognitive skills by providing them with concrete examples of how to approach different tasks.Use my blog post on the Metacognition Cycle if you’re looking for ideas on how to verbalise your thoughts correctly.
#3: Reflect on Learning
Introduce reflective practices, such as journaling or class discussions, where students can express their thoughts, insights, and challenges encountered during the learning process. Regular reflection encourages metacognition by prompting students to evaluate their progress, identify areas for improvement, and consider alternative approaches. This great blog post by Martyn Kenneth describes some excellent self-reflection tools that can be used by students and teachers, so check it out!
#4: Promote Self-Questioning
Encourage students to ask themselves questions throughout the learning process. Teach them how to generate thought-provoking questions that assess their understanding, probe deeper into a topic, or anticipate potential difficulties. Self-questioning helps students activate prior knowledge and monitor their comprehension, fostering metacognitive awareness.
#5: Scaffold Metacognitive Strategies
Teach students specific metacognitive strategies, such as summarizing, predicting, visualizing, and self-monitoring. Provide step-by-step guidance initially, gradually shifting responsibility to the students. These strategies become valuable tools for students to manage their learning independently, fostering critical thinking and problem-solving skills.
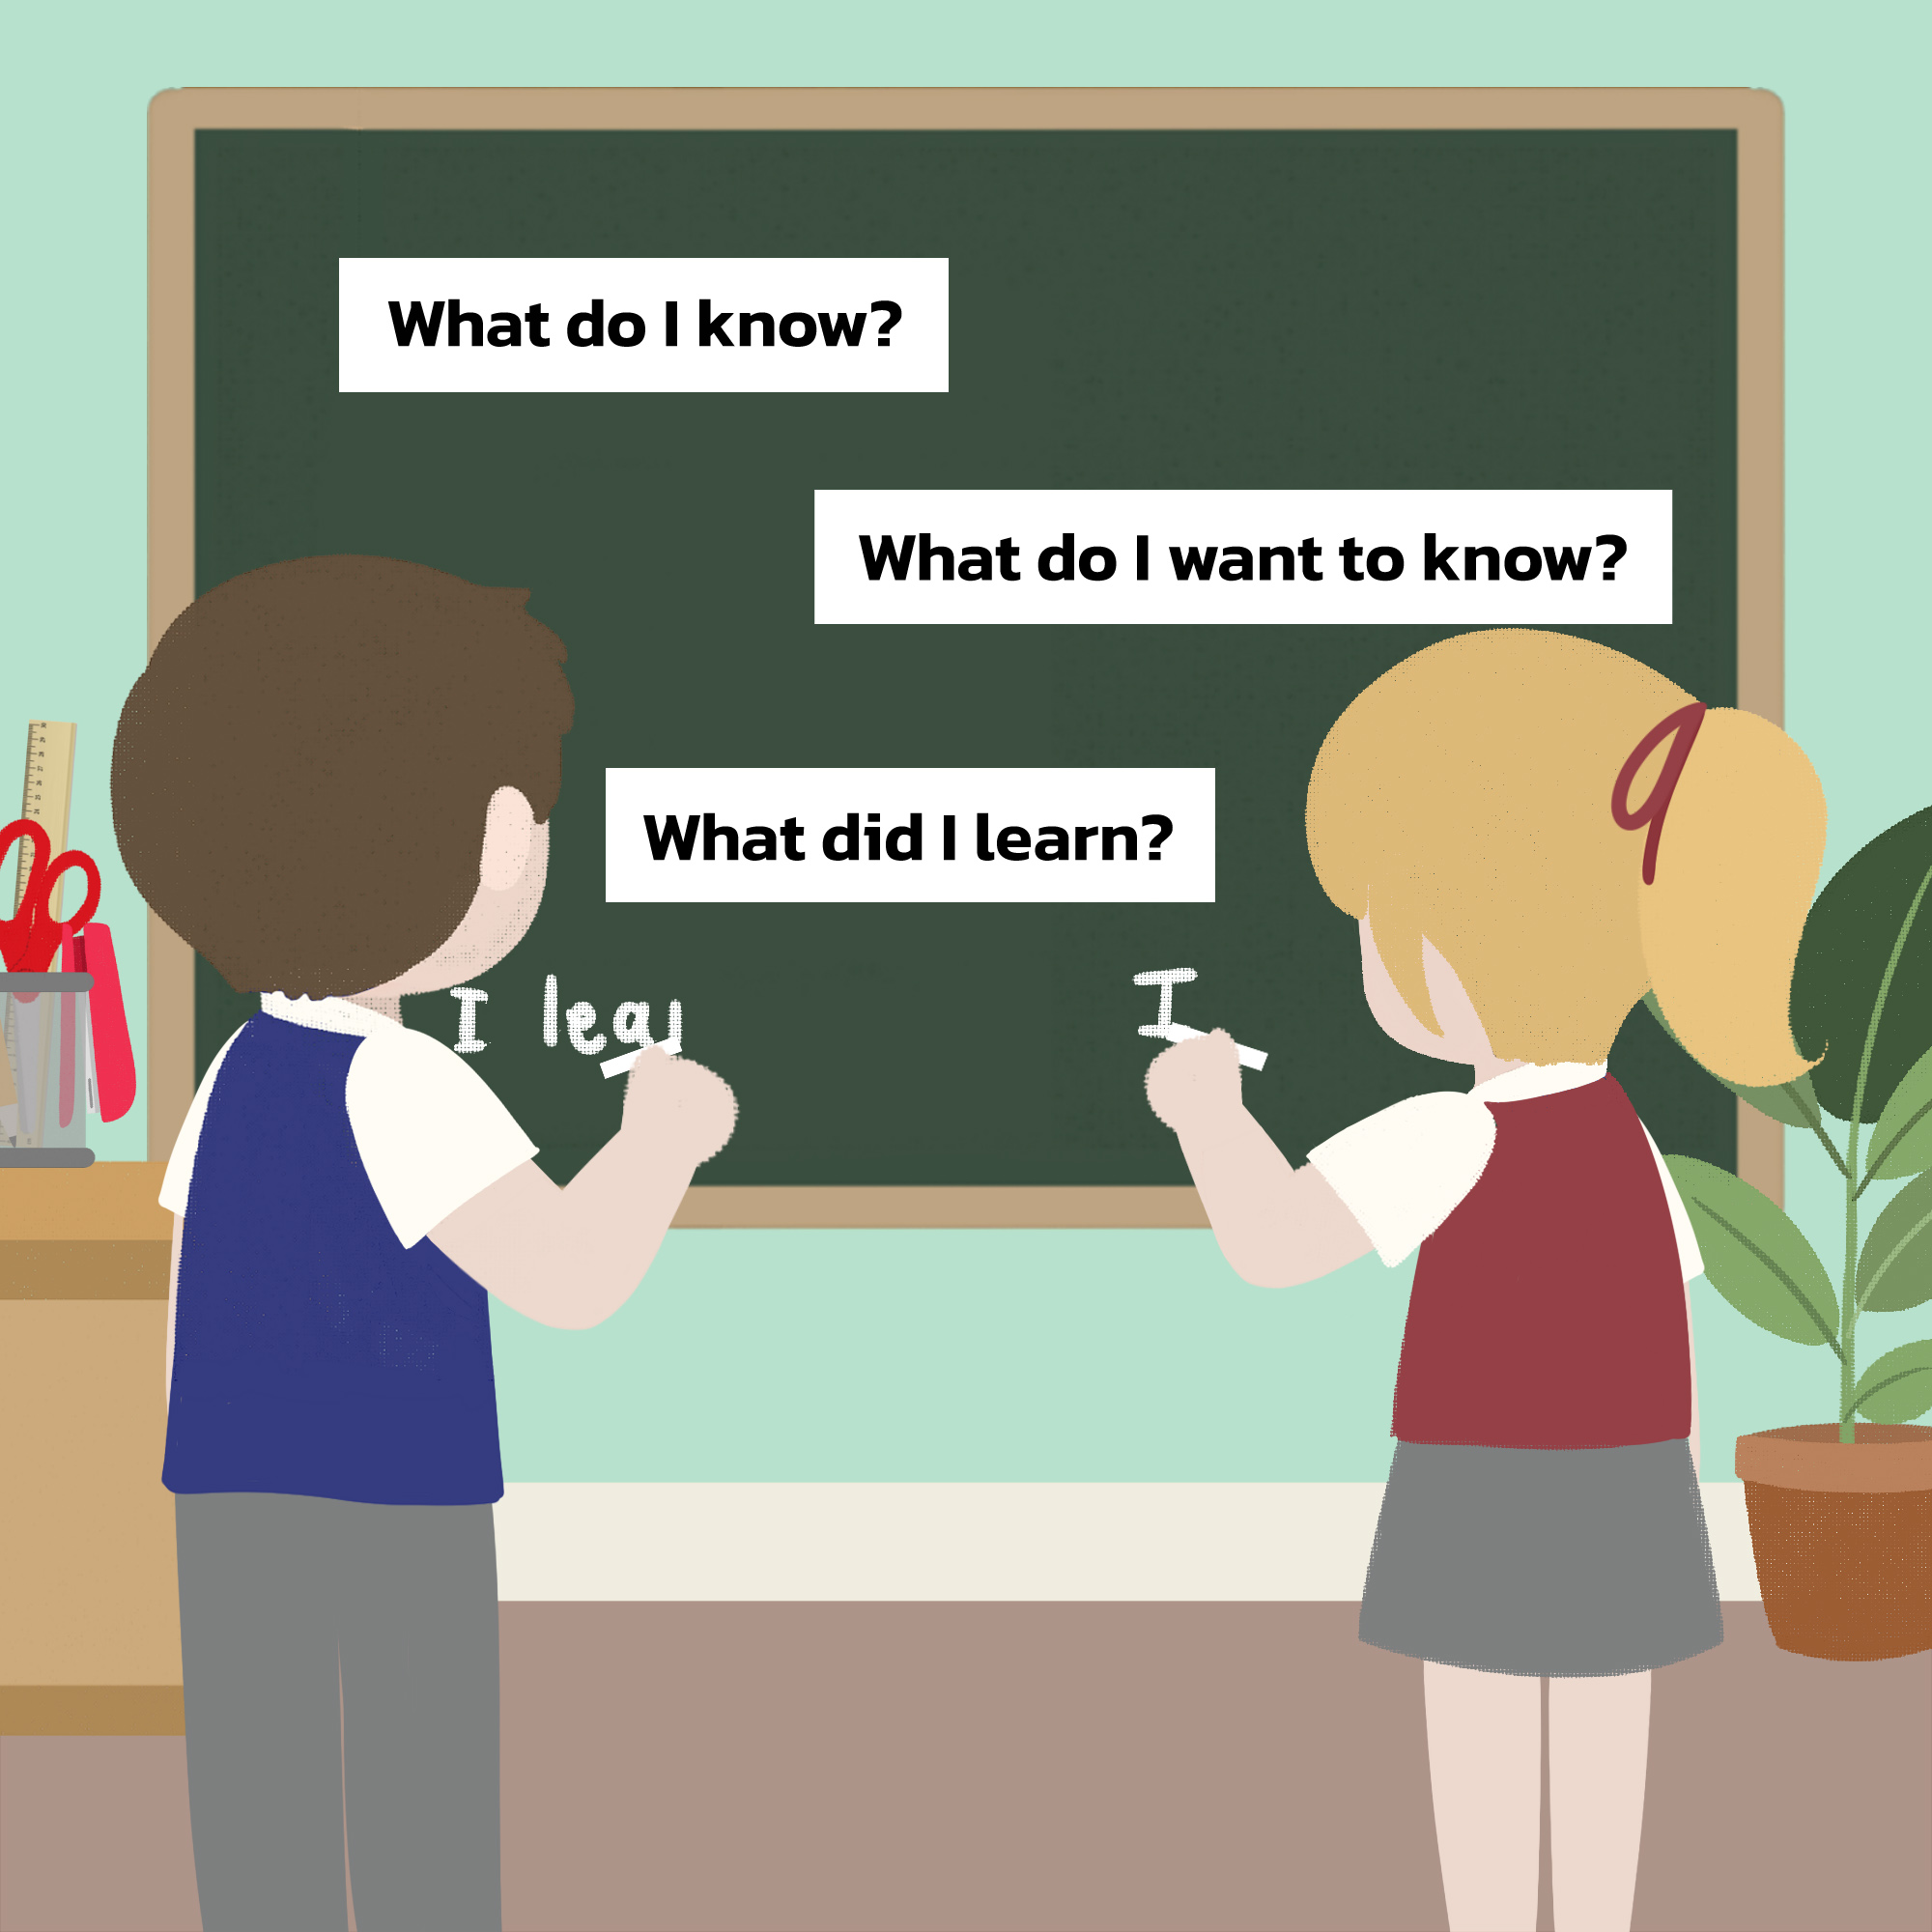
#6: Use Graphic Organizers
Incorporate graphic organizers, such as concept maps, flowcharts, or KWL charts, to help students organize and visualize their thoughts. These visual aids facilitate metacognition by enabling students to connect new information to existing knowledge, identify knowledge gaps, and track their progress. A good place to start for ideas is this blog post on differentiating texts, which provides examples of some types of graphic organizers that can help students to digest large bodies of information.
#7: Encourage Peer Collaboration
Promote collaborative learning activities where students work together, discuss ideas, and provide feedback to their peers. Peer interactions create opportunities for metacognitive dialogue, allowing students to articulate their thinking processes, challenge assumptions, and gain alternative perspectives.
#8: Provide Timely Feedback
Offer constructive feedback that focuses not only on the final product but also on the thinking and problem-solving strategies employed. Help students reflect on their performance, identify strengths and weaknesses, and suggest strategies for improvement. Effective feedback promotes metacognitive development by guiding students’ self-reflection and self-adjustment.
#9: Foster Metacognitive Reading
Teach students reading strategies that enhance metacognitive awareness, such as previewing texts, making predictions, asking questions, and summarizing key ideas. Encourage them to monitor their comprehension while reading, using strategies like self-questioning or visualizing to deepen understanding.Reading can often be coupled with group or self-reflection to encourage deep learning (as opposed to surface learning). Please see my blog post about developing a passion for reading in students, here.
#10: Teach Metacognitive Transfer
Guide students in applying metacognitive strategies across various subject areas and contexts. Help them recognize the transferability of metacognitive skills and encourage their application beyond the classroom, fostering lifelong learning habits.
Conclusion
By incorporating metacognitive strategies into your teaching practice, you can equip your students with essential tools for self-regulation, critical thinking, and lifelong learning. The deliberate cultivation of metacognition empowers students to take ownership of their learning processes, fostering a sense of autonomy and self-efficacy. As they become more aware of their thinking and learning strategies, students can monitor their progress, identify areas of growth, and adapt their approaches accordingly.
Integrating metacognitive strategies into your lessons not only enhances academic performance but also nurtures valuable life skills. By encouraging students to reflect on their learning experiences, set goals, and analyze their own thinking, you are fostering metacognitive transfer—the ability to apply these skills in various contexts beyond the classroom. This transferability prepares students to navigate the challenges of higher education, careers, and personal growth.
All of this promotes deeper engagement and active learning in the classroom. Students who are metacognitively aware are more likely to approach tasks with a growth mindset, embracing challenges as opportunities for growth rather than being discouraged by setbacks. They become more resilient learners, willing to persevere through difficulties and develop strategies to overcome obstacles.
As educators, it is our responsibility to empower students with the tools they need to become self-regulated learners and successful individuals in an ever-changing world. By incorporating these ten strategies into your teaching repertoire, you are setting the stage for transformative learning experiences that will equip your students with the metacognitive abilities they need to thrive academically, professionally, and personally. Embrace the power of metacognition, and watch your students blossom into confident, self-directed learners who are prepared to tackle any challenge that comes their way!
We welcome you to join the Richard James Rogers online community! Join us on Facebook and Twitter for regular updates, giveaways of Richard’s books, special offers, upcoming events and news.
As a teacher, it’s important to have a solid understanding of the principles that underpin effective instruction. One set of principles that has gained widespread recognition is the set proposed by Barak Rosenshine, a former professor of educational psychology at the University of Illinois at Urbana-Champaign. In this blog post, we’ll explore 10 ways you can apply Rosenshine’s principles to your lessons to help your students achieve their full potential.
#1: Start with a clear objective
According to Rosenshine’s principles, the first step in effective instruction is to start with a clear objective. Before you start your lesson, make sure you have a clear understanding of what you want your students to learn.
You may wish to use the ‘Three As‘ to present objectives to the students via a self-discovery process (very powerful). The ‘Three As’ stand for Assign, Analyse and Ask. It’s a simple three-step process for starting each lesson, and allows for the teacher to be as creative as he or she wishes when articulating lesson objectives:
Assign a starter activity, that links to the topic somehow. This can be as simple as a video playing on the screen as the kids walk in, a worksheet or even a learning game.
Analyse the starter activity: This may involve peer-assessing the task, having a class discussion, quick-fire questions or a ‘True or False’ activity
Ask the students: What do you think we are learning about today? This may generate some discussion, but if the ‘Assign’ and ‘Analyse’ parts have been designed properly, then it should be obvious.
For ideas on good starter activities, this blog post is really useful.
#2: Use a variety of examples
Using a variety of examples is a great way to help your students understand the concepts you’re teaching. Use different types of examples, such as visual aids, case studies, or real-life scenarios, to help your students better understand the material.
Different types of examples can help students to better grasp the concepts being taught, as they provide a range of contexts and perspectives from which to view the material. Visual aids, for instance, can be especially effective in conveying complex information in a way that is easy to understand and remember. Case studies and real-life scenarios, on the other hand, can help students connect abstract concepts to real-world situations and make the learning experience more meaningful.
When selecting examples to use in your lessons, it’s important to choose ones that are relevant to your students’ interests and experiences. For instance, if you’re teaching a science lesson on environmental sustainability, using examples that relate to your students’ local community or region can help to make the material more relatable and engaging. Additionally, it’s important to use a mix of examples that are both challenging and accessible. Providing examples that are too easy may bore your students and cause them to disengage from the lesson, while using examples that are too difficult can lead to frustration and discouragement. Striking the right balance between challenging and accessible examples can help to keep your students engaged and motivated throughout the lesson.
#3: Provide guided practice
Guided practice is an effective way to help your students develop their skills and knowledge. Provide your students with opportunities to practice what they’ve learned, but make sure you’re there to guide them through the process.
During guided practice, the teacher provides students with guidance and feedback as they work through problems or exercises related to the material being taught. This can help students to develop their skills and knowledge more effectively than if they were simply left to work independently. Guided practice can take many forms, such as structured activities, group work, or one-on-one interactions with the teacher.
When implementing guided practice in your lessons, it’s important to provide clear instructions and expectations to your students. Make sure they understand what they’re supposed to be doing, and provide them with any necessary resources or materials. Additionally, it’s important to monitor your students’ progress and provide feedback along the way. This can help them to identify areas where they need to improve and make adjustments accordingly. Finally, it’s important to ensure that guided practice is appropriately challenging for your students. Providing practice that is too easy or too difficult can lead to disengagement or frustration. By providing practice that is appropriately challenging, you can help your students to develop their skills and knowledge more effectively.
#4: Use frequent checks for understanding
Frequent checks for understanding can help you gauge how well your students are understanding the material. Use questions, quizzes, or other methods to assess your students’ comprehension of the material throughout the lesson.
Checks for understanding help to ensure that students are comprehending the material being taught and can identify areas where additional support or instruction may be needed. Frequent checks for understanding can take many forms, such as questions, quizzes, or discussions. By incorporating frequent checks for understanding into your lessons, you can help to ensure that students are engaged and actively learning throughout the lesson.Verbal questions are often all that’s needed, just ensure you are not asking the same students to answer. Consider using random name generators (my favorite is the Wheel of Names).Live quiz apps, such a Blooket, Kahoot!, iSpring Quizmaker and others are also great ways to frequently check understanding within lessons, in real-time.
When using frequent checks for understanding in your lessons, it’s important to provide feedback to students on their performance. This can help them to identify areas where they may need additional support or instruction and make adjustments to their learning strategies. Additionally, it’s important to vary the types of checks for understanding used in your lessons to accommodate different learning needs and abilities. For example, some learners may benefit from diagrams or graphic organizers, while other learners may benefit from class discussions or lectures. By using a variety of checks for understanding in your lessons and providing regular feedback, you can help your students to develop a deeper understanding of the material and achieve their learning goals more effectively.
#5: Scaffold your instruction
Scaffolding your instruction can help your students learn more effectively. Start with simpler concepts and gradually increase the complexity of the material to help your students build a strong foundation of knowledge.
Scaffolding your instruction means breaking down complex concepts into smaller, more manageable pieces that build upon each other. This approach can help students to understand and retain information more effectively by giving them the opportunity to build a strong foundation of knowledge before moving on to more complex material. Scaffolding can take many forms, such as providing students with background information, asking leading questions, or providing step-by-step instructions for completing tasks. By gradually increasing the complexity of the material, students can develop their skills and knowledge in a structured and supportive environment.
When implementing scaffolding in your lessons, it’s important to keep in mind the needs and abilities of your students. This means providing scaffolding that is appropriate for their level of understanding and adjusting your approach as needed. Additionally, it’s important to make sure that scaffolding does not become overly restrictive or limiting for your students. While providing structure and support is important, it’s also important to allow students the opportunity to explore and make their own connections between concepts. By striking a balance between structure and flexibility, you can help your students to develop a strong foundation of knowledge while also allowing them the opportunity to think critically and creatively.
#6: Provide feedback
Feedback is an important component of effective instruction. Provide your students with feedback on their performance, both positive and constructive, to help them improve.
I’ve written a LOT about feedback in the past, and there’s lots that we could explore here. However, if I were to distil the essentials into a few bulletpoints, they would be as follows:
State the negatives first, then follow with positives
Use verbal feedback, but make sure the students take action on what you have said
Use time-saving marking strategies which are efficient and effective (e.g., ‘live’ marking, peer assessment, self-assessment and automated assessment)
#7: Use models and examples
Using models and examples can help your students better understand the concepts you’re teaching. Provide your students with examples of how to apply the material to real-life situations to help them make connections.
Models and examples can take many forms, such as diagrams, charts, or simulations. By providing students with concrete examples of how a concept works, you can help them to build a mental model of the concept and understand how it can be applied in different situations. Additionally, using a variety of models and examples can help students to see the same concept from different perspectives, which can lead to deeper understanding and better retention of the material.
When using models and examples in your lessons, it’s important to choose ones that are appropriate for your students’ level of understanding. Providing examples that are too complex can lead to confusion and frustration, while using examples that are too simple can lead to boredom and disengagement. Additionally, it’s important to provide students with opportunities to interact with the models and examples, such as by asking them to explain how they work or to identify different features. By providing opportunities for active engagement with the material, you can help students to develop a deeper understanding of the concepts being taught.
#8: Use a variety of instructional strategies
Using a variety of instructional strategies can help keep your students engaged and interested in the material. Use different methods such as lectures, discussions, group work, or hands-on activities to keep your students engaged.
Every student has unique strengths, and by using a variety of instructional techniques, you can help to accommodate these differences and ensure that all students are able to engage with the material being taught. Some effective instructional techniques include direct instruction, group work, hands-on activities, and multimedia presentations. By varying your approach, you can keep students interested and engaged in the learning process, which can lead to deeper understanding and better retention of the material.
When using a variety of instructional techniques in your lessons, it’s important to keep in mind your learning objectives and the needs of your students. Different techniques may be more effective for different types of learning objectives or for different groups of students. Additionally, it’s important to provide clear instructions and expectations for each technique you use. This can help to ensure that students understand what they’re supposed to be doing and how the technique relates to the material being taught. By using a variety of instructional techniques in your lessons, you can help to create a dynamic and engaging learning environment that supports the needs and interests of all your students.
#9: Review and revise
Review and revise your instruction to ensure that you’re meeting your students’ needs. Regularly assess your students’ progress and adjust your teaching methods accordingly.
Providing opportunities for regular review is an essential part of effective instruction. Review allows students to reinforce their learning and connect new concepts to previously learned material. It also helps to identify areas where students may need additional support or instruction. Regular review can take many forms, such as quizzes, games, or discussions. By incorporating review into your lessons, you can help to ensure that students are retaining the material being taught and developing a deeper understanding of the concepts.
When implementing regular review in your lessons, it’s important to provide opportunities for both formal and informal review. Formal review activities, such as quizzes or exams, can help to provide a structured and systematic approach to review. Informal review activities, such as class discussions or games, can be more flexible and allow for more creative and interactive review. Additionally, it’s important to provide regular feedback to students on their performance during review activities. This can help them to identify areas where they may need additional support or instruction and make adjustments to their learning strategies. By providing regular review opportunities in your lessons, you can help your students to develop a deeper understanding of the material and achieve their learning goals more effectively.
#10: Provide closure
Provide closure at the end of your lesson to help your students solidify their understanding of the material. Summarize the key points of the lesson and provide your students with an opportunity to ask any remaining questions they may have.
Channeling the energy of your students in a healthy and competitive way should be one of the core aims of all plenaries. Reviewing the content and skills learnt in class in a fun, competitive and energetic way can really help with memory and concept retention. Do this consistently each and every lesson and watch your students make tremendous progress as the weeks and months roll by!
By applying Rosenshine’s principles to your lessons, you can help your students learn more effectively and achieve their full potential. Remember to start with a clear objective, use a variety of examples, provide guided practice, use frequent checks for understanding, scaffold your instruction, provide feedback, use models and examples, use a variety of instructional strategies, review and revise, and provide closure.
We welcome you to join the Richard James Rogers online community! Join us on Facebook and Twitter for regular updates, giveaways of Richard’s books, special offers, upcoming events and news.
I’m a great believer in passing-on information about strategies that actually work: things that we, as teachers, can actually deploy in the classroom right away.
The Metacognition Cycle is one such thing.
Great for project work, or for transforming any task we set in-class: the Metacognition Cycle can be used effectively to draw out extra richness and depth from any content our students are required to understand.
So, what are the stages of the cycle, and how does each stage work?
Stage 1: Assess the task
What does the task actually involve? What do we have to do, or understand? What’s the desired outcome?: a Google Slides, a written price of homework, a Kahoot! Quiz?
These are the fundamental questions that students must know the answers to before the task can even begin. You may wish to try the following approaches:
Create a concept map on the whiteboard and ask students to come up and write down what they think they need to do, and what the task may involve.
Have a quick group discussion.
Explain the task as clearly as you can, and follow-through with extension questions in a quick-fire manner: “Jessica, what does ‘Describe the process’ mean?”
Try some spatial-learning techniques to draw-out the answers from the students. For example, try asking true/false questions and ask students to walk to positions in the room that represent those two options. Try a human graph.
If the students are not REALLY clear about what the task involves (or what the task is), then how can they begin the task correctly?
Stage 2: Evaluate Strengths and Weaknesses
Our students need to be encouraged to honestly evaluate their own strengths and weaknesses so that:
They can utilize their strengths in the completion of the task (especially good for group tasks)
Work on practicing skills that will improve their areas of weakness
A suitable example might be a group of three students assigned the task of creating a news report about a chemical explosion. One student might be the best at art, and could be assigned to produce the graphics. One student might be great at verbal communication in front of an audience, and could be the ‘news anchor’. One student might understand chemical calculations really well, and could provide the script for the news anchor for that particular part the task.
It’s important that students delegate carefully in groups, and work on personal targets whether in groups or working individually.
Stage 3: Plan the approach
Flow charts are great for this, as are concept maps. Where possible, it’s great if the students can CHOOSE the approach they take (e.g. for a news report, perhaps a choice between a written article, a filmed on-site report and web-based report could be given).
When students have some degree of autonomy over what they can choose to do, this will make the planning process more useful and fruitful for them. This stage of the Metacognition Cycle is designed to work on critical thinking and problem-solving skills, as well as providing the opportunity to be creative.
Stage 4: Apply Strategies
This is the ‘doing’ part – the part in which the students are actually getting ‘stuck-in’.
My advice to teachers is to supervise well (walk around and check on the students, or ask group leaders, groups or individuals to come to your desk to report on progress). Also, be sure to remind students that they can change their approach along the way if a particular strategy isn’t working).
Stage 5: Reflect
As teachers, we should be providing feedback, but why not also get the students involved in that? Ask groups to evaluate groups, provide a self-reflection form to fill in or even get groups to add a reflection on the process at the end of their project.
Three (bare minimum) questions that students should be asking themselves are:
What did I learn during this task?
What did I do well?
What would I do better if I were given the opportunity to do this task again?
We welcome you to join the Richard James Rogers online community! Join us on Facebook and Twitter for regular updates, giveaways of Richard’s books, special offers, upcoming events and news.