Accompanying podcast episode (audio version of this blog post, read by Richard):
Teaching is definitely a stressful job. In fact, a February 2019 study by England’s National Foundation for Education Research found that 20% of teachers feel tense about their job most or all of the time, compared with 13% of those working in similar professions. Additionally, as if that wasn’t startling enough, a recent Organisation for Economic Cooperation and Development (OECD) survey found that teachers in England have one of the highest workloads in the world.
The statistics themselves are worrying enough – that’s one-in-five teachers in England carrying a burden of worry and stress on a regular basis.
As a teacher myself, I have certainly had my fair share of work-related stress over the past 16 years. Some of the problems I encountered were the result of self-sabotage and inexperience, and some were beyond my control.
Whatever the causes of your stress are, there are effective ways to deal with them and I’d like to share what I’ve found to be the best ways to do just that.
Stress Tip #1 – When your lessons are not going well
This is often a result of poor or rushed lesson-planning and is normally avoidable. I have fallen into this trap many times in my career – using my ‘free periods’ to write rough lesson plans or spending a few minutes before a lesson to think about what I’ll actually do.
Sometimes this works. Sometimes it causes problems.
Take the time to spend a whole morning or afternoon each week to plan a week’s worth of lessons (I use my Sunday mornings for it). Get a good teacher’s planner and think about:
Where the kids will sit at different points during the lesson. Will they need their books at all times? Do you need a seating plan so that ‘problem’ students are not sat next to each other?
Breaking up the lesson into ‘chunks’ – variety is key if you want your lessons to be engaging and ‘fun’. Read myblog post about learning gamesyou can use here.
Syllabus content you will cover – with some classes you’ll have a lot of content to get through in a short space of time. Get your PowerPoints, presentations, quizzes, and other resources ready well in-advance of these kinds of lessons. You might also want to read my blog post aboutkeeping up with your teaching schedule here.
Stress Tip #2 – When you have too much marking to do
Marking tends to come in ‘waves’ in teaching: There are times of the academic year when you’ve just got normal, regular homework and classwork to mark; and there are times when high-intensity marking hits us like a bolt of lightning. For example:
When a ‘work scrutiny’ comes up and a line-manager wants to see your class notebooks
When you have a load of end-of-unit tests or exam papers to mark
When parents’ evenings/parents’ consultations come up and you need to mark a lot of work so that you have some good points to discuss in the meetings
Marking can be a big-problem for teachers, but again: it’s easily avoidable when a little bit of time is spent planning in-advance:
In your weekly planning, think of peer and self-assessment techniques you can use to quickly deal with homework and classwork. Read myblog post on peer and self-assessment here.
Use the technique of ‘Live Marking’ to keep those notebooks up-to-date. Live-marking is basically when you either call the students to your desk one-at-a-time and mark their work in front of them, or you walk around the classroom with a pen in-hand and mark student notebooks in ‘real time’. Read myblog post about ‘Live-marking’ here.
Take a deep breath and plan your time – if you find yourself with a tonne of exam papers to mark within 48 hours (I’ve been there), then the first thing you must do is sit somewhere quiet and plan your time for an hour. Think about your targets – which papers need to be marked by when? Should some papers be marked before others? Is it possible, or appropriate, to use peer/self-assessment for some exam papers?
Try using stamps and stickers – they’ll save you some writing time
Make sure you’ve got a set of model answers ready for your kids – this will save you writing out the correct answers for the kids by hand in their books (never do that, by the way).
Stress Tip #3: When you’re in trouble with your boss over something
One of the main causes of stress for teachers, I believe, is that we are held to a far-higher professional standard than those in most other professions. As ‘role-models’, we have to be extra careful about:
How we interact with our students and former students
We do need to be mindful of these things on a daily basis, but even then we may make mistakes. If you are called to a meeting with your boss over something, then don’t panic! Take a deep breath and think about your side of the story and the facts of the matter at hand.
In your discussion, focus on:
Solutions to what’s happened (‘How can we solve this?’ should be your mentality).
If you’ve done something wrong, then admit it. Covering something up will only cause more problems later on.
If you feel that you’ve been unfairly treated then speak with a union representative or a lawyer before making any big decisions (e.g. choosing to resign).
I know that this is not a nice subject to talk about, but unfortunately it’s one that does come up. Protect yourself and your reputation, do your best everyday and just let life roll – some things are just beyond our control.
Another thing, by the way, is that absolutely everyone makes mistakes. I know that’s cliched, but it is true. Keep a written record of the mistakes you’ve made in life somewhere, and read over it on a weekly basis at least. When people tell us to ‘learn from our mistakes’, they can sometimes miss the fact that in order to learn from mistakes we have to remember those mistakes. Keeping a record and consistently reading over it is a good way to do this.
Stress tip #4: When student behavior is poor
It takes time and experience to build up our skills as good ‘behavior managers’.
Things to bear in mind are:
‘Boring’ lessons can cause some kids to play up. Try to introduce a variety of activities into your lessons if possible, and be vigilant in watching your students carefully during practical activities, computer-based work and group work.
Praise, when used effectively and with sincerity, can be one of the most powerful behavior management tools out there. Readmy blog post about The Four Rules of Praise here, and take the time to watch my video below:
Good behavior management can only really be achieved with a long-term strategy: effective lesson planning, good use of praise, fair and consistent use of sanctions if necessary and good use of ‘professional intelligence’ to reinforce our students’ sense of self-worth and character. Readmy blog post on Subtle Reinforcement here.
There are many facets to being a good behavior manager, but it basically all comes down to the relationship, or ‘rapport’, that you build with your students. Please read my blog posts onbuilding rapportandbehavior management.
Stress tip #5: When a colleague doesn’t like you (or is causing problems)
When you begin to have a positive effect on your students and you gain a reputation as a ‘good teacher’, you may create some enemies. Some of your colleagues may not like you simply because you are ‘better’ than they are.
You need to be careful in these situations. Here are my tips:
Control your speech at all times when in the presence of your colleagues. Off-the-cuff remarks like “I’m behind with my marking” or “I got totally wasted on Friday night” can be used against you by conniving and jealous colleagues who want to secure your destruction.
Don’t gossip, and don’t associate with gossips. Gossips are notorious for being negative and untrustworthy. Just don’t do it. If you’re asked directly or prompted to gossip about a colleague, for example, you can respond with a “I don’t think I should talk about that” or even a “I don’t like to gossip about people”.
If a colleague is genuinely causing problems for you, then make a record of all interactions with that person (hand-written if necessary). Speak with your line-manager about it and ask for suggestions. It’s much better to tackle this issue in a professional way from the outset, rather than submitting a formal complaint when the problem has gotten out-of-hand.
If appropriate, speak with the colleague you are having issues with. You may wish to ask a third person to attend as a witness. Be polite. Be respectful. Show that you are the mature person in this scenario.
Keep all discussions with colleagues academic in nature. Try not to discuss politics or ‘touchy issues’ in society (e.g. Brexit, 2SLGBT+ rights, third-wave feminism, etc.). We live in a time, unfortunately, in which people can be easily ‘triggered’ by an alternative view you might have that challenges their perception of the world. Feel free to discuss this stuff with close friends or family outside of work, but don’t make the mistake of believing that your colleagues are your friends – they’re not. Your colleagues are the people you work with, and all interactions with them need to be professional in nature. If something is not related to your work or the curriculum, then you don’t need to discuss it. It’s that simple.
Conclusion
Teachers today are more stressed than we have ever been in history. Relax, plan-ahead, deal with issues head-on and don’t worry.
Two books I highly recommend for consistent worriers are given below:
How to Stop Worrying and Start Living’ by Dale Carnegie (click on the image to buy the book):
The Power of Now, by Eckhart Tolle (click on the image to buy the book):
We welcome you to join the Richard Rogers online community. Like ourFacebookpage and follow us onTwitter for daily updates.
I’m now 36-years-old. The years have flown by, and they have taught me that my life and time are both very precious.
As a young and rather gullible NQT at 23-years-old, I was a massive time-waster. I wasted time on almost every nuts-and-bolts aspect of teaching. I wasted time writing reports from scratch. I spent hours creating tests and assessements and homeworks, and then hours marking them because I stupidly forgot to source or create an official mark scheme. I put kids on detention and then realised that I had to supervise those detentions, and that ate into my free time.
Nowadays I have long-since scrapped all of those clumsy behaviours and I now streamline everything I can for maximum effectiveness.
So, grab a cup of tea or coffee and sit back because I’d like to share my new and improved teacher behaviours for maximum effect and efficiency.
Hack #1: Copy, paste and modify school reports
Writing school reports used to be a massive chore for teachers. I still remember receiving hand-written reports when I was a kid – imagine how long those must have taken for my teachers to write!
Well, the cat’s out of the bag now, and I don’t feel ashamed to say that it’s okay to do a bit of copying and pasting with school reports – so long as you always modify the reports to match each student.
Here are the steps to follow:
Write a really good set of original, unique school reports for your students. Save these to your computer somewhere (e.g. on Microsoft Word® or Google Docs®) and be sure to comment on attainment, progress and overall characteristics. This first stage will take considerable time (but it’s time that’s well-invested).
When the next reporting cycle comes around, look at your student data and and use your own judgement to see which students match your old reports you wrote. For example, Jennifer from this reporting cycle might be very similar to Susan, who you taught last year.
Use the ‘Replace’ feature on a word processor (like MS Word) to quickly change names, adjectives, genders and other key terms.
Add some unique descriptors and features for that student. Make sure the report accurately reflects the student you’re writing about.
Highlight the report you’ve just modified so that you know that you’ve used this one (you don’t want to duplicate copies)
Copy and paste the text into your report-writing system at school.
I like to be quite prosaic in my report-writing – it ensures that my reports are accurate and professional. I sometimes use a template to help me.
Create a S.W.A.P. template
Every report should contain these four elements (at the very least):
Strengths
Weaknesses (including targets)
Attainment
Progress
They don’t necessarily have to be in that order, but they should all be present somewhere.
A good template can save you tons of time, and will ensure that your reports are detailed and accurate. I’ve given an example with applications below. Please feel free to copy and paste and use this as you see fit:
x has had adisappointing/steady/good/very goodterm/half-term/year/semester. He/She has shown strengths in a number of areas including……………………….. . This is pleasing, but even further progress could be made by………………………………. x’s most recent recent assessment score was ……………., which indicates to me that……………………….. Progress has been disappointing/steady/good/very good, as exemplified by the fact that…………………
Let’s see this in action below:
Example 1: An excellent student
Joshuahas had avery goodhalf-term. Hehas shown strengths in a number of areas includingmodular arithmetic, definite and indefinite integration and differentiation.This is pleasing, but even further progress could be made bycompleting more of the Higher Level assigned tasks on MyiMaths, as he does have the ability to challenge himself further.Joshua’smost recent assessment score was83%, which indicates to me thathe is completing the necessary revision at home.Progress has beenvery good, as exemplified by the fact thathe has jumped from a level 6 to a level 7 in the space of just seven weeks.
Example 2: An average student
Lisa has had a steadyhalf-term. She has shown strengths in a number of areas including balancing chemical equations and completing laboratory practical work. This is pleasing, but even further progress could be made by completing more practice questions on Quantitative Chemistry and using the model answers as a good guide for improvement.Lisa’s most recent recent assessment score was 54%, which indicates to me that she has a good knowledge of some areas of the subject, but needs to work harder to revise identified weaknesses. Progress has been steady, as exemplified by the fact that Lisa’s assessment scores have been consistently above 50% since the start of the course.
Hack #2: ‘Live’ Marking
I have personally wasted so much of my free time both at school and at home marking student work. Many late nights; many lost weekends. All for nothing.
Well, not completely for nothing – at least now I’ve seen sense and can pass on my experiences to you so that you don’t go through the same pain.
You see, I now know that feedback only works if it is relevant, specific and somewhat emotional. How do we achieve this? – we must mark student work with the students. They have to be involved too.
As soon as I started doing these things, my impact skyrocketed:
Simply walk around the classroom with a colored pen in hand. Tick, flick and mark student work as you walk around.
For larger pieces of work, set the kids on a task and call the students to your desk one-at-a-time. Sit with the student and discuss the work, adding written comments in front of the student along the way. Use praise effectively and remember – praise only works if it is sincere, specific and collective (tell your colleagues and get them to praise the student too).
Use peer-assessment and self-assessment, but don’t do this for everything. Students still need to receive acknowledgement from their teacher.
I’ve written a useful article about peer and self-assessment techniqueshere. Some general advice on giving feedback can be foundhere.
Here’s a video I made about the Four Rules of Praise:
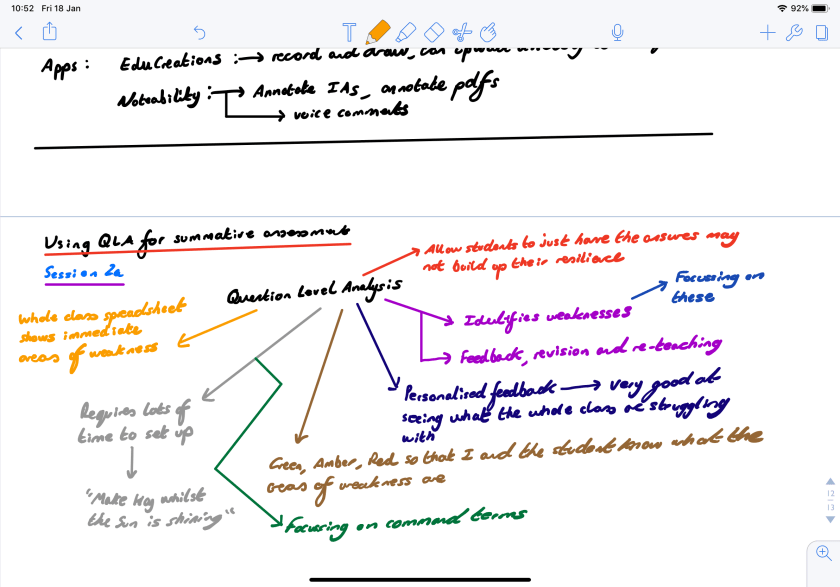
Hack #3: Education Apps
I had the chance to rigorously test out the apps I’m about to show you and, I can tell you: they really do make life easier (and they can do some cool things too!).
Cool Feature #1:You create a slideshow on Nearpod. Your kids login with a code that Nearpod generates (they don’t need to sign up, which saves tons of time) and, boom!: the slideshow will play on every student’s device. When the teacher changes a slide, then the slide will change on the kids’ screens.
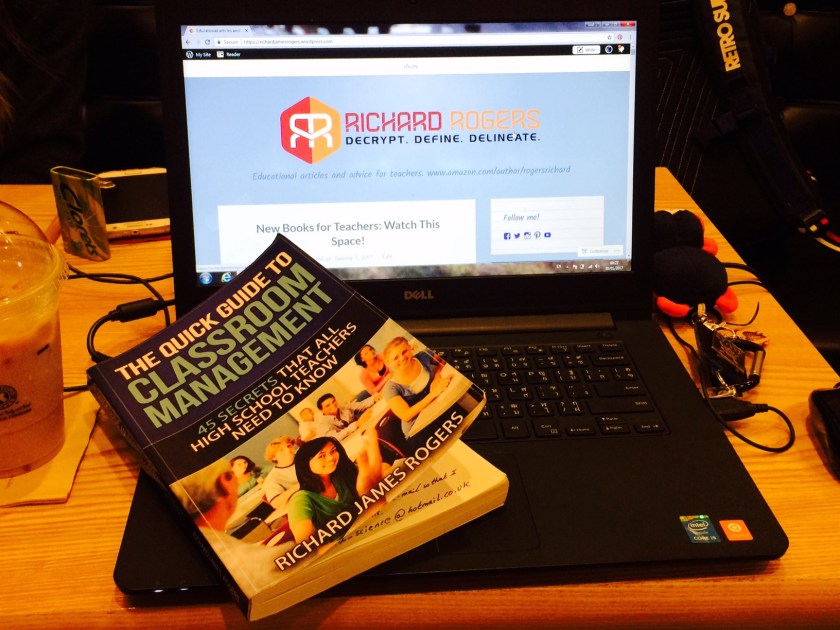
“An AMAZING Book!”
You can choose to show the slideshow on a front projector screen/smartboard, or simply walk around the class with your iPad or laptop as you’re instructing the kids.
Cool feature #2:Put polls, questions, quizzes, drawing tasks, videos, 3D objects, web links and audio segments into Nearpod presentations to make the experience fully ‘interactive’.
When I tested Nearpod I thought it was super-cool because I could write an answer (as a student) and it would show on the front-screen as a sticky-note with everyone else’s. Chelsea Donaldson shows this excellent image of what I experienced over at herblog:
As you can see, other kids can click ‘like’ and can comment on the responses, making this an ultra-modern, ‘social-media’ style education tool.
Another feature I loved was ‘Draw it’. It’s similar to ‘collaborate’ (the feature above with the sticky-note answers), but this time the students either draw a picture or annotate a drawing you have shared.
I can see this being great for scientific diagrams and mathematical operations.
Students can use a stylus/Apple Pencil, their finger (if it’s a non-stylus tablet or phone they are using) or even a mouse to draw the picture. Once drawn, the pictures will show up on the teacher’s screen together, and this can be projected if the teacher wishes.
Cool feature 3:Virtual reality is embedded into Nearpod (and I need to learn a lot more about it!).
I don’t understand it fully yet, but Nearpod themselves say that over450 ready-to-runVR lessons are ready on their platform, including college tours, mindfulness and meditation lessons and even tours of ancient China!
Now that sounds cool!
My thoughts about Nearpod
I like apps that are quick, useful and free/cheap to use.
Nearpod ticks all of those boxes.
The features that I tested which were super, super cool include:
Kids log in with a code and your presentation appears on their screens. When you change a slide, the slide changes on their devices!
You can put polls, drawing tasks and questions into your slides and it’s all fully interactive. Kids’ answers will appear on the projector screen for all to see (if you wish), or simply on the teacher’s screen (for private viewing).
I love this app and I look forward to using all of its features with my students.
Cool feature #1:Noteability has allowed me to make the most amazing notes and save tons of paper and paper-notebooks in the process. Just look at these beautiful notes I made during my Science JAWs training a few months ago:
As you can see, you can select a wide variety of colors and make beautiful notes, Mind-Maps®, concept-maps, flow charts, diagrams and more.
I use this feature of Noteability to:
Plan things in my daily life (such as my blog posts, my weekend plans, my fitness plans, etc)
Write shopping lists
Write lesson plans
Take notes in school meetings
Cool feature #2:Noteability allows you to annotate PDFs with the Apple Pencil. This is absolutely brilliant and has allowed me to annotate my IB Diploma Chemistry coursework (Internal Assessment) quickly and clearly before uploading the coursework to the IBIS system.
I can see this feature becoming really useful for schools that want to save paper and for teachers that want to annotate coursework, homework or classwork and then send it back to the student in some way (e.g. by e-mail, through Google Drive or through Google Classroom).
Take a look at this IB Chemistry coursework annotation I recently did with Noteability and the Apple Pencil:
Another way to use this feature is to get the kids to scan their classwork, homework or past-paper answers and then annotate each other’s work with the Apple Pencil. The teacher could also annotate it too:
Cool feature #3:Students can make revision notes, classnotes, homework assignments and submit work all through Noteability. Using the ‘split-screen’ mode on the iPad Pro they can even copy images and charts directly from a web-page they are reading at the same time:
For students, I can see Noteability being using in a range of creative ways:
Making revision notes
Annotating their own work, or each other’s
Creating assignments and presentations (Noteability allows users to copy content from the web seamlessly using ‘split-screen’ mode)
Making notes in class
There is the possibility that tablets may even replace traditional school notebooks in future too – removing the need for 11-year-old kids to carry really heavy bags around school all day (and this has already been linked to back problems).
My thoughts on Noteability
I mentioned this a few blog posts ago but I feel it’s worth a second shout-out.
I like this app because it has basically replaced all of my notebooks, and is an excellent planning, note-taking and annotation tool.
A big drawback of Noteability, at the time of writing, is that it is only compatible with iOS. Not all students use Apple devices, and schools won’t always fork-out money for them. However, I have found that my own personal investment in an iPad Pro, along with Noteability, has enchanced my life in many ways and has benefited some of my students as I have been able to annotate their work better than ever before.
Cool features: Flipgrid is a secure video-commenting/video-conferencing platform. Flipgrid’s mission is to “Empower student voice” and they’ve certainly achieved that with this app.
Basically, the teacher uploads a video of himself/herself asking a question, or posts a question, link, resource or video, and the students respond by taking videos of themselves responding to the material.
It’s super cool!
Once the students have uploaded their videos of themselves, other students can see them and watch them (and comment on them). They can even respond to videos with videos, so it really can get a discussion flowing!
Image courtesy of Flipgrid
Each video a student creates will receive feedback from other students and the class teacher, and the student who made the video can quickly see the feedback they’ve received.
I would recommend all tech-interested educators to check out Jess Bell’s guest blog post over at larryferlazzo.edublogs.org entitled‘Getting Started with Flipgrid’.
My thoughts on Flipgrid
When I tested it it took me a while to figure out how to use it, and what its purpose was.
Once I’d signed up, however, the website directed me to lots of great help and resources. There’s a load of pre-made lessons and students can sign in with a simple pre-generated code (like Kahoot! and Nearpod) which saves tons of time.
Once you’ve signed up (it’s free) and you’re in on Flipgrid, your dashboard will look something like this:
As you can see: it has a very user-friendly interface.
Hack #4: Learning Journals
Shortly after getting my PGCE and completing my NQT year in the UK, I came to Thailand to work as a Chemistry Teacher at an international school in Bangkok. I was lucky enough to have been given a very able and hard-working class of Year 10 students to teach. In fact, the illustrator of this blog and my books: Pop Sutthiya Lertyongphati, was in that class.
I decided to try Learning Journals with these IGCSE Chemistry students. The idea was that they were to buy a special notebook (not their normal class book) and fill it with revision summaries, mind-maps, key words and anything learnt in class each week. I wanted it to be a ‘living journal’, and not just simply a replica of the students’ class notes.
The students mainly took to it verywell. Extracts from Pop’s beautiful Learning Journal are shown below:
Highly-motivated students like Pop would always hand in beautiful notes, every single week. In fact, CfBT inspectors came to that school that year and they said that Pop’s notes were the best they had ever seen!
Wow! That’s quite a statement.
However, some students didn’t take to it that well and I found out why: I wasn’t giving feedback regularly enough. Some weeks I would be too busy with other school things, so I would sometimes (to my shame) collect in the journals and simply give them back the next day with some simple verbal feedback only.
I discovered that when students were given some written feedback on a weekly basis, however small, they was a marked improvement in the quality of the journals I received each week.
Back then, when I realised this at 26 years of age, I would write multiple comments on every page in a student’s journal. This almost killed me when I had 20 journals to mark. I soon gave that up and came up with a better way.
Oh, but did the journals work? Well…that class went on to get 100% A*-C in their Chemistry IGCSEs.
Did the journals help them achieve this? I believe so.
My updated (better) journaling system
I’ve set up a Learning Journal system with my Year 11 IGCSE and Year 12 and 13 IBDP classes. Every Monday they must bring their journals to my room and place them in the right place, as shown below:
Then, after school every Monday I write one and only one post-it note of feedback for each student; which I stick in their journals. This keeps my feedback focused on the essentials and increases my productivity.
An example of what this feedback might look like is given in this reconstruction below:
Students pick up their journals (with post-it note feedback inside) every Tuesday, meaning that they are getting recurring, weekly feedback as well as regular, meaningful homework.
I’ve been using this system successfully for a few years now. The student-sign register system allows me to quickly see who hasn’t completed a journal and the fact that I force myself to get all of the post-it-notes filled in on Monday evening means that I can chase up late journals very quickly.
A little ‘tweak’
I did find that the Monday evenings were becoming quite hard because of all of the journals I was marking. Now, I spread out the days to match my timetable:
Year 11 give me their journals on a Monday
Year 12 on a Wednesday
Year 13 on a Friday
The system allows me to give regular feedback to my students, and it seems to be showing in the progress they are making in tests and assessments.
In addition to this, I’ve turned my Learning Journals into a ‘live-marking’ recurring feedback system: I mark them in class, with the students. It means that I lose no free time, and I am able to give one-to-one feedback to each student that is meaningful and specific.
Learning Journals Conclusion
Journaling is a powerful tool when used correctly
It can be applied to any subject area
It’s great for exam-level classes doing revision
Recurring feedback and meaningful homework come as part of the package
The students can be creative and present their journals in any way they choose (online is an option too)
The feedback process allows the teacher to get to know their students’ strengths and weaknesses very quickly
The Learning Journal is a permanent record that the students can treasure and be proud of
Journaling is not used enough in the teaching profession. I aim to change this.
Hack #5: Self and Peer Assessment
There’s no doubt about it – getting students involved in their own assessment and marking has a wide-variety of benefits.
Take this greatsummaryby Rosario Hernandez at University College Dublin for example, which explains that peer-assessment benefits students in four key ways:
Promotes high quality learning
Contributes to skills development
Furthers personal development
Increases students’ confidence, reduces stress and improves student motivation
That’s quite a convincing list!
Not surprisingly, similar things can be said of self-assessment. This greatoverviewby the University of Sydney advocates for the wide-use of self-assessment with students for the following key reasons:
It encourages student involvement and participation, so it’s great for students who normally find group activities or active class tasks a little uncomfortable
When used in conjunction with group work it can be a great way to assess one’s personal role and contribution in the group experience and learning process
Academic appraisals aside, I’ve found from my personal experience that both self and peer-assessment are absolutely invaluable to the modern practitioner. They save you oodles of time as a teacher and students learn so much from each process.
But how should we use self and peer-assessment?
There are a number of different ways that self and peer-assessment can be used in the classroom. My experience has taught me (the hard way!) that the following tasks work really well:
Making corrections to tests and assessments: When any important test or assessment comes up, I don’t think it is appropriate to have students marking these themselves. They’ll get it wrong, even with a mark scheme to use, and will be overly generous on themselves and their peers (unless they’ve been trained for a period of time – more on that next). However, a great activity is to mark the tests yourself, then give the tests back to the students along with the a printed or online mark scheme. The students could then use a coloured pen to make full and detailed corrections to their test papers. You could turn this into an AfL exercise, with students writing down the question numbers they got wrong on the whiteboard, or on an anonymous piece of paper. You could then go through these questions afterwards to clear up common misconceptions. If you run a regular learning journals system (as I currently do), then students could write down the questions and the model answers in their learning journals. This causes very deep-learning to take place and is great for building long-term memory!
Assessing homework, classwork and regular assignments: A great time-saver for teachers. Just make sure the kids have access to the model answers. Don’t forget to collect the work in too – you need to know that the kids actually did the work you asked them to do.
Past-papers: Exam-level students really need to become familiar with the official mark schemes provided by exam boards. They need to become comfortable with key vocabulary, language and command terms. Provide exam-level students with regular past-papers to do as homework. Provide mark schemes too, so that they can self and peer-assess their work in class later. For older students (e.g. ‘AS’ – Level, SAT and IBDP learners) I’ll sometimes give them past papers and mark schemes to take home. Their task is to complete the past-papers under timed conditions and mark them using the mark schemes. The student then hands me the papers completed and marked (this is essential – I need to know that they have completed the assignment). I then check the papers for common misconceptions and target those in class.
Technological means: There a number of ways in which technology can assist in the peer and self-assessment process.Google formsare great; as are online quizzes provided by trusted third parties (e.g.BBC BitesizeandMyiMaths) and online quizzes that teachers can build by themselves (e.g.Quizlets). Make use of these and others (e.g.Kahoot– great for getting kids to use their mobile devices), as they are really interactive and can offer a nice break from traditional methods.
Training students to assess themselves
This is a gradual process and basically involves exposing students to exam-style questions and past-papers; along with their mark schemes, over a prolonged period of time. The process is straightforward but can be monotonous: provide past-papers as homework, classwork, projects and even through a special past-paper ECA club (which I’m currently doing with my IGCSE and IBDP students – it’s very effective).
There are a number of creative ways to train students up in proper exam-technique:
Cut up the questions and answers to past-papers and hand them to students one-at-a-time. They can only come and get the next question when they’ve effectively answered and marked the previous one.
Give students the answers to questions and get them to write the questions! Use the same method as the previous bullet-point above, or set up a large display and get students to put their answers on post-it notes which they can stick to the display.
Get a big container filled with cut-up exam questions. Students have to pick out questions from the container in pairs or threes, and work on them. No two groups should have the same question.
Students can make revision videos, websites and even stop-motion animations that contain exam-style questions and answers.
We welcome you to join the Richard Rogers online community. Like ourFacebookpage and follow us onTwitterfor daily updates.
Here’s a quick video I made to supplement today’s blog post:
Every high school student you will encounter; no matter what their domestic situation is or how much peer pressure they are under, craves a sense of personal importance just like you and I do. It’s the reason why we wear posh designer labels; why we brag about our new car or house on social media and why we beautify images of ourselves using various apps on our smart phones. It’s also the reason why a lot of young people turn to drugs, join gangs and get involved in thug culture.
The trick with students is to make sure that they are receiving their validation (i.e. their sense of importance) from positive sources.
My experience has taught me that the best way that we can make our students feel empowered and important positively is by enacting the following steps:
1. Find out what the strengths, hobbies and interests of each of your students are: This can be daunting, as you’ve probably got a whole gaggle of students that you teach and it’s hard to remember everything about everyone. If you have to, then buy a special notebook and write down snippets of information that you pick up. Is Thomas exhibiting his artwork at a local gallery this weekend? Write it down. Does Cassandra love fashion design and magazines like Cosmopolitan? Write it down. Did Jason score a goal at lunchtime football? Write it down.
“An AMAZING Book!”
2. Act on the information you have gathered: Use the information to engage your students in their lessons. If the output of a task or project is open to negotiation, then suggest a way for a particular student to produce that output in a way that is personal to them. Does Damon like boxing? Get him to create an animation or movie of a boxing match in which each boxer represents one side of the debate. They can say counter-phrases whilst they box, and the winner will represent the argument that Damon agrees with the most. When doing group work, assign roles to each student based on their strengths, and make it clear why you have chosen each student for each role.
I once had a student who was famous for being confrontational, and he was the figment of every teacher’s worst nightmare at that school. However, I noticed quickly that he was very good at art, so I made him the class ‘Art Director’, where his job was to check each student’s presentation. He loved the positive attention, and he became my most compliant and hard-working student. I also took a special interest in him by going along to the art room to look at his work, and I viewed his pieces in a local art gallery. This extra effort on my part really paid off, and other subject teachers were amazed at the change they saw in him.
3. Always turn a negative into a positive: Have you just taught a student who ‘played up’ or had a ‘tantrum’? Has one of your students just had a ‘bad day’? Make a special note of this, sit down with the student and offer your help and guidance. Focus on the positives of this situation, and what the student did well. Perhaps this time the student didn’t swear – now that’s a positive and a step in the right direction. Maybe your student was frustrated because they couldn’t quite make their work ‘perfect’ – brilliant, this shows a desire to do well and to try their best. Tell the student how pleased you are that they care about their work so much and offer more time to get it done if needs be. Maybe another student annoyed the kid who played up; offer a number of solutions to the student such as a seating plan and the chance to have a ‘time out’. Get your ‘problem students’ to reflect on solutions, and praise them for being reflective and proactive in wanting to move forwards, and not backwards.
4. Focus on the long-term goals of the student: Some students are completely unsure of what they want to do in life even when they reach 18 years of age: when they’re about to start out at university or find employment. Others take time to develop their goals as they mature through high school and still others are very sure what they want from life since their first day in Year 7/Grade 6. Whatever the situation may be, you must remind your students that there’s a bright and happy light at the end of the tunnel (and it’s not an oncoming train!). Talk regularly with your students about their goals, ambitions and strengths, and constantly make them feel like they can achieve those goals by being supportive and enthusiastic for them. When students can see that there is a real purpose to school life; that all of these ‘pointless lessons’ can actually make their dreams come true, they tend to work harder. However, you, as a teacher, need to constantly reinforce this and it can take some time and effort before positive progression is seen.
Stay strong, have faith and I guarantee that your efforts will pay massive dividends!
5. Use rewards more than sanctions, and make them sincere: When a student accomplishes something, and is then rewarded for this accomplishment, this reinforces the positive behaviour/process that lead to the outcome. However, the extent to which this reinforcement is maximized depends upon the depth, relevance and sincerity of the feedback given to the student. We’re all very busy, and it can be really tempting to just sign that house point box in the student’s planner, or hand out that merit sticker, with little conversation afterwards. However, if we’re going to be effective behaviour managers, then we need to spend more time giving sincere and relevant feedback to our students that focuses on the effort/process that went into the work that was produced. Always sit down with your students, especially those who have a reputation for being disruptive, and talk with them about their accomplishments. Tell the student how happy you are, and give a good reason (e.g. “I was so pleased that you took the time to draw large, labeled diagrams in this work. You also asked lots of questions, and you tried your best to avoid distractions”).
This is actually quite simple when we think about it: all we’re trying to do is reinforce the behaviour that we want to see repeated again in the future.
Conclusion
Making your students feel important, or valued, is probably the most important factor in ensuring that you have a positive relationship with them (and, hence, lessons in which behaviour is good). One of the most memorable examples of this takes me back to my first teaching post in Thailand, when I was teaching Personal, Social and Health Education (PSHE) to a group of Year 8 students. At that time, I was taking the students through the Expect Respect™ programme, and we were covering themes that centred around domestic abuse and neglect. At the end of my first lesson with this group, a very shy and withdrawn young girl spoke with me privately and said that she enjoyed the lesson because it made her reflect on what was happening in her home environment. She then revealed to me something which almost shocked me to a frail state of nervousness as a young teacher – she told me she was self-harming, and she showed me the scars on her arms.
The first thing I did at that moment was talk about the positives of this situation, and I praised her for having the courage to speak to someone. I asked her what she thought of the lesson, and she said that she could empathise with the people involved in the scenarios we had discussed. I said that this was a brilliant quality to have, and that she could use this in her career when she leaves school. She left with a very bright smile on her face, and I could tell that she felt empowered. I saw her domestic situation as a positive, because it gave her the experience she needed to help other people in similar situations.
After our conversation, I referred her to our school counselor who worked with her twice a week to talk about what she was going through and how to move forward. She told her counselor how she felt so refreshed by her conversation with me, and how she felt that she could be a counselor too!
As time went by, I constantly reinforced my belief and professional interest in this student. When we covered career clusters in later PSHE lessons, she was keen to talk about how she wanted to be a person who cared for, and helped, others. She talked boldly about her plans to make people happy, and she would allude to her life experiences as being valuable in making her a strong person. Prior to this transformation, this young lady was famous for crying in class, and would often not take part in group activities. My belief in her, along with the help provided by other staff members, transformed her into a self-confident, determined person.
I am not ashamed to say that I was rather tearful when she got accepted into university to study occupational therapy five years later. She is now a professional, mature and empowered young woman who has a dream and a mission to help the people she comes across in her day-to-day life. I must admit, I can’t take all, or even most, of the credit for this, as many individuals in the school worked with her to empower her to be bold enough to face life’s setbacks and move forward. However, I like to think that that first conversation she had with me all of those years ago was the spark that set the forest fire of ambition raging through the wilderness of her life.
We welcome you to join the Richard Rogers online community. Like ourFacebook page and follow us on Twitter for daily updates.
I was very excited when I handed my homework to her. I was 16-years-old and a very keen GCSE Science student.
That piece of Chemistry homework took me ages to complete – a good few hours if I remember correctly. I really tried hard to write the displacement reactions neatly and clearly, and in a different colour to the explanations.
I knew my Chemistry teacher would be impressed, and I really wanted to impress her. I think that as a teacher almost two-decades later, I am mindful of the fact that my students look-up to me, and they want to impress me.
That gives me a huge task (I won’t say ‘burden’, because it’s not a burden): the task of being responsible and caring enough to give my students the feedback they deserve, in a timely manner.
I waited weeks and weeks for that Chemistry homework to get back to me. Finally I summoned up enough courage to ask her where it was.
“Oh, I am sorry, Richard. I completely forgot about it. I’ll get it back to you pronto.”
She was honest, and I respected her for that. When it did finally get back to me, she added to the written feedback (which I can’t fully remember, if I’m honest) with “Richard, I could tell that you put a lot of time and effort into that work.”
That felt good.
Juggling many things at once
Looking back on those bright and happy days as a teenager I can now see what my Chemistry teacher was suffering with – she was clearly very busy with a number of different things and my homework was low on her list of priorities at that time.
I don’t blame her or condemn her for that at all.
I’ve found myself in the same situation many times in the past, and it was all because I wasn’t organised. Here are the key mistakes I would make in my first ten years (yes, ten – it was slow learning curve!) of teaching:
I would give homework to different classes on random days each week. So, for example, Year 8 Science would get homework on a Monday one week, then on a Tuesday the week after, then maybe on a Thursday the week after that.
Since I was setting homework on random days each week, I would receive it back randomly too. This would mean that I would have ‘cluster’ days when I would get back, say, four classes of homework in a single day.
The net effect was that I couldn’t mark it as quickly or as effectively as I really wanted to, and on some days I would stay at school very late to mark it all
So, what’s the solution to all of this chaos? Well, today, I can very happily say to you that I no longer have problems with marking and returning homework. In fact, I’m almost astonished to say that it has even become an enjoyable process!
So what are these four strategies? Let’s explore them together now.
Strategy #1: Create and implement a homework setting, marking and returningtimetable
Sounds obvious doesn’t it? It wasn’t obvious to me for a very long time (granted: I am slow at learning certain things!).
Many schools will have a homework ‘timetable’ in place, but this normally only extends to the setting of homework. Even if you follow that timetable, you still need a schedule in place for the marking and returning of that homework.
And that’s another point I must make: if your school has a homework timetable in place, then please follow it! I know I’ve been very relaxed about this at certain points in my career, but I now realize that that strategy didn’t help me or my students: they would find themselves overwhelmed with homework on certain days because their teachers didn’t follow the timetable.
Here is my current setting, marking, receiving and returning timetable:
Feel free to download and enlarge the above picture and share it with colleagues if you wish.
Strategy #2: Use Learning Journals
Learning Journals are a form of ‘recurring’ homework and are very powerful because:
They quickly build routines into your students’ lives
They reinforce the importance of constant revision, reflection and reviewing of work done in class
The are cumulative, and provide a record of the work done by the student to-date
They provide an excellent revision resource prior to exams
Students receive quick, effective feedback
Students can customize the work using their own styles, colours and sequence of revision. They even get to purchase their own ‘special’ notebook for this, making the experience uniquely personal.
So, how do we implement a ‘Learning Journals system’? Here are the steps I suggest:
Students purchase their own ‘special’ notebook. A school notebook can be given to students who can’t afford this/don’t want to buy their own.
Students fill their learning journals with revision notes, past-paper questions, Mind-Maps®, summaries and exam-preparation work. Students do this every week. A page from Pop’s Learning Journal (one of the first students I piloted this technique with about 9 years ago) is given below.
Students bring their Learning Journals to class on an assigned day each week. For this academic year, my IGCSE students bring their Learning Journals to me on a Thursday, and my IBDP kids bring them on a Friday (this spreads-out my marking a bit and matches the kids’ timetables)
Students sign on a big sheet on the wall when they hand-in their Learning Journals (please see below). Please note that the following image is one year old (sorry). I now collect in my journals on a Thursday and Friday, not a Monday like it says in the photo:
I put one and only one post-it note of feedback into each learning journal each week. This keeps my feedback focused on what’s most relevant to the student, and it ensures that I don’t spend too much of my free-time marking piles of work. Please see the example below:
The process repeats itself every week, providing a clear and productive routine for myself and my students
In addition to this, I’ve turned my Learning Journals into a ‘live-marking’ recurring feedback system: I mark them in class, with the students. It means that I lose no free time, and I am able to give one-to-one feedback to each student that is meaningful and specific.
Strategy #3: Live marking
‘Live’ marking is an incredibly powerful feedback technique, but it is rarely used effectively in the teaching profession. However, with just a few tweaks our daily routines, that can change.
I’ve made a quick video that outlines the technique of ‘Live-marking’ below:
I have personally wasted so much of my free time both at school and at home marking student work. Many late nights; many lost weekends. All for nothing.
Well, not completely for nothing – at least now I’ve seen sense and can pass on my experiences to you so that you don’t go through the same pain.
You see, I now know that feedback only works if it is relevant, specific and somewhat emotional. How do we achieve this? – we must mark student work with the students. They have to be involved too.
As soon as I started doing these things, my impact skyrocketed:
Simply walk around the classroom with a colored pen in hand. Tick, flick and mark student work as you walk around.
For larger pieces of work, set the kids on a task and call the students to your desk one at a time. Sit with the student and discuss the work, adding written comments in front of the student along the way. Use praise effectively and remember – praise only works if it is sincere, specific and collective (tell your colleagues and get them to praise the student too).
Use peer-assessment and self-assessment, but don’t do this for everything. Students still need to receive acknowledgement from their teacher.
I’ve written a useful article about peer and self-assessment techniqueshere. Some general advice on giving feedback can be foundhere.
Here’s a video I made about the Four Rules of Praise:
Strategy #4: Self and peer assessment
I first learnt the power of peer assessment back in 2008, when I had just moved to Thailand.
As a keen young teacher with two years of UK teaching experience, I found myself teaching students who were all very keen to do their best. Homework assignments and classwork seemed to come my way on a real-time, live-stream basis, and I soon found myself inundated with lots of work to mark.
At first I tried the traditional methods of using a green or red pen to write lengthy comments on each piece of work. I had learned from my training in Assessment for Learning in the UK that written comments that help the student to improve were much better than a letter grade or a score followed by a ‘Well Done’. I’d learnt about the ‘two stars and wish rule’ where I’d write two positive things about the work and then one item or target for improvement.
These ideas were great in theory, but I found that my weekends became shorter and shorter as I tried to write effective comments on every piece of work that came in. I was spending less and less time doing the hobbies I enjoyed, and I became quite the old grouch.
I finally expressed my concerns in the staff room one day and a colleague of mine said “You should do more peer assessment”. She was right.
I instantly started getting my students to mark their own work, and reflect upon it, and the results were astounding: My weekends became ‘me time’ again, and students seemed to learn better than they would from receiving my comments teh traditional way.
As I continued to develop my skills in assigning proper peer-assessment, I discovered that I was sometimes making some catastrophic errors. I refined my strategy over the years, and came up with this six-step system:
Step 1: Make sure that the work you set has an official mark scheme or set of model answers associated with it. There’s nothing worse than trying to ‘guess’ the best answers along the way as you’re trying to get the kids to assess the work. Make your own mark scheme if necessary, but make sure the answers are clear.
Step 2: When it comes time for the kids to assess the work, ask them to swap their work with someone else in the class. Alternatively, if this doesn’t work for your particular class, then collect the work in and redistribute it.
Peer-assessment saves you time and energy, and is effective
Step 3: Ask each student to get a colored pen ready to mark with. Red and green are good. You may wish to have a set of special ‘marking pens’ somewhere in class that the kids can use whenever they mark each others’ work.
Step 4: Print the official mark scheme and give a copy to each student. This has the advantage of providing a permanent copy for each student to keep, and allows you time to help students as they mark. Projecting the answers onto a screen can also work, but you may find that students cannot see and that you may have to scroll through at a pace that’s not suitable for every student. Printing a copy, or sharing it on the schools VLE so that students can access it via a tablet or laptop, is best.
Step 5: Make it very clear that students should tick the answer if it’s correct, and make full corrections if it is wrong. The mere act of writing out the model answer onto the work being marked will reinforce the concepts into the subconscious mind of the student doing the marking.
Step 6: Let the students give the work back. Collect it in at the end of the lesson so that you can glance through and check that everyone has peer-assessed properly. If anyone hasn’t, then make them do it again.
Once work has been peer-assessed, you can sit down with individual students and have ‘progress conversations’ designed to pin point areas of weakness and highlight areas of strength
You have to be quite organised with this method (e.g. making sure you print the mark schemes on time). However, this will save you loads of time and will definitely help the kids to learn properly.
Self-Assessment
Not surprisingly, self-assessment has similar perks to that of peer-assessment. This great overviewby the University of Sydney advocates for the wide-use of self-assessment with students for the following key reasons:
It encourages student involvement and participation, so it’s great for students who normally find group activities or active class-tasks a little uncomfortable
When used in conjunction with group work it can be a great way to assess one’s personal role and contribution in the group experience and learning process
Academic appraisals aside, I’ve found from my own personal experience that both self and peer-assessment are absolutely invaluable to the modern practitioner. They save you oodles of time as a teacher and students learn so much from each process.
There are a number of different ways that self and peer-assessment can be used in the classroom. My experience has taught me (the hard way!) that the following tasks work really well:
Making corrections to tests and assessments: When any important test or assessment comes up, I don’t think it is appropriate to have students marking these themselves. They’ll get it wrong, even with a mark scheme to use, and will be overly generous on themselves and their peers (unless they’ve been trained for a period of time). However, a great activity is to mark the tests yourself, then give the tests back to the students along with a printed or online mark scheme. The students could then use a coloured pen to make full and detailed corrections to their test papers. You could turn this into an AfL exercise, with students writing down the question numbers they got wrong on the whiteboard, or on an anonymous piece of paper. You could then go through these questions afterwards to clear up common misconceptions. If you run a regular Learning Journals system (as I currently do), then students could write down the questions and the model answers in their Learning Journals. This causes very deep-learning to take place and is great for building long-term memory!
Assessing homework, classwork and regular assignments: A great time-saver for teachers. Just make sure the kids have access to the model answers. Don’t forget to collect the work in too – you need to know that the kids actually did the work you asked them to do.
Past-papers: Exam-level students really need to become familiar with the official mark schemes provided by exam boards. They need to become comfortable with key vocabulary, language and command terms. Provide exam-level students with regular past-papers to do as homework. Provide mark schemes too, so that they can self and peer-assess their work in class later. For older students (e.g. ‘AS’ – Level, SAT and IBDP learners) I’ll sometimes give them past papers and mark schemes to take home. Their task is to complete the past-papers under timed conditions and mark them using the mark schemes. The student then hands me the papers completed and marked (this is essential – I need to know that they have completed the assignment). I then check the papers for common misconceptions and target those in class.
Technological means: There a number of ways in which technology can assist in the peer and self-assessment process. Google forms are great; as are online quizzes provided by trusted third parties (e.g. BBC Bitesize and MyiMaths) and online quizzes that teachers can build by themselves (e.g. Quizlets). Make use of these and others (e.g. Kahoot– great for getting kids to use their mobile devices), as they are really interactive and can offer a nice break from traditional methods.
Stategy #5: Make use of ‘Intangibles’
Intangibles are those pieces of work which aren’t really marked, but are still really important. They count as homework, but they save you time because no feedback (or only limited feedback) is needed.
Intangibles include:
Revising for tests and quizzes
‘Reading ahead’ prior to starting a new topic
Completing a group presentation using software like Google® Slides (presumably, the kids would stand-up and present the presentation in class, allowing you to give real-time feedback verbally to them, in the moment)
Automated systems, such as Educake, MyMaths and Lexia. Computer programmes like these assess the work for the students, saving you time. You may, however, wish to follow-up by keeping records and sharing some verbal feedback with your students.
Conclusion
Make homework a powerful and enjoyable process of providing high-quality feedback and learning opportunities for your students. Implement the following strategies today!:
Create a homework marking, setting, receiving and returning timetable for yourself, and stick to it!
Create a Learning Journals system – this will build routines and get your students into the habit of reviewing, customizing and summarizing their work on a regular basis
Try ‘Live-marking’: it’s such a powerful technique and it saves you so much time!
Use peer-assessment and self-assessment – why mark things yourself if the students can do it (and they’ll learn more from the process)?
Make use of intangibles, but don’t overuse them
We welcome you to join the Richard James Rogers online community! Join us on Facebook and Twitter for regular updates, giveaways of Richard’s books, special offers, upcoming events and news.
I absolutely loved mathematics when I was a kid. I loved manipulating numbers and equations, and I loved the challenge of completing complex problems involving logic and algebra.
My teachers loved mathematics too (and I’m not just talking about my maths teachers).
I was lucky enough to attendSt. Richard Gwyn High School, Flint, North Wales. As a prestigious and caring community, every teacher collectively aimed to help each other.
As a teacher myself many years later, all of this is clear to me now.
Take, for example, my form tutor: she was an English Teacher but when I was a keen and boyish Year 7 student she would happily read through my mathematics homework which I proudly presented to her in morning registration on a weekly basis.
“Great equations Richard, and well done for clearly showing what x is equal to. Not many students lay out their calculations so well like you have. Keep it up!”.
That made a difference. It was a confidence booster for sure.
Numeracy in my life
I guess I’m somewhat of an anomaly compared with the majority of people. I’ve been a maths teacher in the past, and I’m currently a Science teacher. Two decades ago, when my mates would ask “When am I ever going to use this maths stuff in real life?” I can honestly give them a real answer – I use it every day in my job.
But it doesn’t stop there.
An AMAZING Book!
After getting really interested in the world of self-help books about a decade ago, I learnt that mathematics can actually be a gateway for financial freedom for anyone. All of that algebra, arithmetic and calculus I learnt in school I am now applying to a range of real-life scenarios:
Savings and investments
Paying credit cards, my mortgage and other bills
Calculating R.O.I. and conversion for my book sales and figuring out the best investment and marketing models
Budgeting
Time-management
A range of business applications, such as demographic analysis of book sales and platform building
Exchange rates and money transfer
Bottom line: numeracy really matters!
The UK is facing a numeracy crisis
GCSE mathematics scores have been disappointing for a number of years, and 2018 was no exception.
GCSE’s in the UK used to be graded from a bottom grade of a ‘U’ to a top grade of an ‘A*’. This year, however, the system has changed so that the top grade a student can get is a ‘9’ and the bottom grade is a U. A grade 9 is slightly higher than the previous A*. The following table tries to clarify the comparison:
Despite this ‘new and improved’ system, however, the percentage of students gaining at least one level 4 (equivalent to a grade C) has fallen slightly, and only3.5% of studentsgained the top grade ‘9’ in mathematics.
When looking at world stats we can compare the UK GCSE grades with global IGCSE results (the international equivalent of the GCSE). The findings are revealing:
In June 2017, 20.8% of all students globally taking theCIE International Mathematicsexaminations achieved a grade A*. An even higher proportion (21.5%) achieved an A* in Additional Mathematics
TheJune 2018 statisticsfor Edexcel are already out and they are revealing: 3.5% of all students globally achieved a level 9 in mathematics. 10.8% achieved a level 8.
The 3.5%
It’s rather telling that 3.5% of students sitting the UK GCSE, and 3.5% of students globally taking the IGCSE (Edexcel) achieved a grade 9 in mathematics.
This could lead us to two very broad conclusions:
Either the new 9-1 maths exams are really difficult, or
The top 5 countries for mathematics are all in Asia, with developing countries like China and Vietnam scoring way higher than the United Kingdom.
This is a cause for concern.
Why numeracy matters
According to aresearch summaryproduced by the Institute of Education, University of London, numeracy skills affect adults in a wide-variety of ways:
Men with poor numeracy and literacy were more-likely to be unemployed, less-likely to get promoted if employed and were deemed more at-risk of suffering from depression
Women with poor numeracy and literacy were less likely to own their own home, more likely to have low self-esteem and even more likely to report poor physical health in the last 12 months
Low numeracy seems to have a greater effect on women than it does on men
Poor numeracy is more strongly related to lack of paid employment than poor literacy
How can teachers increase numeracy?
There are a number of strategies that we can implement.
Numeracy technique #1: Graphs and Tables
Using a variety of fabrics in a textiles class? Comparing high-value paintings with the genre of art on display? Comparing urbanization with habitat destruction?
Get your students to quantify everything! This is so easy to do, but few schools encourage it properly.
With just a simple piece of graph paper, students can analyse a variety of situations numerically. Make sure they calculate gradients too, and perhaps a standard deviation or two won’t go amiss!
When children realise the truth that maths is everywhere, they then see the purpose of maths. Seeing the purpose, they tend to enjoy maths more and work harder at it.
Numeracy technique #2: Use tutor time for arithmetical skills
The time that students spend with their form tutor/homeroom teacher can be golden time for developing numeracy.
Online programs like Ten QQ andMyMathsallow students to interface with technology and quickly learn numerical manipulation.
WithTen QQyou simply show questions on the whiteboard with a time limit to complete each one. This can be easily and quickly peer-assessed at the end. It literally takes only ten minutes but can be very valuable for building up mathematical confidence, and for identifying weaknesses.
If your school lacks the technological means to do this then simply print out some quick worksheets for your students to complete. Here are some good sites to find free resources:
Numeracy technique #3: Teach mathematical language when you teach your subject
Use a wide variety of terms and explain them, when they come up in your subject. Think of ways that they could be taught in your curriculum area. Examples include:
‘Gradient’ and ‘Slope’
A ‘Scatter Graph’ in Mathematics is the same as a ‘Line Graph’ in Science
Highlight the similarities and differences in mathematical vocabulary between departments and subjects
Numeracy Technique #4: Use Mathematical Tools in a Subject-Specific Context
Consider the following:
Venn Diagrams and Carroll Diagrams can be used in almost any subject
Timelines can be used to highlight chronology and even to track progress in a subject
Probabilities, time calculations and percentages come up everywhere. Make an effort to spend time on these calculations and show pupils how to do them properly.
Find out what the maths department is teaching, and when they are teaching it! Try to link the school’s maths curriculum to your own, so that you are reinforcing the right concepts at the right time.
Numeracy Technique #5: Recognise that many students may have bad experiences of learning mathematics
Try your best to enjoy teaching numeracy, and this sense of enjoyment will rub of on your students.
Consider the following:
Adaptlearning gamessuch as ‘Splat’, ‘Corners’ and ‘Bingo’ to help kids solve maths problems (see thisarticlehere for more info)
Be patient and take time to explain concepts. Give learners time to formulate their answers
Encourage your students to see the world through ‘maths eyes’, and encourage them to quantify aspects of your subject. A frequency analysis of adjectives in a short story, or even a geometrical exploration of the map of Wales – the opportunities for seeing the world from a mathematical perspective are endless. The websitehttp://www.haveyougotmathseyes.com/is a great place to start when looking for ideas.
Further Reading (click on the book image to take you to the Amazon sales page)
Jennifer Wathall is probably the world’s premier guru when it comes to teaching your kids how to have ‘Maths Eyes’. This book should be a staple for all teachers, everywhere, in my humble opinion.
With practical strategies that any teacher can use, ‘Teaching Numeracy’ is a very ‘hands-on’ book that any teacher will find helpful.
We welcome you to join the Richard Rogers online community. Like ourFacebook page and follow us on Twitter for daily updates.