Starting your teaching career is an exciting adventure, but it can also feel overwhelming. When I first starting teaching high school science back in 2005, for example, I soon found myself struggling to succeed at (what I see today as) basic tasks, such as marking, lesson planning and managing behaviour. So many aspects of the job were completely new to me, despite the limited teaching experience I gained from the Army Cadet Force as a teenager. I even found it difficult to think straight with so many students making requests and needing attention at the same time. Even writing basic sentences on the classroom whiteboard, in a large and tidy format so that the students could read the words clearly, was a challenge for me at first!
The reassuring news is that every teacher makes mistakes – it’s part of the learning process. To give you a head start, here are ten of the most common rookie blunders new high school teachers make (and, that I have made at some point on my journey!), along with some friendly advice on how to avoid them!
1. Doing Too Much Marking
Marking mountains of work is a fast track to burnout. Many new teachers feel they need to mark everything in detail, but that’s not sustainable! Start exploring alternatives like peer assessment, self-assessment, verbal feedback or even automated tools like online quizzes. You could also try live marking during class, where you give immediate feedback as students work. This not only saves time but also boosts student understanding.
2. Trying to Be Too Friendly with Students
It’s natural to want to be liked by your students, but remember: you’re their teacher, not their buddy. Building rapport is important, but you still need to maintain a professional distance. Being too friendly can blur the lines, making it difficult to manage behavior or assert authority. Keep your role clear, and your students will respect you more in the long run.
3. Inappropriate Use of Social Media
We live in a digital world, and social media can be a fun way to share ideas, but it’s important to be cautious. Avoid posting anything that could reflect poorly on you, your school, or the profession. It’s always better to keep your personal and professional online presence separate. Remember: once it’s online, it’s forever!
4. Oversharing with Colleagues
It’s great to get to know your colleagues, but be mindful of what you share, especially in the early days. Oversharing personal information can blur professional boundaries and lead to awkward situations. Keep conversations friendly, but professional – save your deeper personal stories for your friends outside of work.
5. Not Pacing Lessons According to Long-Term Plans
Pacing is one of the trickiest things to get right. New teachers often get caught up in the moment, spending too much time on early topics and falling behind on their curriculum goals. It’s important to balance the desire to be thorough with the need to stick to long-term plans. Keep an eye on your timeline and adjust your lessons to stay on track.
6. Being Too Lenient with Grading
Being too kind with your grades can do more harm than good. New teachers sometimes grade work too generously, not realizing that they aren’t preparing their students for the higher standards of external exams. Make sure your grading reflects the rigor of official exam boards so students get used to working at the correct level.
7. Relying on Quickly Sourced Content from the Internet
The internet is a treasure trove of resources, but not everything online is classroom-ready. Some teachers fall into the trap of quickly grabbing videos, slides, or worksheets without checking them thoroughly. Always preview your resources before using them in class to ensure they’re accurate, appropriate, and aligned with your lesson goals.
8. Not Preparing Marking Schemes
Without a clear marking scheme, grading assessments can become a time-consuming nightmare. Having a well-prepared scheme not only saves you hours but also ensures consistency and fairness across all students. It’s worth the extra effort upfront to develop marking rubrics and criteria that make assessment straightforward and manageable.
9. Making Promises You Can’t Keep
As a new teacher, you want to impress your students, but making promises you can’t keep – like grading a mountain of work in just a few days – will quickly erode their trust. Be realistic with your deadlines and commitments. It’s always better to under-promise and over-deliver than the other way around!
10. Engaging in Gossip
Gossip can be tempting in any workplace, but in a school environment, it’s especially toxic. Avoid conversations that focus on negative chatter about colleagues, students, or policies. Instead, foster positive, professional relationships. Being a person of integrity will earn you respect from your peers and create a healthier working environmentgenerally.
Originally posted December 2017. Updated December 2022.
The Christmas vacation is finally here. Many of us in the teaching profession can now look forward to a good couple of weeks of much-needed rest and recuperation.
Our students deserve a break too.
I agree that time spent with family and friends is an absolute essential right now, but I’m also mindful of the workload and duties that will hit me like a tornado when I return to school in January.
When it comes to school holidays, I always see them as time to ‘go at my own pace’. The way I see it, I have two choices:
Do nothing for the whole holiday and totally chill out, returning to the normal barrage of work that hits every teacher at the start of Term 2
Still have a holiday and some rest but do some little things to get a head-start on things before I return to school
I’ve always found that trying to do option 2 is the best, even if I don’t get through all of the ‘head-start’ work that I plan to do.
Is this an admission of failure before I even begin? Maybe, but here are my plans made as realistic as possible: meaning that I can have a rest and do around 50% (minimum) of these things too:
Requisitions and orders: I’m a Science Teacher, so I need to order chemicals and equipment for my lessons each week. This Christmas my first priority will be to get all of my requisitions done for each week of Term 2, ahead of time. This will save me many a long night when I get back to school, and will help me to plan ahead and reinforce my long-term curriculum mapping.
Termly review: Every Christmas I make it a priority to evaluate where I am at now, and where I want to be with my classes by the end of the term. This kind of self-analysis allows me to see where I’m behind and where I’m ahead and how to address those issues. This is really important for final-level exam classes as they must have covered the whole syllabus and have revised by the time the terminal exams come along.
Getting back to gym: I’ve been slacking off lately (I said this back in 2017 too!). No excuses this time. I’ve got every day free for a few weeks so I’ll be up early and out for a jog before hitting the weights later in the day.
Responding to student e-mails: Some students in my exam classes will be e-mailing me with questions about past-papers, coursework and subject-specific stuff. If I can help, then I will help. However, if not urgent, then I will deal with these queries when I am back at school.
Clothes: I’m running out of a few things (such as shirts that actually fit me!). Time for a wardrobe mini-makeover so that I continue to look half-decent at work.
Writing my next book: My first book was quite well-received, as was my second (The Power of Praise: Empowering Students Through Positive Feedback) so I’ve decided to have a go at writing another. Ten Techniques Every Teacher Needs to Know will explore the themes of classroom management and assessment to inform learning in even greater depth and breadth than my first book, and will build upon the fundamentals covered in one of my most popular blog posts. I see this as ‘downtime’ for me because I really love writing. Can I count this as ‘relaxation’?
Going back to karate: Another thing I’ve been putting off. Time to get a regular schedule set up.
Contacting people I should have contacted ages ago. Chasing up old leads and projects that I’ve allowed to slip.
Of course, as well as all of this I plan to enjoy my freedom in Thailand as much as possible. A trip to Pak Chong (where The Big Boss was filmed), along with my long-awaited visit to the Death Railway in Kanchanaburi (still haven’t done that yet – it needs to go on the list!).
How will you use your free-time this Christmas? Is it all one-big holiday or can you think of some small ways to make your life easier when you get back to school?
Like ourFacebookpage and follow us onTwitterfor daily updates.
It was a mid-spring morning in 1996. I was 13 years old enjoying Science class with one of my favourite teachers up on the top-floor lab at North Wales’ prestigious St. Richard Gwyn R.C. High School.
I loved Science. The feel of the lab, decorated with preserved samples in jars and colorful posters and periodic tables and famous Scientists on the walls, along with the cool gas taps and Bunsen burners that rested on each desk. This was my favorite part of the school.
Today’s lesson was special though, and I remember it for a very unexpected reason.
We were receiving back our Forces and Motion tests today. I loved getting my tests back, not least because I always revised really hard and was used to getting at least 75% on each one.
I always used to do two things whenever I got my tests back:
Check that the teacher had added up the scores correctly
Check how to improve my answers
On this particular day I had lost marks on a question that was phrased something like this: ‘If a rocket is travelling through space, what will happen to the rocket if all of the forces on it become balanced?’
In my answer I had written: ‘The rocket will either continue travelling at a constant speed or will not move at all.’
Now, how do I remember this seemingly obscure moment in a sea of moments from high school, most of which I cannot recall? Well, that’s simple: My teacher came over and took the time and effort to verbally explain where I’d gone wrong.
I should have just written that the rocket will continue at a constant speed, not “or will not move at all”.
A one-to-one conversation that I’ll remember forever
This moment of personal, verbal feedback from my teacher was powerful and precious. Not only did it serve to maintain my momentum in Science learning, but it left me with visual impressions of the memory itself: My friends in the Science lab, the posters on the wall and even the sunlight shining over the glistening Dee Estuary which was visible from the Science lab windows.
This little story shows us the power of verbal feedback, and therefore the caution we should place on what we say to our students. Young girls and boys grow up to become men and women, and their teachers leave a number of impressions on them, some of which are permanent.
The trick is to ensure that the permanent impressions are useful, positive and productive: As was the case with my conversation with my teacher that day.
And not all impressions need to be verbal. Written feedback can be just as memorable.
Do you empower your students with the feedback you give?
Let’s now explore the fundamentals of effective student feedback that are easy to implement, and useful.
Peer Assess Properly – The Traditional Method
I first learnt the power of peer assessment back in 2008, when I had just moved to Thailand.
As a keen young teacher with two years of UK teaching experience, I found myself teaching students who were all very keen to do their best. Homework assignments and classwork seem to come my way on a real-time, live-stream basis, and I soon found myself inundated with work to mark.
At first, I tried the traditional methods of using a green or red pen to write lengthy comments on each piece of work. I had learned from my training in Assessment for Learning in the UK, that written comments that help the student to improve were much better than a letter grade or a score followed by a ‘Well Done’. I’d learnt about the ‘two stars and wish rule’ where I’d write two positive things about the work and then one item or target for improvement.
These ideas were great in theory, but I found that my weekends became shorter and shorter as I tried to write effective comments on every piece of work that came in. I was spending less and less time doing the hobbies I enjoyed, and I became quite the old grouch.
I finally expressed my concerns in the staff room one day and a colleague of mine said “You should do more peer assessment”. She was right.
I instantly started getting my students to mark their own work, and reflect upon it, and the results were astounding: My weekends became ‘me time’ again, and students seemed to learn better than they would from receiving my comments.
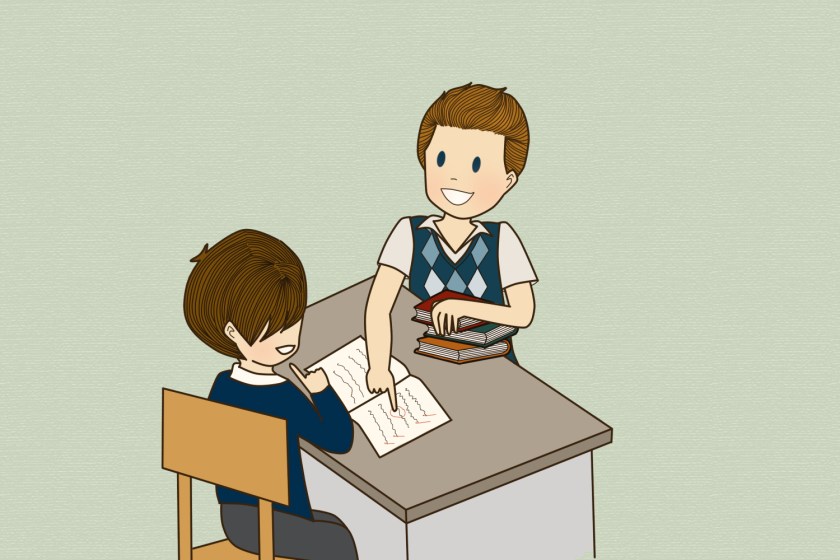
When students reflect on their work they develop a ‘growth mindset’
As I continued to develop my skills in assigning proper peer-assessment, I discovered that I was sometimes making some catastrophic errors. I refined my strategy over the years, and came up with this six-step system:
Step 1: Make sure that the work you set has an official mark scheme or set of model answers associated with it. There’s nothing worse than trying to ‘guess’ the best answers along the way as you’re trying to get the kids to assess the work. Make your own mark scheme if necessary, but make sure the answers are clear.
Step 2: When it comes time for the kids to assess the work, ask them to swap their work with someone else in the class. Alternatively, if this doesn’t work for your particular class, then collect the work in and redistribute it.
Peer assessment saves you time and energy, and is effective
Step 3: Ask each student to get a colored pen ready to mark with. Red and green are good. You may wish to have a set of special ‘marking pens’ somewhere in class that the kids can use whenever they mark each others’ work.
Step 4: Print the official mark scheme and give a copy to each student. This has the advantage of providing a permanent copy for each student to keep, and allows you time to help students as they mark. Projecting the answers onto a screen canalso work, but you may find that students cannot see and that you may have to scroll through at a pace that’s not suitable for every student. Printing a copy, or sharing it on the schools VLE so that students can access it via a tablet or laptop, is best.
Step 5: Make it very clear that students should tick the answer if it’s correct, and make full corrections if it is wrong. The mere act of writing out the model answer onto the work being marked will reinforce the concepts into the subconscious mind of the student.
Step 6: Let the students give the work back. Collect it in at the end of the lesson so that you can glance through and check that everyone has peer assessed properly. If anyone hasn’t, then make them do it again.
Once work has been peer-assessed, you can sit down with individual students and have ‘progress conversations’ designed to pin point areas of weakness and highlight areas of strength
You have to be quite organised with this method (e.g. making sure you print the mark schemes on time). However, this will save you loads of time and will definitely help the kids to learn properly.
Experiment with automated assessment
I wrote a blog postabout the effective use of ICT in lessons some weeks back, and I mentioned the first time I came across MyiMaths.
It was back in 2013, and it totally transformed my work life.
Why? That’s simple. Students would go into the ICT lab, or use their laptops or tablets in class, and literally be taught mathematics by the computer! The program would even assess the work immediately, and differentiation wasn’t a problem because students could work through the tasks at their own individual pace. The benefits were enormous:
All of the students were focused and engaged
All of the students were challenged
The teacher had more time to spend with individuals working on specific problems
The content was relevant and stimulating
No behavior management issues as the students were all quietly working
No time was needed by the teacher for marking and assessment. The program did all that for you. All you had to do was collate the data.
Instructional software can provide quick and comprehensive feedback to students, with little involvement from the teacher
There are numerous instructional software programs on the market today that save the teacher lots of marking time, and provide the students with engaging material to learn from, Whilst I wouldn’t advocate using instructional software every lesson, it certainly can become a big and effective part of your teaching arsenal.
Give verbal feedback the right way
Verbal feedback is a great way to have a personal one-to-one conversation with a student. It can help you to address systemic, widespread issues (e.g. not writing down all of the steps in calculations) and it can be a great way to motivate each student.
However, many teachers are only going so far with verbal feedback and are not using it as the powerful tool it is.
Take this piece of KS3 Geography work for example:
Geography work from an 11 year old, shown to me on 21st June 2016
I received this work from a parent at dinner, who knew I was an educational author, on 21st June 2016.
You’ll undoubtedly have noticed the dates on the work: 1st December and 8th December 2015. I’m sure you’ll have shuddered upon the realization that this work hadn’t been marked in seven months! No peer-assessment, no self-assessment and no comments from the teacher. There aren’t even any ticks! Add this to the fact that this boy’s entire notebook was completely unmarked, just like this, and you can begin to understand why I nearly had palpitations in front of several avid noodle and rice connoisseurs!
When I asked the boy about why it wasn’t marked, he said that this teacher never marked worked, he just gave the occasional verbal feedback. My next obvious question was to ask what verbal feedback he’d received about this work. He said he
With teacher workloads increasing globally, this kind of approach is, unfortunately, not uncommon, However, verbal feedback need not be time-consuming and can be executed in a much better way than is seen here in this Geography work. Here are my tips:
1. Set your students a task to do and call each student one-by-one to have a chat about their work. Be strict with your timings – if you have a 40 minute lesson and 20 students in the class then keep each conversation to two minutes.
Mention the points for improvement and use sincere praise to address the good points about the work. Ask the student to reflect on the work too.
Once the conversation is over, write ‘VF’ on the work, and ask the student to make improvements to it. Agree on a time to collect it in again so that you can glance over the improvements.
As you can see, this simple three step approach to verbal feedback generates a much more productive use of time than simply having a chat with the student. Action has to be taken after the discussion, and this places the responsibility of learning solely in the hands of the student, which is where it should be.
Be specific in your comments
Sometimes it is appropriate to collect student work and scribble your comments on it with a colored pen. When you do this, make sure your comments are specific and positive, Take a look at these examples, which all serve to empower the student:
A piece of IBDP Biology homework. Comments are designed to empower and motivate the student, and address areas of weakness
An end of semester test. Comments refer to specific progress made, and areas that require further attention.
This piece of work was sent as a photograph via Skype. The teacher has added word-processed comments and an encouraging smiley.
Peer Assess Properly – The Technological Method
A growing trend that is proving popular with teachers is to use Google forms in the peer assessment process. I wrote about this in my book, and I’ve included the extracts here:
A good form for students will look something like this:
There are many alternatives to using Google forms. For example, you may wish to create a form via your school’s VLE, or even get the students to send each other their work through e-mail or a chat application (although this will remove anonymity). Either way, peer assessment with technology will save you time and provide your students with quick, detailed feedback.
Make sure students improve their work
A common theme you may have spotted in this week’s blog post is that of improvement. Students should always improve the work that’s been marked or assessed. This serves two purposes:
The student will get into the habit of giving their best effort each time. After all, a great first attempt means less effort needed in the improvement phase
The process of improving a piece of work serves to firmly cement concepts in the subconscious mind of the student, aiding memory and retention
Don’t forget to use rubrics, mark schemes and comments – students can’t possibly improve their work without these.
We welcome you to join the Richard Rogers online community. Like our Facebook page and follow us on Twitter for daily updates.
Advertisements
Occasionally, some of your visitors may see an advertisement here
Updated: October 2022 (Originally posted May 2017)
I received a message from a very stressed out Newly Qualified Teacher a few weeks ago. It pertains to a problem that many educators face: dealing with homework. When I told her that I was planning to write an article about this very issue, she agreed to share her message with all my readers:
Dear Richard. I’m about to finish my first year in teaching and I’m really ashamed to admit that I haven’t been able to mark my students’ homework on time each week. In fact, I’ve set so much homework that it has just piled up and piled up over the course of this year, to the point where I now have a literal mountain to deal with! I’m kind of hoping that most of my students will forget that I have their work, and this seems to be happening as some of it is months old. I’m so stressed out! How can I make sure that this never, ever happens again?! – G
A letter from a stressed-out NQT. Are you facing similar challenges?
Being overwhelmed with marking, particularly that caused by homework, is a common problem for new and experienced teachers alike. In this article, I’ll examine the best ways to design and organise homework, as well as ways to avoid being bogged down and ‘up to your eyeballs’ in paperwork. If you would like an audio version of my strategies, then please listen to this excellent UKEdChat podcast (highly recommended for anyone who wants to get better at assigning and organizing homework)here.
An AMAZING book! A must read for all teachers!
Consideration #1: Homework is not pointless
It’s really important to make this point from the outset. A number of articles have come out in recent years causing us to question the merits of setting homework. At one point, this mindset became so mainstream that I remember sitting-in on a departmental meeting in which a number of teachers suggested that we shouldn’t set homework at all, as it is totally pointless!
This might be a nice excuse to use to avoid some paperwork and marking, but unfortunately it’s not true at all.
In my experience, homework is only pointless if the kids never ever receive feedback, or if the homework doesn’t relate to anything on the curriculum. Then, of course, their time has been wasted.
I’ll always remember one school I worked at where all of the teachers had set summer homework for their students. Piles and piles of homework were set, including big, thick booklets full of past-papers. Guess what happened when those students returned to school the next academic year; many of the teachers had changed, and the work was piled up in an empty classroom and never marked. What a tragedy!
We’ll explore some ways in which we can give feedback in a timely manner today, as well as ways in which we can design our homework properly.
Consideration #2: Think carefully about the purpose of each piece of homework you set
This is crucial. Ideally, all homework should fall into one of four categories:
To review concepts covered in class
To prepare students for new content they will cover in class
To prepare students for examinations (e.g. with exam-style questions, revision tasks and past-papers)
A combination of two or three of the above
If the homework you are setting does not fall into these categories then you are wasting both your time and the students’ time by setting it.
Consideration #3: Think carefully about how much time the students will need to complete each piece of homework
Homework affects whole families, not just the kids you teach
This is an important consideration. Put yourself in the students’ shoes. Is this homework too demanding, or too easy for them? Will they actually have enough time to complete it? Is your deadline reasonable?
Consideration #4: How much self-study or research will your students have to do to complete your work? Where will they get their information from?
If the piece of work you are setting involves preparation for content or skills soon to be covered in class, then your students might have to do some research. Is the level of self-study you are asking of your students reasonable? Are they old enough, and mature enough to be able to find this information on their own? If not, then you may need to give some tips on which websites, textbooks or other material to look at.
Consideration #5: Can you mark this work?
This is such an important consideration, but can be overlooked by so many teachers who are in a rush.
Think carefully: if you’re setting a booklet of past-paper questions for ‘AS’ – Level students, then how is it going to be marked? Crucially, how will the students receive feedback on this work? And remember: homework really is pointless if students don’t get any feedback.
Be honest with yourself. If you honestly don’t have enough time to mark such large pieces of work, then it’s much better to set smaller, manageable assignments. At least that way your students will get some feedback, which will be useful to them.
Also, don’t try and do everything yourself when it comes to marking. Use peer-assessment, self-assessment and even automated assessment (such as that found on instructional software) on a regular basis. Be careful though – make sure you at least collect in your peer-assessed and self-assessed assignments afterwards just to be sure that all students have done it, and so that you can glance over for any mistakes. Students can be sneaky when they know that the teacher is trusting them with self-assessment each week by simply providing the answers to the work.
Another good tip is to spend some time on the weekend planning your homework for the week ahead. What exactly will you set, and when, to allow you enough time to mark everything? How can you set decent homework that’s not too big to mark? An hour spent planning this on a Saturday is much better than four hours cramming in a marking marathon on a Sunday because you didn’t think ahead.
Consideration #6: Are you organised enough?
Not to sound patronizing, but are you, really?
If you’re a primary school teacher then you’ll be collecting in assignments relating to different subject areas each week. If you’re working in the high school, then you’ll you’ll be collecting in work from potentially more than a hundred students on a regular basis.
You need to have some kind of filing system in place for all of this work. Maybe a set of draws? Folders? Trays? Electronic folders?
One strategy that absolutely works for me is that I get all of my students to complete their homework on loose sheets of paper, not their notebooks. Why? Because if they do it in their notebooks, and I haven’t had time to mark their work by the very next lesson, then it’s a nightmare having to give back notebooks again and collect them in continuously.
With loose paper its easy. I collect it in, and put each group’s assignments in a set of trays. I have one set of trays for work collected in, and one set for work that is marked. It stops me from losing students’ work and losing my sanity at the same time! The students then glue the work into their notebooks afterwards.
In addition to organizing my paperwork, I also organise my time. I use every Saturday morning for marking, which really saves me lots of headaches during the week. Do you set aside a fixed slot each week to do your marking?
Summary
Think carefully about the purpose of each piece of work you set
Don’t set work that will take the students too long, or too little time, to complete
Think carefully about the demands of any research that students will have to do. Maybe you need to point them in the right direction?
Use a variety of assessment strategies to mark student work. Don’t make assignments so big that you just don’t have time to make them.
Make sure you have some kind of filing system in place, so that you don’t lose work.
We welcome you to join the Richard Rogers online community. Like ourFacebookpage and follow us onTwitterfor daily updates.
Like what you see? 🎯 Check out my shop for unique merchandise and products that support this blog. Every purchase helps me keep creating content you love. – Richard
Accompanying podcast episode:
I’m currently working through an excellent online course offered by the University of Queensland via EdX. The course is entitled ‘Deep Learning through Transformative Pedagogy‘. It’s absolutely fascinating and I would highly recommend the course for any teacher who is serious about helping students prepare for examinations, catch-up on missed work or understand complex content.
In today’s blog post I aim to share:
What I have learned about deep and surface learning from the course so far
Some practical ways in which deep learning can be encouraged in the classroom
So, get ready for a deep dive into this compelling topic!
A brief history behind the development of deep learning practices (and why surface learning is no longer enough)
The course began with brief history of schooling, and how technology has been a key driver for the need to educate children. The point was made that surface learning (e.g. memorization of facts) may have been sufficient in the past. However, for our learners today, facts can change very quickly. Skills need to be upgraded regularly and throughout one’s life. As a result, teaching has seen a massive shift from teacher-centred approaches to those which are learner-centred. Contemporary pedagogical approaches, such as constructivism (where students are active participants in their own learning and construct new knowledge based on links to current understandings and prior fundamentals) have an important role to play in this new, digital age.
It’s important to remember throughout today’s blog post that effective and active learning are two sides of the same coin: to be effective, learning must be active. Research shows that learner-centred approaches to teaching that change and develop student thinking get better results in terms of student learning outcomes than traditional information transmission methods.
What is deep learning, and how is it different to surface learning?
Deep learning means asking big questions. When students have the opportunity to explore a topic: asking the why, what, where, when and how behind some concept, idea or process, they learn a plethora of different things and extend their knowledge and understanding.
Surface learning involves rote memorization, and I saw a lot of this happening when I worked in China. Examples included colleagues who had very high-level credentials from top universities in Asia, but who were unwilling to perform classroom practical tasks/experiments with students because either ‘the students didn’t need to do that to pass their exams’, or the teachers themselves felt nervous due to inexperience. This seemed to really show itself in one subject in particular, however: mathematics. Students would be trained to learn lots of formulae, and would be given an astronomical number of drill questions to do for homework. However, when it came to applying the mathematics to an unusual or real-life problem, many students struggled.
Since taking the online course with the University of Queensland, I’ve learnt a number of interesting facts about deep learning:
Deep learning often involves revisiting and reviewing a topic, and can be achieved through tasks in which students are involved in active problem-solving.
Neuroscience teaches us that the brain is plastic, and that chemical changes actually occur during deep learning. Deep learning involves consolidation of knowledge, and is driven by protein synthesis in the brain. Animal studies have shown that when protein synthesis in the brain is blocked, only surface learning occurs.
Deep learning is a process of integrating new facts we learn about the world into our existing semantic framework.
Deep learning can be achieved when students are given the opportunity to discover content, knowledge and skills for themselves.
Deep learning Involves an analysis of the information being collected, allowing a more complete understanding than surface learning can provide.
In contrast to deep learning, surface learning concerns itself only with the knowledge, ideas and content present in a curriculum. Deep learning is all about relating or extending all of that. This surprised me to some extent, as I thought that learning high-demand content (e.g. redox equations in IB Chemistry) would be considered deep learning, when actually it’s just surface learning (even though the content may be considered ‘advanced’). Deep learning would occur when the student is able to apply their knowledge of, say, redox equations, to unfamiliar or extended contexts – such as when the student is tackling sub-sections of an IB HL exam paper in Chemistry, or designing and implementing an experimental investigation into the topic.
It’s important to note that there isn’t a clear-cut distinction between surface and deep learning: rather, there exists a gradation between one and the other. A progression is made from having an idea to having many ideas (surface learning), to relating and extending those ideas (deep learning).
Whilst the progression from surface learning to deep learning follows a continuum, it is also cyclical – as students begin to relate and extend ideas, they come up with new ideas which brings them back to the surface learning part of the cycle.
What kinds of activities can teachers do in the classroom to encourage deep learning to take place?
The Flipped Classroom: This was something completely new to me which I discovered on this course, and it was really enjoyable to learn about this novel approach to teaching and learning. The basic idea is that pre-reading is done at home and homework is completed in class! The students come to class already prepared with some fundamental knowledge, and then complete activities based upon what they have read. Collaborative activities (e.g. using Padlet) are really good for getting students to reflect on their learning. In terms of the pre-reading to be done at home – this doesn’t actually have to be reading. Short, 5 minute videos that the students have to watch may be enough.
Give students some prompt material (e.g. a website to use, an information sheet, etc.) and ask students to CREATE something from it. Good things to create include a Google Slides presentation, a Google Site, a Google Doc summary, an infographic, a stop-motion animation, a quiz (e.g. a Kahoot!) and so on. Please note: If you ask students to create something, then make sure they present it to the class in some way (e.g. a short talk). Students can work in groups for activities like this. I’ve written a separate blog post about encouraging creativity in the classroom here.
Since deep learning can be achieved through revisiting and reviewing content and skills regularly, journaling and past-paper practice can meet the necessary requirements. With past-paper practice, however, make sure that the students make full corrections, and can somehow articulate why they made made mistakes. The process of completing, correcting and reflecting on past-exam paper questions (or exam-style questions) is a problem-solving sequence in and of itself – hence a deep learning activity.
Practical work that allows students to explore an unusual context, or an extended part of a topic, can definitely encourage deep learning to take place – especially if the students have been involved in the creative design of the task themselves in some way. Think about opportunities you can create for students to design and implement their own experiments, presentations, model-building and practical/hands-on work (e.g. welding together an iron gate, making an item of clothing, building the circuitry for a small radio – it will depend on the subject you teach, of course).
We welcome you to join the Richard James Rogers online community! Join us on Facebook and Twitter for regular updates, giveaways of Richard’s books, special offers, upcoming events and news.
According to the International Union for Conservation of Nature, at least 14 million tons of plastic end up in our Earth’s oceans every year. Campaigns such as Keep Britain Tidy and the Project Learning Tree aim to inform young people about the environment and the harm that single-use plastics can cause. However, despite these excellent projects, much, much more still needs to be done to bring this critical issue to our students’ attention. Today, I’ve invited Kat Sarmiento (content writer at Katreena’s Content Studio) to share her tips on how to educate children about the dangers of single-use plastics, along with advice on how to utilise sustainable alternatives.
Single-use plastics are a modern convenience, but how much is that convenience costing the environment? The manufacture, spread, and waste of single-use plastic are a major environmental issue that has been talked about yet remain unsolved.
People still openly burn plastic waste and use single-use plastics even when they can not use such things excessively. It has been the great efforts of dozens of organizations to phase out single-use plastics in the industry and replace them with more sustainable options.
Decarbonization always starts on an individual level. The individuals most affected by a toxic environment are the youth who have to grow up in it. But now the question is, where can the youth start on the mission to reduce plastic waste in the environment?
Why Is It So Difficult To Enact Change?
One of the most deceptively simple tasks you can do is actually the hardest. Most people don’t even realize how much plastic and paper they waste. On an individual level, think of how many water bottles you have thrown away in your life.
Whatever the number is, it is most likely too much. Now multiply that number by the population of the globe. This is why it’s so difficult to reduce plastic waste. Most people aren’t even aware of the fact that they are wasting plastic.
Although big strides are being made in reducing the use of single-use plastics in many developed countries, it’s a different story in less fortunate places. Many people fail to consider the necessity of single-use plastics in these areas because of how cheap they are to produce.
Not to mention, the lack of education on the negative effects of pollution is still a real issue. More efforts should be made by local governments to teach their citizens about the effects of excessive waste. Eco-friendly practices, especially the ones discussed in this article, should be commonplace and enforced.
How To Reduce The Impact of Single-Use Plastics
Truth be told, the efforts of the individual do very little in the grand scheme of things. However, it’s important to uphold these practices and share them with as many people as possible.
The more people learn from your example, the better your chances of making a difference. Here are some of the practices you should follow:
#1: Start Reusing More Often
While you cannot stop the production of single-use plastics on an individual basis, you are still capable of going against its intended purpose. Single-use is just a suggestion, not a feature. Things such as plastic bags, cups, bottles, utensils, and food packaging should be repurposed in some form.
The concern with single-use plastic is less about the material itself than the excessive use of it. Plastic wouldn’t be such an issue if there wasn’t so much of it all around the world. However, many supposed single-use plastics are quite handy as use for containers and makeshift tools.
Just make sure the types of plastic you are reusing don’t start leaking the chemicals used in their creation.
#2: Replace Single-Use Plastics With Sustainable Options
That being said, switching to more sustainable materials is not a bad idea. Whenever possible, look for cost-effective alternatives to the usual functions you use single-purpose plastics for:
Instead of having them bag your groceries, ask if you can have them put in cardboard boxes instead. Cardboard boxes are much less impactful on the environment and offer far more utility in a home.
Alternatively, bring your own cardboard boxes and eco-bags. Eco-bags are one of the handiest grocery things you can have.
Instead of buying plastic cups, just shoulder the admittedly less enticing washing of extra glasses. There are several cheap reusable cups in the market that you can look around for.
Store your lunch in jars or bento boxes instead of Ziploc bags.
#3: Push Organizations To Value Eco-Friendliness
For a more significant dent in the use of single-use plastics, the best thing students can do is make their voice known. Kids, teens, and young adults are huge demographics for many companies.
If enough of them start caring and demanding products that maximize recyclability and reusability, companies will have to listen. The businesses to start with should always be on a local level because the transport of plastic goods is just as intensive as using it.
Also, push for businesses to consider the impact that end-of-use products have. They should have professional recycling or disposal plants on call for their waste.
Schools are also subject to this. Encourage your school to go green by doing all of the above in their daily routines. Schools often go through a lot of single-use plastics, especially in cafeterias.
Another great way to reduce both environmental impact and printing costs is to print only what’s necessary. For example, some events hand out paper cups with custom-printed logos that won’t last the day. Instead of doing that, just encourage students to bring their own thermos or tumblers.
Kat Sarmiento
Kat is a Molecular Biology Scientist turned Growth Marketing Scientist. During her free time, she loves to write articles that will bring delight, empower women, and spark the business mind. She loves to bake but unfortunately, baking doesn’t love her back. She has many things in her arsenal and writing is one of her passion projects.
We welcome you to join the Richard James Rogers online community! Join us on Facebook and Twitter for regular updates, giveaways of Richard’s books, special offers, upcoming events and news.
This blog post comes with an accompanying podcast episode. Listen here:
Videos are a staple of the modern practitioner’s arsenal. They’re often easy to source, well-made and free.
Video hosting platforms like YouTube and Vimeo have allowed us, as teachers, to turn our classrooms into makeshift cinemas (and our virtual classrooms into large resource banks). This is a revolution of sorts – one that has been spurred on by many factors, not least the declining cost of smart boards, sound systems and data projectors as the years have gone by.
As a teacher myself I have made use of videos in my practice extensively over the past sixteen years: even earning the invisible badge of honour that comes with wheeling in a TV on a trolley with accompanying DVD player back in 2008.
Videos can offer great instructional material for students – but only when they are sourced and executed carefully by the teacher. Whilst this may seem like a simple and straightforward process, further analysis reveals that there is much to consider.
In today’s blog post I will draw upon my experience of using videos extensively over my entire career. My aim is to provide you with strategies and points to consider, so that you don’t make some big mistakes along the way (like I have!).
So, without further ado, let’s hit the ‘Play’ button and get right into these top tips for using videos as teacher.
Tip #1: ALWAYS watch the video yourself before you show it to your students
This can be a challenge when time is limited, but it is a crucial first step that we should always take. Watching the video beforehand allows us to check the following:
Is the content at the right level?
Is it age-appropriate? Are there scenarios within the video that could be culturally insensitive?
Does the video contain any swearing?
Is the volume of the video loud-enough?
Will I show the auto-generated captions/subtitles within the video? Are these subtitles an accurate reflection of the spoken words within the video? Do the captions contain any swear words by mistake (or on-purpose)?
Are there any points-of-interest that I can capitalise on? Are there any real-life examples or applications that I can think of that link directly to the video’s content?
One key mistake I’ve made a number of times as a teacher is sourcing a video quickly, only to find that much of the material was either too advanced or too basic for my students. Be particularly careful with captions/subtitles – a old colleague of mine got into some hot water for showing a video to students that contained clean spoken language, but subtitles containing swear words.
Surely it must be every teacher’s worst nightmare to show a video to students that wasn’t checked beforehand, only to hear or see crassness, immorality or inappropriate scenarios on the video when played in on a big screen in front of the students. The fear of embarrassment alone should be enough for us to remember the cardinal rule of using videos in teaching: ALWAYS watch the videos before we share them with our students.
Tip #2: Keep Videos Between 5 and 15 minutes long (as a general Rule of Thumb)
I’ve made the mistake on a number of occasions of finding a reputable, clean, amazing video, only to then play it to the class for 40 minutes or longer (e.g. in the case of lengthy documentaries). When the videos we choose are too long (or the segments we choose to play are too long) then many students will become disengaged and irritable. This is understandable – in today’s digitized social landscape students are more distracted than ever before in human history.
For me personally, I attempt to keep my videos to 15 minutes maximum. For this to happen, I have to choose videos (or video segments) very carefully. Sometimes I’ll source videos that get straight to the point (e.g. a laboratory demonstration of an experiment) and that take less than 5 minutes to play through.
In short – be aware of how much time the students spend watching the video. Is that time being efficiently used, or does the video explore topics that the students don’t need to know?
Tip #3: Watch the students as you’re watching the video
I once was blasted by my mentor during my teacher-training year. Why? – I had committed the atrocious crime of showing a video to my students, and then casually sitting down to watch the video with them.
Of course, any experienced teacher will immediately be able to identify the inadequacies of this strategy – when you don’t watch the students as the video is playing, then small pockets of chatter, disruptiveness and distraction can manifest.
My mentor put it bluntly: “When you show a video to your students you must watch the students. Don’t watch the video!”. I had been reprimanded (well, probably just advised, but it felt like a reprimand).
That was sixteen years ago. Today, I would have to say that I disagree with my old mentor, at least to some degree.
Check out my award-winning book on Amazon, Barnes &Noble and at all good retailers.
I believe that as a video is playing it is most effective for a teacher to watch the students AND watch the video. Consider the following:
Walk over to students who are chatting during a video, or who are being disruptive, and stand next to them. Normally this will bring them back on-task, but if it doesn’t, then a quiet one-to-one word should do the trick. “I really need you to focus on this video, Lucy”, for example.
Stand to the side or behind the class so that every student is within your field of vision.
If disruption becomes too pervasive, then don’t be afraid to stop the video and talk to the class. For example: “I’m so sorry to those students who were listening quietly to the video. It is unfortunate that some students are not paying attention”. Then play the video again ONLY when every student is focused.
However, why should we watch the video as we are watching the students? Well, there are many answers to that question, but the core principle is that you may wish to use key material within the video for discussion or tasks later. You may even want to pause the video at key points to discuss a real-life example or application, or even to re-phrase something the video has just described. Don’t be afraid of pausing videos at key moments like this, by the way – students learn a lot when prior concepts are linked to content that has been very recently covered.
Tip #4: Make sure the video has a purpose, and is utilized afterwards
We must not get into the habit of showing videos to students for the sole purpose of filling time, however. We must attempt to extract all of the juice that we can out of a video. Consider asking your students to do the following:
Make a list of key bullet points as the video is playing (which could be used as source material later in a group activity for example).
Complete a worksheet based on the video.
Use information from the video to complete exam-style questions or past-paper questions.
Follow the instructions within the video, step-by-step (e.g. if it’s a ‘How to’ video’). This could apply to tasks as diverse as coding, model-making, conducting scientific experiments, cooking, etc.
Collaborate with others to create a presentation, infographic, mind-map, news report or debating panel based on the concepts and information covered.
There are exceptions to this rule, of course. Sometimes we might want to show students videos as stimuli material, or to build passion for and interest in a subject. Recently, for example, I was teaching a physics lesson about forces and motion. The lesson covered pretty rudimentary calculations involving speed, distance, time and acceleration. However, I was presented with a most unusual gift – NASA had just landed a new rover on Mars. This was a golden opportunity to excite my students – so I played some footage from the Mars landing and initiated a short discussion about the physics involved.
Conclusion
I feel that we’ve become so used to the accessibility of high-quality videos that we’ve become somewhat complacent. We must always ensure that video content is sourced, planned and executed well. We do this by:
Watching the videos before we show them to our students
Being mindful of video duration
Keeping our eyes on our students, as we’re watching the video with them
Making sure that there’s some kind of activity or task included in the lesson that links to the video in some way (where possible)
We welcome you to join the Richard James Rogers online community! Join us on Facebook and Twitter for regular updates, giveaways of Richard’s books, special offers, upcoming events and news.
In the quest to better ourselves on a daily basis we often consume self-help advice from places like YouTube, blogs and books. Most of this advice focusses on proactive things we should do to achieve success. With titles to choose from such as4 Straight Forward Steps to Success and If You Commit to Yourself, Here’s What Will Happen, there’s certainly is no shortage of motivational and personal growth guidance out there.
Most of this self-help material, however, focusses on new things we should implement on a regular basis. Strategies that provide us with new things to do to improve productivity, health or wealth.
Many people use to-do lists to clarify priorities for the day, week or longer. How many of us, however, have thought to use not-to-do lists?
Few resources focus on what NOT to do, and this is a pity as such advice can often be the clearest and simplest to understand.
This video resonated with me because of its simplicity, and my somewhat skewed opinion that it’s easier to stop myself doing destructive things than it is to implement a completely new habit. Perhaps I felt that I should stop doing destructive things first, and get used to that, before implementing some new strategies in my life.
So, let’s get right into how the past 14 days of trialing these 10 habit-stoppers went.
Habit Stopping Tip #1: Don’t hit the snooze button
This is something I’ve ashamedly preached aboutbefore, but in my daily life I’ve found it really difficult to implement. My warm bed entices me to climb back into it when my alarm goes off, and this is further compounded by an extreme feeling of tiredness for at least 10 minutes after waking (something that has gotten worse, I think, as I’ve grown older).
I managed to do this on 9 out of 14 days.
On those days that I did get right out of bed as soon as the alarmsounded, I found that I was in a much better mood during my teaching day (and in a state of better physical alertness) than on those days when I snoozed. I also found out that if I have an immediate ‘get out of bed’ ritual to follow, then I am much more likely to actually get out of bed. At the moment, that ritual involves switching off my alarm and immediately walking to the nearest 7-11 convenience store to buy coffee and breakfast – this acts as a kind of reward for not hitting snooze. If I were to snooze, then I probably wouldn’t have time for this.
As a result of not hitting the snooze button on 9 out of 14 days I was able to eat breakfast before school started, read over lesson plans and even avoid traffic because I left my home earlier, which brings me on to tip number 2…………
Habit Stopping Tip #2: Don’t get mad at traffic
Leaving home earlier (because I didn’t snooze) meant that there was less traffic to get mad at, so tip number one definitely rippled into tip number 2.
I have gotten mad at traffic many times in the past – and at my taxi driver for not driving fast enough; not turning quickly enough or even for going along a route I didn’t prefer. All of this mental complaining would put me in an angry frame of mind before my school day had even started.
“An AMAZING book for teachers!”
I managed to not complain at traffic for 14 out of the 14 days, and I found that I was in a better mood at school because of it.
Habit Stopping Tip #3: Don’t be late
This is one I’ve always advocated, and it’s significance will surely be obvious to the readers of this blog. When we’re late, then what we are saying is that ‘Your time is not valuable enough for me to be on-time’.
A good analogy I was once told is that if you had to turn up at a designated location to receive 10 million pounds in cash at 6am tomorrow, then you would certainly be there on-time, perhaps even arriving very early for this appointment.
We turn up early and on-time to those things we consider important enough to be punctual for. We therefore need to assign a high-level of importance to meetings, duties and any other activities/events that require us to be punctual.
Once again, tip number 1 (Don’t hit the snooze button) allows us to be on-time, every time.
Habit Stopping Tip #4: Don’t tolerate gossip
This is a principle I have (thankfully) had the sense to follow since day one of my teaching career, and I wrote about the devastating effects that gossip can have for teachers in my debut book,The Quick Guide to Classroom Management.
When we gossip, we show people that we cannot be trusted. Secretly, our coworkers are thinking “I can’t trust him – what if he gossips about me one day”. Gossip also circulates quickly, and so-called friends can very often be duplicitous: acting as ‘double-agents’ who pass on information to those who have been gossiped about.
Just don’t gossip – it’s that simple.
Not tolerating gossip takes this principle to another level – the advice being that if you hear gossip, then you should shut it down with, perhaps, a statement like “I don’t think it’s appropriate for this conversation to be happening”. This advanced-level step, however, requires bravery, and its consequences will depend on your workplace ethos and culture. You may just wish to take the easy way out by simply standing up and walking out of the room, or walking away from the gossip, whenever you hear it.
Habit Stopping Tip #5: Don’t watch the news
I found this one SO DIFFICULT to implement, and this really surprised me! By consciously attempting to stop myself from reading the news, I discovered that I often scroll through news websites because I’m simply bored. I’m hooked – and it was hard to break to this habit.
The idea behind this is that news is a distraction, and is very often biased anyway. The majority of the news we read is bad news, and most of it describes events that are beyond our control. Why waste our time and energy feeling sad about things we can’t change?
On those days that I stopped myself reading the news, I found myself with little else to distract me besides work. This increased my productivity.
Habit Stopping Tip #6: Don’t pass judgement
I’ve fallen out of the sky many times in my life. I started from nothing, and I know what it feels like to have nothing. I’m not trying to paint myself as someone special here – many people can relate, I’m sure. However, I try my best not to look down on people where possible because:
I never know the full story
I’m far from perfect myself
I know what it feels like to be inadequate – both in terms of skill and finances
Passing judgement is just another one of life’s energy drainers that we could all be better without.
Habit Stopping Tip #7: Don’t eat and scroll…….
…………and don’t scroll at any social gathering, for that matter.
When I see couples or families at restaurants and coffee shops, and all they are doing is playing on devices, it makes me very sad (but also happy that I have a great relationship with someone in which this never happens). People are quickly losing the ability to interact physically, in my opinion.
The principle behind this habit-stopper is presence – we should be present in everything we do if we’re to get the most out of it. As I write this blog post, for example, I’ve mostly ‘gone dark’ – my phone is out of reach as I know that if I check it I’ll never get this blog post finished.
I’m more productive and present when I’m not on my phone, unless I’m using my phone for a specific purpose.
Habit stopping tip #8 – Don’t check e-mail before noon
Does this apply to teachers? I’m not sure.
E-mail has become an essential part of my job, but some would say it is yet another distraction. I’m still on-the-fence about this one, as important announcements often come to me by e-mail, and they often need to be acted upon quickly.Are there e-mails that I don’t need to check before noon? Probably. E-mail is evolving quickly into a messaging tool, however, and as teachers we are fast-approaching a stage where we need to be reachable at all times at work. GMail, for example, is becoming more skewed towards Google Hangouts and instant messaging. As workplace messaging technology evolves, teaching will surely evolve with it.
Habit Stopping Tip #9: Don’t leave dishes in the sink
I loved seeing how this particular habit affected my life. It was very powerful.
I am typical ‘dish-leaver’, and once I started to pro-actively wash dishes as soon as I used them I found myself also doing laundry right away; tidying up after myself right away; putting my work clothes in my wardrobe instead of over the back of a chair; putting old cosmetics’ bottles in the bin right away, and on and on it went.
My home became tidier more quickly – and less clutter at home meant an overall sense of happiness.
I highly recommend this tip.
Habit Stopping Tip #10: Don’t wait for perfect
In the video provided at the start of this blog post, Ben uses the phrase “Jump, and grow wings on the way down”. As a result of this one statement, I found myself going to the gym more often, despite being in not-so-perfect shape.
That’s got to be a good start, right?
Have you grown your wings yet, or are they still growing?
We welcome you to join the Richard James Rogers online community! Join us on Facebook and Twitter for regular updates, giveaways of Richard’s books, special offers, upcoming events and news.
Our lessons need to be clear in order for students to understand the subject content they are expected to learn. This is particularly important for older students who are preparing for exams, and who are therefore expected to memorize, understand and apply vast amounts of information.
An unclear teacher who presents information in a confusing way can be a source of dread for students who are expected to perform highly on end-of-unit tests and exams. A clear teacher, on the other hand, can make students feel confident, relaxed and comfortable with the learning process contained within each lesson.
The good news for us is that it is easy to make our lessons clearer with just a few, simple, proactive tweaks. In today’s blog post I offer my top eight suggestions for maximizing lesson clarity: all of which have been distilled from just over 16 years of experience. Within these paragraphs I will present the conclusions garnered from the many mistakes I have made in my teaching career, so that you don’t have to make those same mistakes yourself.
Lesson Clarity Tip #1: Share resources with your students in advance of each lesson
When we share instructional resources with our students in-advance of each lesson we provide an opportunity to read-ahead. And, of course, we should be encouraging our students to read-ahead before each lesson anyway, as this process will cement some foundational principles before greater detail is presented within each lesson itself.
Nowadays most teachers are competent in the use of Virtual Learning Environments (VLEs) such as Google Classroom, Firefly, Moodle and so on. However, one aspect of this digital realm that’s not fully exploited is the ability to upload PowerPoints, Google Slides, PDF summaries, worksheets and other resources in advance of each lesson.
One big challenge that this poses for teachers is that these resources actually need to be ready and stored somewhere, in an organized fashion, before they can be uploaded en masse. This problem becomes further compounded when syllabuses change, and resources need to be adapted accordingly.
Where possible, we should have a sequence of slideshows, worksheets, summaries and other resources mapped out for a course before the course begins. Then, when day one of the course starts, all of the resources needed for the entire course can be ready for students to access right away. At the moment, for example, all of my PowerPoints for my entire two year IB Diploma Chemistry course are uploaded on the students Google Classroom, and are classified on there by topic.
Advantages to us, as teachers, when we do this are:
We don’t have to scramble to upload resources on the day of teaching. Our time can be better spent on other things.
We don’t have to scramble to find resources on a USB drive or some kind of shared folder. The resources are all in one place, online, ready to go.
Students can view the presentations, worksheets, PDF textbooks and other materials on their individual device screens in real-time, as the lesson is happening. This aids our instruction, reduces note-taking time for students and even saves paper for printing (students can view worksheets on their screens, without the need for a printed copy, for example).
Lesson Clarity Tip #2: Don’t put too much information on slides
Keep text large and clear.
Make diagrams and illustrations as large as possible (as large as the slide is perfect, where possible).
Avoid ‘crowding’ slides with too much information. A slide filled with paragraphs of small text can be very off-putting for students, not least because the the text can be difficult to read when it’s so small.
Keep information digestible – present material in bitesize chunks. Avoid presenting tons of information all at once.
Lesson Clarity Tip #3: Avoid irrelevant information
It can be tempting to bring-in content that’s indirectly related to the material we are presenting: often to provide an extra dimension of fun and interest to the subject. A good example I can think of from my experience is when I was teaching physics to young teenagers some years ago. The topic they were learning was entitled ‘Sound and Hearing’, and the students had to learn about sound waves, the Doppler Effect and how human ears work.
In my youthful stupidity, however, I thought (for some bizarre reason) that it would be a good idea to teach the students about sign language. I thought that it would bring a bit of fun to the classroom and allow my learners to empathize with those in society who cannot hear properly. This proved to be a mistake on my part, however, as some students were confused about what exactly they needed to know for their upcoming test.
“Do we need to know about sign language for our test, Mr Rogers?” was a question I was asked.
The answer was no, of course. I had essentially wasted a good portion of teaching time bringing-in extra material that was unnecessary. That time could have been better spent reinforcing the foundational concepts needed to pass the test.
We must keep our lessons focused on the curriculum statements we are expected to teach. When we want to bring in topical information, then let’s do that after the students have learnt the main material. At the end of a recent physics lesson, for example, I played a short video of the recent Mars Perseverance Rover landing from NASA, as this was related to velocity, acceleration and distance (concepts we had been exploring in class). This NASA video didn’t form the main-body of the lesson, but was rather a short ‘treat’ for the students at the end of an hour of hard-work.
Lesson Clarity Tip #4: Always assign focused activities
Have you ever been in a rush at school and quickly found an online quiz or web-activity that relates to your topic, only to share it with your students and later find out that the activity wasn’t quit up-to-standard?
I’ve fallen into this trap many times in the past. I’ve assigned Quizlets, Wordwalls, Kahoot! activities and other online quizzes in a rush, only to later find the following errors:
Spelling, punctuation and grammar mistakes.
Content mistakes (in some cases).
Too much information (more than the students needed to know).
Too little information (not enough for the task to be substantial).
Irrelevant information (content that the students didn’t need to know).
Poor usability (problems with software interactivity and the user experience).
It’s vital that we check our third-party content thoroughly before we assign it to our students. This level of due process needs to be extended to offline resources, such as textbooks, too.
Lesson Clarity Tip #5: Speak loudly and clearly
We must avoid the following:
Mumbling.
Using colloquialisms that our students may not understand.
Speaking with an accent that may be unclear to some learners.
I quickly learnt the importance of the above three points when I moved to Thailand in 2008 to teach Chemistry at an international school. My students mostly had Thai as their first language, so I had to lose my thick North Wales accent (which even native English speakers would find difficult to understand at times) and I had to speak classical, textbook English. I’m “sound as a pound” became “I’m fine, thank you”, “That doesn’t quite cut the mustard” became “This work is not up-to-standard”, and so on.
We must ensure that our speech is clear and, just as importantly: loud. This latter point is of more importance now than ever before as teachers all over the world are wearing masks and visors when speaking. One thing that surprised me when I wore a visor to teach last summer was that my voice sounded louder to myself when I wore the visor, then when I took it off (due to vibrations and bone conduction).
Lesson Clarity Tip #6: Speak slowly
Our students need time to process information: especially when it is presented verbally. We must include pauses in our speech, and check for understanding along the way. It may be necessary to repeat key sentences a few times too, especially if the concept being explained is advanced, or technically challenging to understand.
Lesson Clarity Tip #7: Reinforce key words
Technical vocabulary feature prominently in official mark schemes, and are often the core components of a well-formulated answer to an exam-style question. Consider the following strategies:
Ask students to say key words when they appear in your lessons. In a recent chemistry lesson, for example, I said “Everyone say the word ‘resonance'”, after which the whole class said it. Forcefully getting students to articulate key words through deliberate speech can be a good way to prime the brain to remember those words when they are used in some thought process later on in the lesson.
Use exam-style questions and official mark schemes to show students just how important it is to write key words within an acceptable context during an exam.
Encourage students to highlight key words in their notes along the way.
Lesson Clarity Tip #8: Use everyday language to explain advanced concepts (where possible)
Rephrasing sentences that contain subject-specific vocabulary can be a good way to help students understand the underlying concepts being taught. Here are some examples:
The train accelerated = the train sped up
The bond enthalpy of the C-C bond is…… = the energy contained within the C-C bond is…….
The dinner was sublime = the dinner was superb
We can prompt this process by repeating technical sentences in an everyday format, and we can ask our students “What does ___________ mean?”. This can lead to meaningful discussion that will serve to reinforce key words (Tip #7) and clarify the underlying theory of the lesson.
We welcome you to join the Richard James Rogers online community! Join us on Facebook and Twitter for regular updates, giveaways of Richard’s books, special offers, upcoming events and news.
We’re facing tough times as teachers during a pandemic right now. In today’s exclusive guest blog post, Tayla Elson (who’s a UK-based Newly Qualified Teacher and Blogger) shares her tips for succeeding as an educator during Covid. Enjoy!
Hey! My name is Tayla and I was asked by Richard to write a short piece on teaching from the NQT standpoint. It is not my full intention to write from a pandemic standpoint, but as someone who lost half of my training year to Lockdown 1, barely survived face to face teaching in Lockdown 2 and is now teaching online during Lockdown 3 – it’s all I’ve really got. And it’s been hard. So, I wanted to used this time to give you my top tips, from a realistic standpoint. We haven’t got the privilege right now to talk inspirational classrooms and a roaming classroom presence so I’m going to try and be a bit more practical and honest.
#1:Remember how you got here.Just like your peers you trained hard to get here, and no one trained for this, and we’re doing the best we can. A year on, it is easy to forget that we are all living through a crisis, we cannot be expected to work and live ‘as normal’ right now. So, stop feeling guilty that you’re not.
#2: Be Creative. This is probably one of the hardest things, both right now whilst we are teaching online, but also when you’re faced with a really difficult group. It always feels safer to teach in a simpler, easier way, but often times it is when I have been a bit more creative and daring that it has paid off the most. Teach in a way that gets you excited, especially with the groups that are the hardest to teach. Smile, show them you care.
#3: Teach the basics. It almost feels criminal to add this as a tip as it is something I have only just (stupidly) realised for myself, but I wanted to include it in case, like me, you just had no idea. We are there to teach our students, we often know our subject well, and of course we know we need to teach students how to behave. But after focusing on how to improve my behaviour management, a book highlighted something pretty obvious to me. We need to teach students what good behaviour looks like. For some students, they simply do not know what it looks like, so how can we expect them to just do it when we ask? So, I have included this in the list, teach them the basics. This will be my sole focus when we return to face to face teaching. The basics. Right from the start, the simplest of actions. That’s something they really don’t teach you in your training year.
“An AMAZING Book!”
#4: This is a career. Remember what this job really is, no one is expecting you to become an amazing teacher in your first year. That’s why they say it is the hardest teaching year. Comparison is the thief of joy. I often find myself comparing my own teaching abilities to those around me, those that have behaviour management in the palm of their hand, those that are organised beyond belief and those that have simply been in the school for a much longer time. THESE THINGS WILL COME. They just take time; this career is not a quick fix – accept it and work hard to improve in the long run.
#5: Breathe. If you’ve made it this far through the blog post without breathing, then I really suggest you take a deep breath right now! Some days will be hard, some days will be so hard you cry after your first lesson of the day, or you cry at home wondering what the heck you are doing trying to be a teacher. And yes, I am totally speaking from personal experience. This job is hard. But we’re all here for a reason, so just breathe through it and keep turning up. And remember:we are living through a global crisis, this is not normal. No-one is expecting you to work as it is.
So, if you’ve made it this far (and taken that deep breath we talked about) then I would like to thank you! Thanks for taking the time to listen to the panic-stricken reality of a very much bewildered NQT. I am currently an NQT at a secondary school in Worcestershire, teaching Geography as my subject specialism as well as some History to year 7. I write on my ownblog, which you may have guessed is more ramblings,andtweetsometimes too.
We welcome you to join the Richard James Rogers online community! Join us on Facebook and Twitter for regular updates, giveaways of Richard’s books, special offers, upcoming events and news.