Whether it’s high-stakes assessments, end-of-unit tests, coursework, homework or classwork, it’s inevitable that every teacher will have to mark some assignments the old-fashioned way from time-to-time – i.e. by hand.
This can be a daunting task for many of us who, in today’s EdTech age, are so used to marking things digitally (or allowing software to do the work for us!). I’ve written at length, for example, about how automated systems like MyMaths and Educake, and live-quiz apps that have ‘assignment’ options, can mark classwork, homework and other assignments within seconds and provide detailed analytics within summary reports.
Thankfully, I’ve been in the position where there’s no other option but to mark assignments by hand more than a few times in my 17 years as a high school teacher, and I’ve made every blunder possible – wasting countless hours of my life in the process!
At least I now have enough experience of doing marking the wrong way to pass on my knowledge to my readers – I guess every cloud does have a silver lining, after all!
So, get your red pen ready (or whichever color you wish to use) and let’s learn how to efficiently mark assignments by hand!
#1: Mark every script one question at a time, or one page at a time
What this means is that if you have, say, thirty exam papers to mark, then ONLY mark question 1 for each paper (or page 1). Then, when you’ve finished marking question 1 (or page 1) for each paper, ONLY mark question 2 for each paper (or page 2), and so on.
The reason this works so well to improve your marking efficiency is that:
You will get quicker at marking the same question the more times you do it in succession.
It becomes easier to compare one student’s answer to another, which is great for choosing model answers to showcase and to ensure fairness.
Marking our papers this way is MUCH quicker than marking, say, one whole exam paper/assignment, followed by another, then another.
#2: ALWAYS have a mark scheme available for the assignmentyou are marking
Never set an exam paper or assignment if it doesn’t come with a mark scheme. If you don’t have one, then create one. This ensures fairness and efficiency during the marking process.
During my early years of teaching, I would find myself quickly creating exam papers and assignments due to my poor time-management skills. I would often forget to source the mark schemes for those documents.
Have you ever tried to mark a stack of exam papers without having the model answers to hand? It’s a nightmare scenario! You’ll find yourself spending tons of time attempting to apply marking consistency across multiple answer types. This is almost impossible to do without a mark scheme.
Another behavior to avoid is quickly sourcing worksheets or assignments from the internet, without making sure there’s model answers that go along with them. This is a particularly toxic action for the busy/stressed teacher, as time is limited. It seems like a great short-term fix to quickly source those questions from a particular web link you’ve found. However, in the long term, you’ll pay for it with frustration and more wasted time since it will become very difficult to mark that work in the absence of proper marking schemes.
#3: Keep your papers organized
Don’t lose them – and that’s easier said than done! I find that it’s often best to keep all of my papers at school and do all of my marking at school, because:
Papers don’t get lost in transit (e.g. if I were to take papers home to mark).
It’s good for my work-life balance – schoolwork stays at school.
Consider creating a special area of your room to keep the work that you are marking by hand. Perhaps a special drawer in your teacher’s desk is appropriate, or a shelf on your classroom wall.
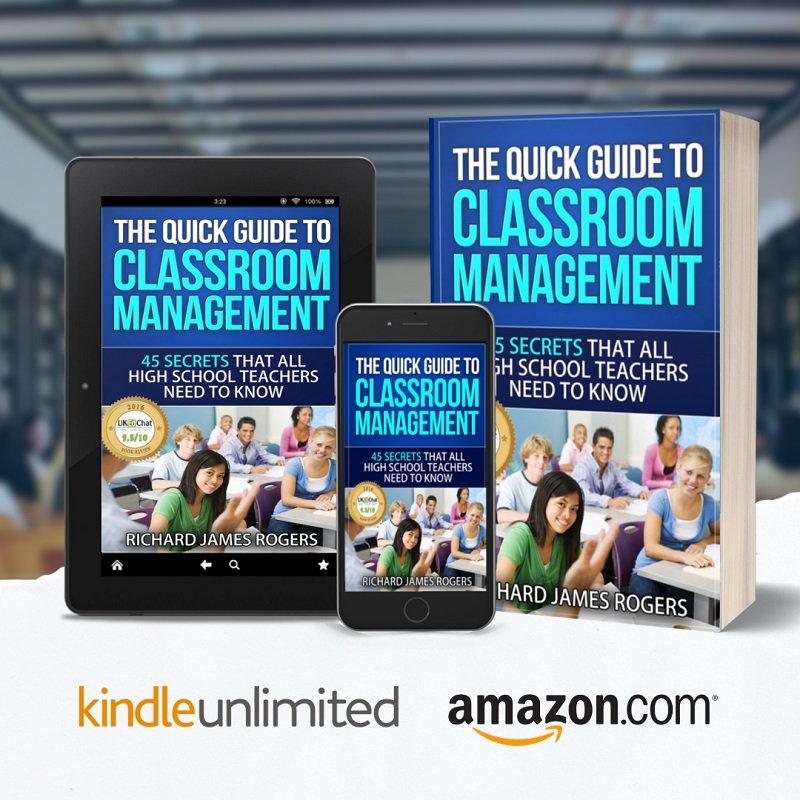
My award-winning book for high school teachers.
#4 Utilize live marking where possible
One-to-one conversations with students offer the best possible feedback out there – because those conversations are personal and should involve some metacognition. Students will have to process information and think about their responses deeply during the live-marking process, which should always involve some type of conversation (even if it’s a short one).
If possible, walk around the class and mark work in real-time as the students are doing it, or call them to your desk one at a time for a conversation and to add some hand-written comments to their work.
#5 Do NOT give the work back to the students until the data has been inputted into your school’s tracking system
This is sounds so obvious, yet, to my embarrassment, this is a mistake I have made in the past.
This really is the epitome of stupidity because once the graded work has been given back to the students, you’re going to have quite a job on your hands to get it all back again so that you can input the assessment data.
Mark it, input the data, then give it back to the students. If that means that the students have to wait a little longer to get their work back, then so be it. Due diligence is more important than quick turnaround.
Summary
I really hope this blog post was helpful. Life is precious, and short, and too valuable to be marking work inefficiently in my opinion.
Speed up your marking time by….
Marking one question at a time, or one page at a time
Sourcing mark schemes for EVERY piece of work that is to be marked by hand
Demonstrating good housekeeping by organizing your papers – don’t lose any!
Marking work in real-time, if possible
Input the assessment data into your school’s system before giving the work back to the students
In addition to the above points, I would also advise teachers to seek help from colleagues when you are unsure about how many marks to award for a student’s answer. You may find that a fresh perspective will confirm, or refute, your initial thinking on the matter. Also, get efficient with free periods/non-contact time, too. If you plan what you will mark in those ‘frees’ carefully, you’ll find that minimal weekend and evening time is taken up with marking (which is what the status quo should be).
We welcome you to join the Richard James Rogers online community. Check out our official Facebook Page, Instagram and Podcast for regular updates.
Unless you’ve been hiding in acave for the past five years, it’s highly likely that you have heard the phrase ‘retrieval practice’ being bandied about multiple times at educational seminars, Professional Development workshops and even in the departmental meetings you’ve attended at school. It’s one of those areas of pedagogy that has gotten educators excited due it’s evidence-based effectiveness, as well it’s inclusion, affirmation and promotion of metacognitive strategies (another hot topic in education).
It is my observation, however, that the majority of teachers are not 100% clear about what retrieval practice actually is – in part because some of the professional literature on the issue is conflicting, and also because as a concept it complexifies something rather simple (something that teachers have being doing for decades):getting students to reflect upon and use what they know.
In today’s blog post, I aim to provide my readers with the following:
A simple, understandable description of what retrieval practice is
A handy acronym (P.O.W.E.R.) that we can all use to remember the stages we need to follow as teachers when carrying out retrieval practice with our students
Some ideas on techniques and activities we can use in the classroom to facilitate good retrieval practice
Think ‘expression’ as opposed to ‘ingestion‘
I was most impressed with this great video by Unleash Learning which described retrieval practice as focusing on getting information out of students’ heads, rather than into students’ heads. This implies that retrieval practice only works if information has been put into the students’ heads in the first place – and this is true – retrieval practice is used as a follow-up when students have already been taught the information they need to know.
Retrieval practice is used as a follow-up at some point after a topic/unit has been taught.
Students should be encouraged to articulate what they have learned in some way, and then use what they have learned in some way (e.g., to answer an exam-style question). Retrieval practice places heavy emphasis on learning rather than assessing, although low-stakes assessments can be used as part of the retrieval process (see this blog post of mine on assessment ‘for’, ‘of’ and ‘as’ learning for more info on that!).
Give your students the P.O.W.E.R. they need to succeed!
So, let’s look at an easy-to-remember step-by-step process for facilitating retrieval practice in the classroom – the P.O.W.E.R. technique.
Prime (P): Prime the Mind
Start by priming the mind. Review essential concepts, key points, or summaries to prepare your students for the learning experience ahead.A great activity for this is Mind Map Mayhem: Encourage students to create colourful mind maps summarizing key concepts from the previous lesson. They can use doodles, arrows, and even emojis to make it visually appealing. This primes their minds for what’s to come!
At this stage, summaries do not need to be organized – they can be scattered and random, and do not necessarily need to be handwritten – a group discussion, quick verbal presentation to the class or even a bulleted list will suffice.
Organize (O): Organize Thoughts Actively
Encourage active organization of thoughts. Have your students organize information in their own words, creating meaningful connections and enhancing comprehension through an engaged approach. There are many tools that can be used for this, but my favorites are:
Mnemonics
Acronyms
Infographics
Graphic organizers
Google Slides, Docs, Sheets and Sites
Flow charts
Audio notes
It’s quite important at this stage that information follows the required pattern in which it needs to be retrieved in the final exams – e.g. the stages of cell division (in order), a timeline of King Henry VIII’s reign (in order), the points to raise in a written response to a language question (in order), etc.
Wrestle (W): Wrestle with Challenges
Yes! – we finally have a teaching acronym with ‘Wrestle’ in it (cue the giggles in teacher workshops all across the world from this point onwards). If nothing else, this wise choice of a word will help us all to remember that in this stage the students should tackle thought-provoking questions that demand active recall.
This step engages the mind in a mental wrestling match, strengthening memory and reinforcing the learning process.
The questions do not necessarily need to be provided in a mini-test or handout format (although you can go with that too), live quiz apps, verbal questioning, exam-style questions, past-papers, flash cards, quick writing exercises, worksheets and learning journals can all be used as tools to facilitate this process. At this stage, the questions should be low stakes, so that making mistakes is encouraged.
Evaluate (E): Evaluate Understanding
Promote self-evaluation to gauge understanding. Guide your students to reflect on their comprehension, identifying areas of strength and pinpointing topics that may require additional attention.
Check out my award-winning book for high-school teachers on Amazon. Purchases support the creation of my blog posts and podcast episodes.
A great technique that teachers have been using for decades for this is Traffic Lights. Provide students with red, yellow, and green cards. Ask them to hold up the corresponding card to indicate their understanding. Red for unclear, yellow for partial, and green for solid comprehension. It’s a quick and visual way to evaluate understanding.
Again, live quiz apps can be used for student self-evaluation, as well as self-reflection rubrics. Metacognitive tools, such as self-regulation checklists, are also great for this.
In my current practice, I like creating Google Sheets in which students can type in their reflections as they do them – essentially creating a long-term digital journal/record of their progress. The sheets are very simple – usually asking which questions the students got wrong, why they got them wrong, and what they should do next to improve further. When created on a Google Classroom assignment, one sheet is enough, as a copy will be made for each student if you select the correct option from the drop-down menu.
Reinforce (R): Reinforce Through Practice
Transition to reinforcement through practice. Engage your students in hands-on activities, be it additional past-paper questions, problem-solving scenarios, experiments, or real-world applications. This step solidifies knowledge and encourages practical application.
Practice makes perfect!
One activity you might want to try (if you’re looking for something unusual) is Escape Room Extravaganza. Create a virtual or physical escape room with challenges related to the lesson. Students work in teams to solve problems, unlock clues, and apply their knowledge. A QR-code treasure hunt may work well for this, for example. It’s a fantastic way to reinforce learning through collaboration and critical thinking.
Conclusion
Retrieval practice is essentially a way to build long-term memory of concepts, skills, ideas, key vocabulary, techniques and knowledge. At some point after a topic or unit has been taught to your class, use the P.O.W.E.R. strategy to get your students retrieving that prior knowledge – you’ll soon find that concepts will be generally better understood, performance in future assessments will increase and students will feel more confident articulating, processing and recalling the material they have covered.
Recommended further reading
Head over to retrievalpractice.org where you will find lots of free, downloadable pdfs containing tons of advice on how to implement retrieval practice in your lessons.
We welcome you to join the Richard James Rogers online community. Check out our official Facebook Page, Instagram and Podcast for regular updates.
In the rapidly evolving landscape of education, traditional teaching methods are being reshaped by innovative approaches that prioritize creativity, problem-solving, and collaboration. One such methodology gaining traction is Design Thinking. Originally conceived in the realm of product design, Design Thinking has found its way into education, offering a dynamic framework for educators to foster critical thinking and innovation among students. In this blog post, we will explore what Design Thinking is and how it can be effectively applied in classroom teaching.
What is Design Thinking?
Design Thinking is a human-centered problem-solving approach that places empathy for the end-user at the core of the creative process. Coined by David Kelley and Tim Brown of IDEO, this methodology has since transcended its origins in design and has been embraced across various fields, including education. The key stages of Design Thinking typically involve empathizing, defining the problem, ideating, prototyping, and testing.
How can Design Thinking be used in classroom teaching?
Here’s a handy acronym to help remember the stages of Design Thinking:
E.D.I.P.T.
Empathize
Define
Ideate
Prototype
Test
Let’s go through each stage one-by-one:
Empathize
Design Thinking encourages educators to understand their students on a deeper level by empathizing with their needs, challenges, and perspectives. By gaining insights into students’ lives, educators can tailor their teaching methods to address individual learning styles and needs.
Define
The second stage of Design Thinking involves clearly defining the problem at hand. In a classroom setting, this translates to identifying the learning objectives and challenges faced by students. This step sets the foundation for targeted and effective teaching strategies.
Ideate
Design Thinking encourages a culture of brainstorming and creative thinking. In the classroom, this means fostering an environment where students feel free to express their ideas without fear of judgment. Educators can facilitate brainstorming sessions to generate diverse solutions to educational challenges.
Prototype
Just as designers create prototypes to test their ideas, students can develop prototypes of their learning solutions. This might involve creating projects, presentations, or interactive activities that demonstrate their understanding of a concept. Prototyping allows for hands-on learning and experimentation.
Testing
Design Thinking emphasizes an iterative process. In education, this means encouraging students to gracefully receive feedback on their work, reflect on their learning experiences, and make improvements. The iterative cycle fosters a growth mindset and resilience in the face of challenges.
A real classroom example of E.D.I.P.T.
Let’s see how E.D.I.PT. can be used in the planning and execution of a real high-school lesson.
Subject: High School Biology
Lesson Title: “Adapting to a Changing Environment: A Design Thinking Exploration”
Objective: Students will use the Design Thinking process (E.D.I.P.T.) to propose and prototype innovative solutions for an organism’s adaptation to a changing environment.
1. Empathize (E):
Activity: Begin the lesson with a short video or reading about a species facing environmental challenges (e.g., climate change, habitat loss). Engage students in a discussion about the impact on the species, their ecosystem, and the challenges they might face.
Outcome: Students develop empathy for the organisms and understand the need for adaptations in response to environmental changes.
2. Define (D):
Activity: Guide students in identifying specific challenges faced by the chosen species due to the changing environment. Encourage them to narrow down their focus to one key problem that they want to address.
Outcome: Students articulate a clear definition of the problem, such as the impact of temperature changes on the species’ reproduction or food sources.
3. Ideate (I):
Activity: Conduct a brainstorming session where students generate various ideas for how the species could adapt to the identified challenge. Encourage creative thinking and diverse solutions.
Outcome: Students compile a list of potential adaptations, considering biological, behavioral, or physiological changes the species might undergo.
4. Prototype (P):
Activity: In small groups, students choose one of the adaptation ideas and create a prototype or model showcasing how the species might implement this adaptation. This could include drawings, diagrams, or even physical representations.
Outcome: Each group produces a prototype that visually represents their chosen adaptation solution.
5. Test (T):
Activity: Groups present their prototypes to the class, explaining the rationale behind their chosen adaptations. Facilitate a class discussion where students provide constructive feedback and ask questions.
Outcome: Students refine their prototypes based on feedback, considering the practicality and effectiveness of their proposed adaptations.
Can you think of a suitable topic that would lend itself well to an E.D.I.P.T. lesson in your subject area?
Conclusion
Design Thinking in classroom teaching is a powerful tool for cultivating a generation of creative, adaptable, and empathetic individuals. By integrating this methodology, we can transform traditional classrooms into dynamic spaces where students are not just recipients of knowledge but active participants in their own learning journey. Embracing Design Thinking in education is not just about preparing students for the future; it’s about empowering them to shape it!
Recommended further reading
Lee, D. (2018). Design thinking in the classroom: easy-to-use teaching tools to foster creativity, encourage innovation and unleash potential in every student. Berkeley, California: Ulysses Press.
Jakes, D. (2022). The Design Thinking Classroom.
D.M. Arvind Mallik (2019). Design Thinking for Educators. Notion Press.
We welcome you to join the Richard James Rogers online community. Check out our official Facebook Page, Instagram and Podcast for regular updates.
Like what you see? 🎯 Check out my shop for unique merchandise and products that support this blog. Every purchase helps me keep creating content you love. – Richard
As we embark on our (hopefully) fulfilling journey of shaping young minds and fostering a love for learning, it’s crucial to navigate the realm of assessments with a clear understanding of the three fundamental pillars: Assessment for Learning (AFL), Assessment of Learning (AOL), and Assessment as Learning (AAL). These three components not only guide our teaching practices but also play a pivotal role in student growth and achievement.
Assessment for Learning (AFL)
Imagine a classroom as a dynamic ecosystem where both teachers and students are co-creators of knowledge. That’s the essence of Assessment for Learning (AFL). In this approach, assessments are viewed as tools for understanding where students are in their learning journey, identifying misconceptions, and tailoring instruction accordingly.
AFL is about ongoing, formative assessments that provide real-time feedback to both teachers and students. It’s not just about grades; it’s about fostering a growth mindset and creating a supportive environment where mistakes are viewed as stepping stones to success. Through quizzes, discussions, and other formative assessments, AFL helps us make timely instructional adjustments, ensuring that no student is left behind.
Some effective examples of AFL activities include:
Formative Quizzes: Create short quizzes or assessments that students can take during or after a lesson to gauge their understanding of key concepts. Use the results to identify areas that may need further clarification or reinforcement.
Peer Feedback Sessions: Organize peer review sessions where students provide feedback on each other’s work. This not only helps in assessing the quality of their work but also encourages collaboration and the development of critical evaluation skills.
Think-Pair-Share: Pose a question or present a scenario, and have students think about it individually first. Then, they pair up with a classmate to discuss their thoughts before sharing with the larger group. This encourages individual reflection and collaborative learning.
Exit Tickets: Use exit tickets as a quick assessment tool at the end of a lesson. Ask students to answer a few questions or solve a problem related to the day’s lesson. This provides immediate feedback on their comprehension and helps in adjusting future instruction based on identified needs.
Concept Mapping: Have students create concept maps to visually represent the relationships between different ideas or topics. This not only assesses their understanding of the material but also helps them organize and connect information in a meaningful way.
Assessment of Learning (AOL)
Assessment of Learning (AOL), often referred to as summative assessment, is what most of us are familiar with – the end-of-unit tests, final projects, or standardized exams. AOL is like taking a snapshot of what students have learned over a specific period. While AFL informs our day-to-day teaching, AOL provides a comprehensive overview of student achievement and allows for accountability at a broader level.
As teachers, AOL helps us evaluate the effectiveness of our instructional strategies and curriculum. It provides valuable insights into the strengths and areas that may need improvement. While it’s essential for reporting and grading purposes, AOL is most impactful when combined with AFL, creating a holistic approach to assessment.
Examples of AOL activities include:
Traditional Exams: Standardized written assessments that test a student’s knowledge and understanding of the material. This can include multiple-choice questions, short answers, essays, or a combination of these formats.
Project-Based Assignments: Tasks that require students to apply what they have learned in a creative or practical way. This could involve research projects, presentations, or hands-on activities that demonstrate their understanding of the subject matter.
Peer Assessment: Involving students in evaluating the work of their peers. This can be done through group projects, presentations, or other collaborative activities where students provide constructive feedback on each other’s performance.
Case Studies: Real-world scenarios or problems presented to students, requiring them to analyze, synthesize information, and apply their knowledge to propose solutions. Case studies encourage critical thinking and the application of theoretical concepts to practical situations.
Performance-Based Assessments: Tasks that assess a student’s ability to apply their knowledge and skills in real-world situations. This could include simulations, role-playing exercises, or any activity that requires students to demonstrate their competencies in a practical context. Performance-based assessments provide a more hands-on approach to evaluating learning outcomes.
Assessment As Learning
Now, let’s delve into the transformative power of Assessment as Learning (AAL). This approach is all about empowering students to take an active role in their own learning process. AAL encourages self-reflection, goal-setting, and metacognition, turning assessment into a journey of personal growth.
In an AAL environment, students become partners in the assessment process. They learn to monitor their progress, set learning goals, and reflect on their strengths and areas for improvement. By engaging in regular self-assessment, students develop a deeper understanding of their preferred learning modalities and strategies and become lifelong learners who take ownership of their education.
Some great examples of AAL activities include:
Self-Reflection Journals: Students regularly write reflections on their learning experiences, identifying strengths, weaknesses, and areas for improvement. This encourages metacognition and self-awareness. In my personal opinion, journaling really holds the key to transforming secondary education and should be much more widely practiced than it is presently. I have written an entire blog post outlining how to implement journaling in your subject area, here.
Learning Logs or Blogs: A continuous record where students document their learning journey, including challenges faced, new insights gained, and connections made with prior knowledge. This ongoing process helps them track their progress. Sometimes these are called ‘e-portfolios’, and Google Sites lends itself very well to this process.
Graphic Organisers: Students create visual representations of their understanding of a topic by connecting concepts and relationships. This not only reinforces learning but also allows them to see how different pieces of information fit together. An even better way to do concept mapping is to upgrade to Mind Mapping (a distinct process created by the late Dr Tony Buzan, with whom I was very lucky to enjoy a video call with several years ago). I’ve written an entire blog post about ways to organise information, which includes Mind Mapping, here.
Peer Teaching or Tutoring: Students take turns teaching a concept or skill to their peers. This not only reinforces their own understanding but also provides an opportunity to receive feedback and correct misconceptions. From an AAL perspective, this works best when both the ‘deliverer’ and the ‘receiver’ have already grasped the fundamentals of the topic being taught.
Goal Setting and Monitoring: Students set personal learning goals, breaking them down into smaller, achievable targets. They regularly assess their progress toward these goals, adjusting strategies if needed. This encourages a sense of ownership and motivation in their learning journey. Again, I believe this is best facilitated by the journaling process.
Striking a balance
While each of these assessment approaches has its unique role, the magic happens when we strike a balance between them. AFL guides our daily interactions with students, AOL provides a snapshot of their overall achievement, and AAL empowers them to become active participants in their learning journey.
So, fellow teachers, let’s embrace the ABCs of assessment with open arms. Let’s use Assessment for Learning to inform our teaching, Assessment of Learning to measure overall achievement, and Assessment as Learning to empower our students. Together, we can create classrooms where learning is a collaborative adventure, and assessment is a compass guiding us toward success.
Happy teaching!
We welcome you to join the Richard James Rogers online community. Check out our official Facebook Page, Instagram and Podcast for regular updates.
Slides are a staple of effective teaching, corporate presentations and workshops. They’re so ubiquitous, in fact, that many of us don’t realize just how much of a legendary, legacy technology they are. I was surprised to learn during my research for this blog post, for example, that MS PowerPoint was released way back in 1987! PowerPoint and other slide-based information delivery systems have stood the test of time because they are, essentially, extremely effective content presentation tools.
Slides are here to stay – that’s undeniable, so let’s discover the common mistakes teachers are making when utilizing them (note to reader – I have made ALL of the mistakes I’m about to mention at some point or another in my career, so I’m a real expert on this topic!).
#1: Putting too much text on each slide
The content needs to be readable, and not overwhelming. When we fill our slides with text, we tend to not only make our sentences too small for learners at the back of the class to read, but we also present too much information at once.
Whilst we often have a lot of stuff to get through in a lesson (especially if you are teaching exam-level students), consider spreading the information out over more slides. 3 sentences per slide on 3 slides, for example, is better than 9 sentences all crammed together on one slide.
#2: Making students copy from slides
Here are the problems this causes:
Children have different writing speeds, and you’ll always find that the majority of the class are sat around waiting for the slow students to finish copying.
It dramatically slows down the pace of your lessons, making it difficult to keep to a curriculum map schedule (if done repeatedly).
Copying notes from slides is one of the most ineffective ways to learn new content. According to Make It Stick (a book I highly recommend) when no effort is required in the learning process, learning doesn’t last very long. The book’s authors cited one study where students were allowed to copy notes word-for-word on some material but were made to rephrase other material in their own words. When tested afterwards, students did a much better job of recalling the material they had to put into their own words.
So, how do we solve this problem, especially when we have so much content to get through?:
Consider providing printouts of slides with blank spaces for the children to fill in along the way. I remember one of my Biochemistry lecturers doing this at Bangor University when I was an undergrad there and I loved it – not least because I was getting accurate notes to take home, but also because I had to focus on the lesson in order to fill in the blanks correctly. Whilst this is perhaps not the most effective way to learn content out of all the methods available, it does solve the problem of pace (i.e., you won’t go too slow using this method).
Consider differentiating texts by using the methods outlined in this blog post, in order to make large paragraphs more digestible for your learners.
#3: Not making slides interactive
Include some exam-style questions along the way during your slide presentation to break up the lesson a bit. Consider word-matching activities, fill-in-the-blanks, or even just questions with allotted time for the students to answer. Perhaps you could embed a link to a live-quiz app (such as Blooket, Quizlet Live or Kahoot!) into your slides to get your students competing in a healthy way.
#4: Not sharing the slides with the students
It’s so important to make the slides available to your students once the lesson is over, and for some classes it may even be appropriate to share them before the lesson begins.
VLE and LMS platforms, such as Google Classroom, Moodle, Firefly and others are perfect for this.
With pre-university students, such as IBDP or ‘A’ – Level learners, I often find that it’s helpful to share the slides ahead of time, as the students can then read ahead before the lesson begins.
Whichever method you choose, just make sure the materials are available to your students. That way you cannot be criticized for not providing the resources that your students need to revise for their tests and assessments.
#5: Reading the slides to the class
This is an absolute no-no for teachers and is an obvious behavior to avoid to those who are more experienced in the profession. For new and trainee teachers, however, it can be a challenge to present slides without reading from them.
Teachers tend to read from slides for two main reasons:
Lack of subject knowledge/lack of reading ahead
Nervousness
Consider the following solutions:
Freeze your slide and move to the next slide on your computer. Quickly glance at, and read, the slide on your computer screen before presenting it to your class. This will help you to re-phrase the content into your own words.
Print out a copy of the slides for yourself and have it in your hand during the presentation. Again, this will allow you to read-ahead in ‘real-time’.
This sounds obvious but READ AHEAD. Never present a slideshow without reading over it first (avoid sourcing a slideshow from a third party on the internet immediately before a lesson begins).
Practice pronouncing key vocabulary and technical language before the lesson begins.
My Award-Winning book for high-school teachers.
Other mistakes teachers are making with slide presentations
Getting the visuals wrong – include nice pictures, charts and graphics where possible, and make them big enough for the class to read. If you’re stuck for time, then SlidesGPT can use AI to make a visually appealing slide presentation for you with just a few prompts (FYI – always CHECK the slides once generated). In addition to this, MS PowerPoint now comes with visual suggestions and can make slides visually appealing by using its AI Copilot feature.
Not annotating slides – if you have the technology (e.g., a smartboard), then annotate your slides as you present them. Circle key words, underline key phrases, add extra information and even re-phrase things. This will serve to make the content clearer for your students.
Conflicting colors – Are your slides readable? Always check the color balance before you present (red text on a black background, for example, is notoriously difficult to read!)
Unclear fonts – avoid Brushscript! Calibri, Comic Sans and Arial tend to work really well for presentations.
Shameless plug – check out my Powerful Public Speaker Certificate Course
If you are interested in some excellent Professional Development for you or your team, which focuses on making your slide presentations as perfect as possible, then check out my Powerful Public Speaker Certificate Course. This can be delivered online or on-site. Feel free to e-mail me at info@richardjamesrogers.com if you’d like to book me for this training.
We welcome you to join the Richard Rogers online community. Like our Facebook page and follow us on Twitter for daily updates.
Boo! Halloween is right around the corner, and it’s time to bring some spooktacular fun into your high school classroom. Whether you’re a seasoned educator or a fresh-faced teacher, these ten Halloween activity ideas will help you create memorable, engaging, and educational experiences for your students. So, put on your witch’s hat, grab a handful of candy corn, and let’s get started!
#1: Costume Day
Let your students come to school dressed in their favorite Halloween costumes. You can even turn it into a creative writing exercise by having them explain why they chose their costumes. It’s a fun way to break the ice and get everyone into the Halloween spirit.
Consider hosting a sustainable Halloween-themed fashion show, by awarding prizes to students who make the best costumes out of everyday, recyclable materials. Consider making this a group-project, with the Design Technology, Textiles, Art and Science departments all getting involved. What a great way to build collaborative skills!
#2: Spooky Storytelling
Organize a spooky storytelling session in your classroom, or in the school library!. Encourage your students to share their favorite ghost stories or urban legends, and even get those creative juices flowing by making subject-specific references a part of the task brief. Here are some examples:
Chemistry: The reactions involved in photography, and how objects can sometimes appear as ghosts when they’re not
Geography: World locations that are famous for ghost sightings, and their history
English Literature: An easy one! Students analyse chosen texts that deal with the supernatural (my favourite is Bram Stoker’s Dracula)
By creating subject specific briefs like this, which require some kind of presentation as the task output, you’ll be providing a fantastic opportunity for your students to work on their public speaking skills while indulging in the eerie side of literature.
#3: Halloween-Themed Quizzes
Create a set of Halloween-themed quizzes or trivia games. Topics could range from famous horror movies to historical facts about Halloween, or even subject-specific Halloween-linked content. It’s a great way to infuse some educational content into the holiday. See my blog post on live-quiz apps for some great systems that can help you deliver this.
#4:Pumpkin Decorating
Bring a little creativity into your classroom by having a pumpkin decorating contest. Provide pumpkins and art supplies, and let your students’ artistic talents shine. You can even incorporate some team-building by having them work in pairs or groups. This could be great for a tutor-time or PSHE activity.
#5: Halloween Art Projects
Give your students the chance to express themselves through art. Encourage them to create Halloween-themed drawings, paintings, or even 3D sculptures. You can display their masterpieces around the classroom to add to the spooky atmosphere.
#6: Halloween History
Explore the history of Halloween with your students. Discuss its origins and evolution over the years. You can even tie it into a broader lesson about cultural traditions and holidays. This page by History.com is great resource that can be used to facilitate such a lesson.
#7: Halloween Science Experiments
Turn Halloween into an opportunity for hands-on learning. Conduct fun and safe science experiments that align with the holiday. For example, you can create “boo bubbles” with dry ice or explore the chemistry of candy. We Are Teachers has a great page that contains lots of ideas for this.
#8: Halloween Movie Day
Let your students unwind by watching a classic Halloween movie. Pick a film that is both age-appropriate and has a good blend of spookiness and humor. Afterward, you can have a discussion about the themes and elements of the movie. You can find a list of Halloween movies for kids here, with some being available via Netflix Kids (i.e. easy to login and show via your smartboard or projector).
#9: Costume Parade
Organize a costume parade in your school. Invite students and teachers to participate, and even have a costume contest with prizes for the most creative, scariest, or funniest costumes. It’s a great way to build a sense of community and excitement.
#10: Halloween-Themed Writing Prompts
Encourage your students to embrace their inner authors by giving them Halloween-themed writing prompts. Have them write spooky stories, poems, or creative essays. This activity can foster imagination and improve their writing skills. Sarah Gribble lists 20 such prompts at her excellent site, here.
Final thoughts
Remember, Halloween in the classroom should be a balance between fun and learning. These activities not only create a spooktacular atmosphere but also provide valuable educational experiences for your high school students. Plus, it’s a great way to build a sense of community and camaraderie among your class.
So, get ready for some ghoulishly good times this Halloween season. Your high school classroom is about to become the coolest and creepiest place in town! Happy Halloween, teachers, and may your students have a wickedly wonderful time!
We welcome you to join the Richard James Rogers online community. Like our Facebook page and follow us on Twitter for daily updates.
Every child deserves a fair shot at a bright future, regardless of their socioeconomic background. Yet, the harsh reality is that billions of children around the world are living in poverty, facing numerous challenges that can hinder their educational journey:
There were 4.2 million children living in poverty in the UK in 2021-22. That’s 29 per cent of children, or nine in a classroom of 30 [Source: Child Poverty Action Group]
In the United States, the poverty rate among children saw a sizeable increase, more than doubling from 5.2% in 2021 to 12.4% last year [Source: United States Census Bureau]
Globally, the numbers are even more sobering: 1.2 billion children worldwide are living in poverty [Source: Save The Children]
Teachers, as the unsung heroes we are, play a pivotal role in helping these children overcome adversity and reach their full potential. This is supported by the fact that the number one way to get children out of poverty is via good education. Nearly 60 million people could escape poverty if all adults had just two more years of schooling, and 420 million people could be lifted out of poverty if all adults completed secondary education, according to UNESCO.
In this blog post, we’ll explore how teachers can make a significant difference in the lives of children living in poverty, along with some practical strategies that can be implemented in the classroom.
#1: Build Relationships
Take the time to get to know your students individually. Learn about their interests, backgrounds, and challenges. Building strong teacher-student relationships can make a significant difference in the lives of students living in poverty. They need to feel like someone cares about their well-being and success.
#2: Flexible and Differentiated Instruction
Recognize that students in poverty may come to class with varying levels of preparedness due to circumstances beyond their control. Embrace differentiated instruction to cater to diverse learning needs. Offer additional support, extra time, or alternative assignments as needed. Flexibility in your teaching approach can help students catch up and stay engaged.
#3: Provide Access to Resources
Some students may not have access to textbooks, school supplies, or a quiet place to study at home. To bridge this gap, provide necessary resources in the classroom. Create a lending library, offer extra copies of textbooks, and keep a stash of school supplies for students who may need them.
#4: Encourage a Growth Mindset
Instill a growth mindset in your students, emphasizing that their abilities and intelligence can be developed with effort and determination. Teach them to embrace challenges as opportunities for growth rather than seeing setbacks as failures. This mindset can empower them to overcome obstacles they face. One my favourite techniques for implementing a growth mindset is Subtle Reinforcement.
#5: Breakfast and Snack Programs
Advocate for and participate in school breakfast and snack programs if they are available. A nutritious meal can make a significant difference in a student’s ability to concentrate and learn. These programs can help ensure that all students start their day with a full stomach. When implementing such programs, it’s important that poorer students are not singled out via a voucher system, or some kind of list for free meals that they must sign. Go for a campus card system instead and make it available to every student. Load credit onto the cards of poorer students and secure funding through scholarships, charities and community schemes.
#6: Connect with Community Resources
Reach out to local community organizations and social services that can support students in need. These organizations may offer tutoring, mentoring, or even access to free or low-cost extracurricular activities. Collaborate with these resources to provide additional support to your students.
#7: Teach Financial Literacy
Include financial literacy in your curriculum to equip students with essential life skills. Understanding how to budget, save, and make informed financial decisions can empower them to break the cycle of poverty in the long run.
Conclusion
Teachers play a crucial role in the lives of students living in poverty. By creating a supportive and inclusive classroom environment and implementing practical strategies, we can help these students overcome obstacles and succeed academically and beyond. Remember that every small effort can make a big difference in a student’s life, and together, we can create a brighter future for all our students.
We welcome you to join the Richard James Rogers online community. Like our Facebook page and follow us on Twitter for daily updates.
Hello, dedicated educators and champions of knowledge! As we gear up for another exciting academic year, it’s time to reflect on the lessons learned, the challenges overcome, and the fresh opportunities that lie ahead. The landscape of education is ever-evolving, and in 2023, teachers find themselves at the forefront of this transformation. Whether you’re a seasoned pro or a newbie, here are some key considerations to ponder as you embark on this new journey.
#1: Fostering Inclusivity and Diversity
The world is a vibrant tapestry of cultures, perspectives, and backgrounds, and your classroom is a microcosm of this beautiful diversity. As we step into the new academic year, make it a priority to create an inclusive and welcoming environment for all your students. Embrace multiculturalism through diverse teaching materials, celebrate different holidays and traditions, and encourage open discussions that allow everyone’s voice to be heard. By doing so, you’ll be shaping not only informed minds but also compassionate and empathetic individuals.
#2:Blending Technology and Tradition
The fusion of technology and traditional teaching methods is no longer a distant concept—it’s now a necessity. Embrace edtech tools that enhance learning experiences, from interactive apps to virtual field trips. However, remember that while technology can enrich education, the personal touch of face-to-face interactions and handwritten notes is equally valuable. Striking the right balance between digital innovation and human connection will be a hallmark of successful classrooms in the years to come.As I’ve mentioned in an earlier blog post, post-pandemic teaching is very different to what we did before COVID, mainly due to students becoming disenfranchised and disinterested with independent learning tasks that are heavily tech-dependent.
#3: Nurturing Critical Thinking and Adaptability
In an era marked by rapid change, the ability to think critically and adapt is a superpower. Encourage your students to question, analyze, and approach problems from multiple angles. Assign projects that require creative problem-solving and collaboration. By cultivating these skills, you’ll be equipping your students with tools that will serve them well in an ever-shifting world. Check out this blog post of mine about deep learning strategies for ideas to include more critical thinking in your lessons.
#4: Promoting Mental Health and Well-being
The past couple of years have underscored the importance of mental health and well-being. As a teacher, you’re not just an educator but also a source of support for your students. Keep an eye out for signs of stress or anxiety and create a safe space where students feel comfortable discussing their feelings. Incorporate mindfulness exercises or short breaks to help students recharge. Remember, nurturing their emotional well-being is just as crucial as nurturing their intellect.
5. Flexibility in Assessment and Evaluation
Gone are the days when rigid exams were the sole measure of a student’s progress. Embrace a more flexible approach to assessment, including project-based evaluations, portfolios, and real-world application of knowledge. This allows students to showcase their skills in ways that align with their strengths and interests, fostering a deeper understanding of the subject matter.
Conclusion
As you step into the new academic year and beyond, keep in mind that you are not just imparting knowledge but shaping the future. By fostering inclusivity, embracing technology, nurturing critical thinking, promoting well-being, and adapting your assessment methods, you’re not only equipping your students with tools for success but also inspiring them to become lifelong learners and responsible global citizens. Here’s to a year filled with growth, discovery, and countless “a-ha” moments! Happy teaching! 🌟
We welcome you to join the Richard James Rogers online community. Like our Facebook page and follow us on Twitter for daily updates.
Firstly, I’ll begin with a big hello and a salute to every teacher reading this right now. Many of us taught through the grueling COVID years and made it (unscathed, albeit exhausted) to the other side.
That is an achievement in and of itself.
Those of us who stayed in teaching have shown tremendous resilience. COVID destabilized so many schools and demoralized so many teachers – so much so, that more teachers are leaving the profession than those that are applying for open vacancies.
For those of us who did decide to stick to our guns, post-pandemic teaching has brought with it some new challenges that were somewhat unexpected:
Children are fed up of doing online tasks, and now expect more human-interactivity in lessons. Teachers need to be more active within their lessons than ever before – we simply cannot get way with setting our kids some work to do whilst we check e-mails and do admin. This kind of dovetailing simply cannot happen anymore.
AI has been thrust upon us – possibly the biggest challenge to education since COVID
Many of our students are way behind, since they picked up misconceptions and did not learn deeply enough during the COVID years. Many of us are now trying to teach advanced concepts to children who have little foundational knowledge.
The ways in which we taught students before COVID are not necessarily the ways we should teach students in the post-COVID years
As a result of these challenges, we need to be more organized than ever before if we are to stay in the game. So, are you ready to level up and become even more efficient? Well, you’re in luck! In this blog post, we’re going to explore five practical ways you can boost your efficiency in 2023 and beyond. Get ready to embrace new strategies, tools, and ideas that will make your teaching journey a breeze. So, let’s dive right in!
#1: Embrace the power of technology (but don’t let it take over)
In this digital age, technology is your trusty sidekick. From interactive whiteboards to educational apps, find tech tools that align with your teaching style and make your life easier. Harness the power of online platforms for grading, communication, and lesson planning. Let technology be your secret weapon in conquering classroom chaos!
Utilise live quiz apps like Blooket, Quizlet Live, Quizziz, Kahoot! and iSpring Quizmaker to get your students interacting with lesson content. It’s important that the teacher is active during these tasks too – comment on scores along the way, use humor and walk around the classroom to help students.
Use G Suite tools to aid with collaborative project work. Google Sheets, Docs, Sites and Slides all allow students to create high-quality outputs in real-time, in groups. Think of ways to utilize these tools to your advantage. Some ideas are given here.
Utilise Virtual Learning Environments to share resources and communicate with your students. Google Classroom, Firefly, Moodle and Class Dojo are all great platforms that I highly recommend. Share slides and summaries ahead of time if you can – this will allow your students the opportunity to read ahead.
Technology warning – do not replace human teaching with technology-driven teaching. Whilst there’s so much great software out there that will literally teach children all they need to know about a subject or topic, the children attending school today do not want this. They’ve had enough of educational software as they were heavily exposed to it during the COVID years when they were learning remotely. It’s back to basics, I’m afraid – paper-based tasks, spatial learning and active engagement are in-vogue and will be for some time to come.
#2: Streamline Lesson Planning
Create a system that saves time and energy during lesson planning. Organize resources, templates, and activities in a central location for easy access. Collaborate with fellow teachers and share ideas to lighten the load. Remember, a well-planned lesson is a successful lesson!Read my top 7 strategies for efficient lesson planninghere. Here’s a quick summary:
Plan in a way that works for you personally:The methods of lesson planning that I use personally have changed and evolved over the course of my career, just as I have changed and evolved too. The methods I use work for me, and that allows me to express myself in the best and most natural way possible.
Always get a quick starter activity ready: You’ll often find that there are many great workbooks full of activities and worksheets published and ready for you to use. A small investment of money in resources like this can save you loads of time that you may have spent making resources from scratch.
Always include a quick plenary:This can be as simple as getting the students to stand at the front of the class and do some quick-fire questioning, playing a learning game or even getting groups of students to verbalize their own summary.
Keep your plans and reuse them year after year: There’s no point in reinventing the wheel. Keep your planners safe and organised and use them again and again when you teach the same or similar content. Modify as you go along.
Look online for Schemes of Work, Programmes of Study and lesson plans that other people have created:You’ll be surprised at the wealth of information available. I’ve personally done this many times in the past. A quick search on a search engine can pull up many documents that you can use, modify and change to suit your own lesson planning.
Use published Schemes of Work to assist you: All examination boards produce Course Guides or syllabuses, and some will even provide Schemes of Work. Use the content from these to inform your lesson planning, particularly if you’re filling in an ‘Objectives’ or ‘Learning Outcomes’ section.
Take a long-term view:If you teach students who will take exams in May, for example, then you should know which exact topics you’ll need to cover each month in order to give you enough time to do revision and get the students ready for their exams on time.
#3: Automate Routine Tasks
Don’t let paperwork and administrative tasks steal your precious time. Seek out apps and software that automate grading, attendance, and reporting. Free yourself from the never-ending stack of papers and focus on what you do best—teaching!
Check out these blog posts and sites for some great ideas on how to automate some of your routine work:
I’ve mentioned this point many times before in blog posts and podcast episodes, but I really must emphasize again that we must PRIORITIZE self-care.
When we look after ourselves, we are better able to teach. It’s that simple.
Burnt out, stressed teachers occupy too many classrooms (often through no fault of their own). We must do what we can to counteract the stressors that affect us.
Being an efficient teacher starts with taking care of yourself. Remember to recharge your batteries, both mentally and physically. Get enough sleep, exercise, and enjoy hobbies outside of the classroom. A happy teacher is a highly efficient teacher!
Read more tips on how to be a happy teacher in this great blog post by Jessica Robinson.
#5: Embrace Flexibility
The ability to adapt and be flexible is a superpower in the ever-changing world of education. Embrace innovative teaching techniques, experiment with new approaches, and adjust your lesson plans to meet your students’ evolving needs. Stay open-minded, and your efficiency will skyrocket!
Read this great blog post by Gill Murray (Founder of Alba English Class Online and Homestay) on the topic of being a flexible and adaptable teacher for some great tips you just can’t miss!
Conclusion
We stayed in the profession despite the massive challenges we faced during COVID, yet new challenges have presented themselves since schools reopened. Being a teacher in the post-COVID years is, and is going to be, more challenging than it has ever been before. For those of us who are tired and fed up, we MUST find ways to raise our energy levels so that we can engage our students. Our paperwork, once a task we could partly do within lessons, must be completed in our free periods and our free time – and that requires good organizational systems to be in-place.
On top of all of these new challenges we face professionally, we also find ourselves on a common personal battlefield – that of our wellbeing. Here’s a big newsflash just in case you missed the memo – your school, your district and your government are NOT responsible for your personal mental and physical health and will probably do little to help you anyway. We must prioritize our own happiness and wellbeing. For some of us (me included), this means that everything must change – from how we wake up in the morning, to how we embrace fitness opportunities and get deep, restful sleep.
We welcome you to join the Richard James Rogers online community! Join us on Facebook and Twitter for regular updates, giveaways of Richard’s books, special offers, upcoming events and news.
Effective teaching practices which are suitable for the Early Years Learning Framework (EYLF) include creating a play-based learning environment, observing and responding to each child’s individual needs and interests, building positive relationships with families, and using intentional teaching strategies. Play-based learning allows children to explore, discover and learn through hands-on experiences. Observing children and responding accordingly allows educators to tailor their teaching to the needs of each individual child. Building positive relationships with families fosters a sense of collaborative partnership in the child’s learning journey. Intentional teaching strategies involve planning and implementing purposeful learning experiences that promote children’s knowledge, skills, and interests. These teaching practices support the holistic development of each child, including their emotional wellbeing, social skills, language development, and cognitive growth.
Today, I’ve invited Jessica Robinson, educational writer at The Speaking Polymath, to share her insights and tips for implemeting best practice when delievering the EYLF.
The environments we expose our children to during childhood play a part in their brain development, learning experiences, and overall life. When children are exposed to positive learning environments, they attain a widened mindset about life.
Parents and teachers play a vital role in a child’s learning experiences. Moreover, it’s the parents that cultivate a firm foundation for their children’s learning. Science also asserts that brain development in children is almost complete by the age of five.
This means that when children are provided with a positive environment, they are more likely to thrive and develop reliable life skills. These range from curiosity, independent thinking, creativity, problem-solving, and many more.
A good learning environment during childhood also enlarges a child’s mindset. It helps him or her remain open to learning and develop competencies for every study area. Many children have trouble learning, it is sometimes because they received no reliable support while growing up.
However, a supportive learning environment helps a child develop an interest in certain subjects that are seen as complicated by other kids. For example, many students hate science. Not because they are dull, but because they weren’t provided a positive environment to learn. On the other hand, some children are able to perform exceptionally in class because they receive the support they need, both at home and school.
If you’re a parent, you might be thinking of how to provide a supportive environment for your child’s learning and cognitive development. Or perhaps you’re a kindergarten teacher who wants to provide meaningful learning experiences for young kids.
The Early Years Learning Framework (EYLF) details a range of pedagogical practices that educators and parents can leverage to promote early learning. The framework emphasizes three aspects vital to children’s upbringing and learning. These include belonging, being, and becoming. It is designed to inspire conversations, and improve communication.
The EYLF learning outcomes also help children develop a strong sense of identity, understand the world they live in, and develop the desire to learn continuously. However, for children to dimensionally benefit from the framework, their parents and educators must identify children’s strengths, weaknesses, and interests.
This helps them choose appropriate teaching strategies and design the learning environment accordingly. In this blog, we look at some of the best EYLF practices that can support children’s learning and development. Let’s get started.
The 7 Best EYLF Practices for Parents and Teachers
#1: Holistic Approaches
Gone are the days when children’s learning mediums only emphasized intellectual development. The modern world is changing at a great speed and learning these days, exceeds that. Precisely, children need more than intellectual stimulation and good scores to thrive in life.
They require a set of skills that range from critical thinking, independent thinking, emotional intelligence, and problem-solving skills among others to succeed in life. Implementing holistic learning approaches helps children to dimensionally be prepared for life; i.e in school, workplace, and homes.
Holistic learning practices can be incorporated into a child’s daily life to foster emotional, social, physical, and intellectual development. In this case, parents and teachers can consider;
Stories and songs
These are very effective in promoting cognitive development in children. They stimulate a child’s awareness and also improve emotional and self-regulation capabilities.
Games & Play
Provide a child with indoor materials to play with and you can also take a child out to playgrounds. These mediums help in the development of sensory organs, limbs, hand-eye coordination, and gross and fine motor skills. They also help a child develop physically.
Additionally, consider taking your child for walks, and shopping, or let him or her play with others. Exposing the child to the natural environment helps them grow mentally. You can also consider other activities like gardening where they directly come into contact with the earth.
Painting
This is one of the best early childhood activities that promote cognitive development. Painting, coloring, colored objects, and music allow children to develop and use their senses. They also help children express their emotions and convey ideas. Above all, they increase their imagination.
#2: Responsiveness
During childhood, children are very sensitive and if not attentive, parents and teachers are more likely to misinterpret children’s feelings. During this phase, children ask many questions and when provided with a positive learning environment, their love to learn and evolve is fostered.
However, when parents and teachers fail to understand children’s questions, their emotions, and act accordingly, children are discouraged from many things.
With that, take note of their emotions, thoughts, words, and actions and ensure to remain responsive. Responsiveness is key to promoting learning and also helps teachers evolve with the changing learning environments. For example, when it comes to teaching diverse classrooms.
“An AMAZING book!”
Consider leveraging inquiry-based learning, open-ended questions, and problem-based learning. Questions like “I wonder why babies cry” help children to think about the question, analyze it, and offer answers depending on what they think.
Also, consider extending parent or teacher talk time. The more you’re available to a child, the more it cultivates trust. These learning mediums also help children to think out of the box and put themselves in that position. This helps improve EYLF outcomes as children are able to relate to the questions.
#3: Playing
Playing during the early years is associated with a range of benefits. Streaming from physical development, motor skill, cognitive, and social skill development, playing caters to emotional well-being. Therefore, as a parent, guardian, or teacher, ensure to provide safe playgrounds for children.
Playing caters to learning in many ways, especially outdoor playing. Outdoor activities like running, building, catching the ball, and hide and seek are immersive learning experiences. They not only help children to put their creativity to use, test out ideas, and build new understandings, but they also help children to break free.
Playing conforms to the aspect of being as it helps them enjoy their childhood and build relationships. It also exposes the children to nature which helps them learn more about their surroundings. Besides that, children are able to realize the diversity of the world we live in. For example, the different cultures, plant species, and races among others.
Other mediums to promote playing among children include providing them with play materials for example crayons, fabrics, blocks, and any other materials that can help them use their creativity. All round, playing contributes to sensory, cognitive, linguistic, social, and emotional learning.
#4: Promote Positive Learning Environments
Environments make a lot of difference during learning. Precisely, they can either break or make a child. During the early years, children are entirely new to everything, and the environments they are exposed to play a big role in their cognitive and personality development.
As a parent, consider providing a safe learning environment for your child. You can consider indoor play materials or online STEM apps. Play materials and learning apps help children to develop curiosity and to use their free time productively.
Stem resources have proven to help children develop an interest in science subjects. They also help them think critically, analytically, and creatively. Parents can also consider leveraging teaching mediums for example storytelling, singing, and playing.
On the other hand, teachers can leverage a range of teaching mediums, for example, outdoor activities, group discussions, and classroom lessons. These learning experiences foster a positive learning environment that promotes holistic development in children.
Generally, children are able to play, test ideas, share thoughts, and explore. These help them to develop emotionally, physically, socially, and personally. All in all, positive learning environments comprise social interactions and safe spaces that also cater to cultural diversities.
#5: Intentional Teaching
Intentional teaching mediums are deliberately designed to help children learn specific things. It can be a subject, an activity, or a test. For example, if you want a child to learn the habit of sharing, you will have to directly tell the child to share with others.
Intentional teaching may also involve intervening with a child when doing something to correct them. For example, asking a child to explain what he is doing. A child will have to stop and think about his or her actions in order to provide an answer.
Other intentional teaching mediums include striking meaningful conversations with children. For example, talk about your father. Other ways include creating opportunities for a child to take initiative. Other considerations are active learning strategies like peer teaching.
All these avenues allow a child to think independently, evaluate scenarios, and develop new perspectives. Additionally, intentional teaching helps children reflect on their actions, behaviors, and emotions. However, a parent or a teacher must be strategic.
First and foremost, recognize a child’s unique strengths and weaknesses and then tailor learning experiences accordingly. You can consider purposefully choosing activities that foster EYLF learning outcomes. For example, painting to improve imagination, and playing to boost interpersonal skills and communication.
Besides that, help them develop their interests and hobbies. For example, once you notice that your child likes music, start playing songs and watch his or her reaction.
Also, you can motivate, recognize, and praise. Praising children encourages them to keep learning and trying out new things.
There are many ways to offer praise and encouragement. Beyond verbal compliments, you can also reward children by letting them choose a favorite activity, select a prize they love, or even receive custom keyrings — a fun and meaningful option.
These custom keyrings can be personalized with cartoon characters and designs the child enjoys, along with their nickname, a personal image, or a special message of encouragement from you. You can also use their favorite colors to create unique, one-of-a-kind keyrings just for them.
When children receive such a thoughtful, customized gift as a reward for their hard work, they’ll feel both surprised and proud — motivating them to keep striving to become the best version of themselves.
#6: Enabling Transition
Any positive learning environment caters to smooth transitions. Learning evolves and children must develop such a mindset while still young. Besides that, children go through significant transitions in the early stages. These can be within the home, community, or on a bigger scale.
Parents and teachers must foster mediums that enable children to transition seamlessly. For example, explain to the child why he or she needs to shift to another bedroom. Or, you can explain to a child why he or she needs to stop eating a lot of candies.
Change shouldn’t be drastic and children should be given time to adjust. Therefore, parents and teachers can consider mediums that gradually introduce children to change. These can be providing learning spaces that cater to change and continuity. Also, parents and teachers must leverage teaching mediums that help children attain the necessary flexibility.
#7: Assessing & Monitoring Learning Progress
It is important for parents and teachers to monitor, document, and evaluate children’s learning outcomes. Evaluating children’s learning outcomes helps parents and teachers identify learning gaps and develop personalized teaching mediums.
For example, when a mother realizes that her child’s cognitive development is lagging, she can decide to see a doctor. However, this is possible when a child is monitored as per the baby’s development stages.
She will also leverage teaching models that help a child improve speech, numeracy, social and literacy skills. Therefore, as a parent or teacher, ensure to track children’s learning outcomes to identify delays or upgrade teaching mediums.
Bottom Line
The Early Years Learning Framework (EYLF) is a curriculum designed to support the development of children from birth to five years of age, or before starting primary school. The framework can be adopted by mothers and educators as a way of providing a firm foundation for children’s learning and development.
The framework details outcomes that children are expected to attain when leveraged effectively. With that, parents and teachers must consider activities and lesson plans that foster learning outcomes such as social skills, and intellectual capabilities among others.
We welcome you to join the Richard James Rogers online community. Like our Facebook page, follow us on Instagram and check out our Twitter feed for the latest news, blog posts and commentary.