Lesson observations can be nerve-wracking and stressful for many teachers. Often, this is a result of not-knowing how to effectively deal with the observation (or anticipation of it) on an emotional, professional and strategic level. Today, I’ve invitedRose-Anne Turner, Admissions Director atDestination TEFL, to share her advice on how to ace a TEFL lesson-observation.
Images for this guest blog post have been kindly provided by Destination TEFL and show teachers they have successful trained in-action, interacting with students. If you’re thinking of getting a TEFL qualification and teaching overseas, then Destination TEFL can help you!
There are so many things to think about when you’re being observed, that it’s easy to forget the obvious. Here are some ways to make sure you ace your observed lessons.
Before the lesson
This applies to observed practicums during your course: Pay attention in class! Know the correct procedures and techniques, so you know what is expected of you.
PRACTICE, PRACTICE, PRACTICE!Practice the steps and procedures (drilling, back-chaining etc) and practice your full lesson beforehand, on your own or with your partner. Get your classmates to act as students and let them point out any mistakes afterwards – all in good faith of course, and you do the same for them. Ask for a copy of the observation form that your observer will use and understand what they’re looking for. Your trainer should make it clear what is expected of you.
This will also apply should you be doing a demo lesson for a job interview. When you are called in for a demo, be sure to get all the facts beforehand, including the number and level of the students, how long the lesson will be, the topic, the facilities on site, etc.
Have a backup for everything!Always have a spare board-marker – they have a nasty way of suddenly dying when you least need them to. Time wasted scrambling for another pen will affect your lesson time management, and the curveball will make you nervous, as well as having a knock-on effect. If you plan to show images on a projector, print the images too. If you’re giving students handouts, always have a few spares on hand in case your observer wants a copy or in case there are more students than expected. Have a safety net for every aspect of the class. Be prepared to upscale or ‘dumb-down’ the lesson in case the level of the students is not what you were expecting, so make sure activities can be adjusted accordingly.
Have a checklist.Having an amazing board game or a fun worksheet is pointless if you leave it behind – we’ve seen this happen too many times – you can only be marked on what you actually do in class, not what you left at home. Attached to your lesson plan, have a checklist of what to bring, including a bottle of water and a sweat towel – there’s nothing worse than dripping sweat over the kids (yes, we’ve seen this happen too!). Make sure you have all your materials required for the lesson.
Dress professionally.If you look the part, you’ll feel the part and then you’ll act the part. If you’re not confident, fake it! Soon it will be real confidence. Find out beforehand what the dress code is at the school where you’ll be conducting the lessons. If this is for your teacher practicums during the course, you will be told this beforehand, but if it’s for a demo lesson find out! Some schools for instance, insist that female teachers wear skirts, not trousers, and many schools want all tattoos covered up.
Don’t rush and don’t leave things to the last minute! Do all your printing the day before – power outages happen and that could mean you can’t print your worksheets, lesson plan etc. make sure your computer is charged and is working. Don’t assume there will be WiFi if you need to show a YouTube clip – either download the video or make sure you can send a hotspot from your phone to the computer for internet access. On the day devote all your attention to delivering a great class, not worrying about last minute logistics.
During the lesson
Stay calm.It’s natural to be nervous when being observed. Many people speak too quickly when nervous – take a deep breath and SLOW DOWN, or your students will not understand you. Smile at your students. They will smile back and this will help you to relax.
Take note of your students.Plans should be followed… however, they should also be adapted if need be, according to your students’ levels. This is why it’s important to plan for your lesson to be adjusted both up and down, particularly for a class you have never taught before, and are not familiar with the level. Involve all your students When nervous, it’s natural to just focus on the students in the front, or those who are actively participating. Try your best to encourage all to participate.
Step back and read what you have written on the board.Often our brains are thinking ahead and we make silly spelling or other mistakes on the board. Take a step back and read what you have written.
After the lesson
Listen to the feedback, and take it to heart.Getting constructive feedback is the best opportunity for you to develop as a teacher. Sometimes, it’s not easy to hear, but the feedback given during your observed lessons on the course, is done so with the best intentions, allowing you to get the most out of the course. Avoid acting defensively, arguing with the observer and blaming the students. Instead, keep an open mind, ask for more details and note down the suggestions.
Do a self-analysis. After each lesson, think back to what you did, and how you could have done it differently. Think about how you handled questions, unruly kids, etc and think about how you could improve. Keep a lesson journal, and take your own feedback to heart too.
Take responsibility. Think about what you could have done to teach a better class, not about how someone else is at fault for what went wrong in your lesson. Many people get defensive when given feedback. Blame it on naughty kids? Rather take responsibility for poor classroom management, and research classroom management techniques. Not enough time? Look at your time management skills, and how much wasted time there was in the class.
It’s important to act on the feedback given after a lesson. If you don’t incorporate the suggestions given by your observer in your next lesson, then the feedback was pointless. Make the most of the valuable feedback session given during your course. After a demo lesson for a job interview, ask for feedback too. Your potential employer will value the fact that you are keen to improve and every good teacher knows that the best teachers never stop learning.
Thoughts and reflections from Richard James Rogers
I really enjoyed reading this great blog post, Rose-Anne. Thank you for taking the time to share these great tips with our community. As a high-school Science teacher in Thailand, I found these tips to be just as helpful to me as they would be for a TEFL ‘purist’. I think your advice is beneficial for teachers in a wide-variety of different settings.
My key-takeaways were as follows:
A lesson-observation needs to be dealt with strategically: this is not something that you can leave to chance, or be ad-hoc about. You need to have a plan in-place for the run-up to the lesson, the lesson itself and the after-lesson reflection process. Most teachers focus only on lesson-planning and their presence during the lesson, in my personal experience.
Planning the lesson activities and meeting lesson-objectives is important, but dealing with your own emotions and mental well-being as the teacher is equally important. This aspect of preparing for a lesson-observation is often overlooked and poorly discussed in traditional teacher-training programmes, in my personal opinion.
I really liked the after-lesson tips: teachers need to hear no-nonsense advice like “Listen to the feedback, and take it to heart”. I really like how you encourage teachers to “take responsibility”: we live in a world of convenience coupled with flux, and this often causes adults to become resentful and play the ‘blame game’ when receiving constructive criticism. It’s important to detach any negative emotions from whatever feedback you receive, analyse what happened, and take the necessary action steps to become better next time.
We welcome you to join the Richard James Rogers online community! Join us on Facebook and Twitter for regular updates, giveaways of Richard’s books, special offers, upcoming events and news.
Teaching online can be a very productive and worthwhile experience for both the teachers and students involved. However, at this time of widespread school closures due to COVID19, many teachers have had to quickly adapt their skills to teaching online without full knowledge of the heightened risks involved.
This blog post aims to educate teachers everywhere about the things we can do to protect ourselves when teaching online. I believe that this list is so important that I’ve included it in my upcoming book for teachers: 100 Awesome Online Learning Apps (Release date: 8th April 2020 on Amazon globally).
Available on Amazon from 8th April 2020 onwards
‘The List’: What do we need to be aware of?
Anything we say or do online can be recorded, stored, edited and forwarded without our knowledge.Google Hangouts Meets, for example, can be set to autonomously record your meetings and auto-generate a transcript of what was spoken and by whom. We must keep every interaction with our students professional and clean. The same high standards of personal conduct that are expected of us in the classroom apply even more when we are teaching online.
Know when your camera and microphone are switched on.When you start doing video conferencing for the first time, you might inadvertently set your students on a task after a live stream video briefing and then proceed to make a coffee; yawn and stretch in front of the camera; or even chat casually about how messed-up life is with your spouse who’s also working from home. Be careful. This is a very easy trap to fall into (I’ve come close to doing this myself on several occasions!). Make sure your camera AND MICROPHONE are switched off when you no longer need to engage with your students in real-time. In addition, be equally aware of video conferencing apps that can auto-generate captions. If you switch your camera off, but fail to switch off your microphone, then that next YouTube video that contains expletives and blares out of your mobile phone will not only be audible to your students, but captions may even appear on their screens!
Parents will watch you teach, so be prepared for that.In my experience, many students like to switch off their cameras towards the beginning of a lesson and, unbeknownst to you, a parent could be watching. This places us, as teachers, under even greater pressure to deliver high-quality lessons than when we are snug and comfortable in our respective classrooms. Be professional and keep standards high. If we aim to be clear, caring and professional, then our students and their parents will respect and appreciate our efforts all the more for it.
Be aware of chat features that are built into apps.These can contain casual emojis that one can choose to use; but we must be careful not to chat casually with any student (even by adding emojis to our messages). Keep all communication conducted through integrated chat as professional as you would in the classroom. I expand on this advice in a separate blog post (How Should Teachers Behave on Social Media?). This section is well-worth a read if you want to see some real examples of teachers who lost everything because of their lack of alertness to this point!
If you are not sure about an app’s appropriateness for use, then check with your school’s Senior Leadership Team or your line manager.Some schools like to keep all their prescribed online learning apps under the control of their domain (e.g. schools that use Google Classroom and Gmail may prefer to use Google Hangouts Meets as their video conferencing system, as opposed to Zoom). A great story that illustrates this point is a slight blunder that a former colleague of mine made several years ago. Knowing that Flipgrid was a popular video-exchange system used by many American schools, she recommended it to her colleagues in an upcoming collaborative teacher-training session. However, the school’s head of ICT followed up on that training session by e-mailing all the secondary teachers to tell them not to use Flipgrid – because it wasn’t a system under direct control of the school.
Check student well-being on a regular basis.When students work from home they can feel lonely, extremely bored and anxious. At this very moment, for example, as I write this prose; the novel coronavirus pandemic has snared much of the world’s population with fear and confusion. This fear and confusion is certainly being felt to varying degrees by many of the students I currently teach. Check that your students are having regular breaks and are sticking to a routine. E-mail parents of the students you are responsible for to find out how things are going. Recommend any tips you can for working from home productively and maintaining a personal sense of happiness and wellness. Share any tips that your school counselor or Student Welfare Officer sends out. When interacting on a video-call, check how your students look and feel. Are they dressed properly? Are they tired or stressed-out? Are there any student-wellbeing issues that come to your attention? Is the technology working correctly for your students?
Effective online teaching requires effective technology.This can be a challenge when using old hardware or software (or both) and when internet connections are slow. We must adapt: no matter what it takes. Set work via e-mail if video conferencing is not an option. Experiment with using the apps listed in my book (100 Awesome Online Learning Apps) on your phone if you don’t have a tablet or notebook/laptop. Figure out how your device’s integrated microphone works if you don’t have a headset. Go through the apps in this book that seem appealing and test the efficiency of each when setting tasks through the technology that’s available to you. Check-up on your students regularly – do they have the technology required to access and complete the tasks you are setting?
We welcome you to join the Richard James Rogers online community! Join us on Facebook and Twitter for regular updates, giveaways of Richard’s books, special offers, upcoming events and news.
Release date: Wednesday 8th April 2020 on Amazon Globally [ISBN 979-8629490937]
Great news!: My GAME-CHANGING book, 100 Awesome Online Learning Apps, is now LIVE on Amazon. Copies can be ordered here:https://www.amazon.com/dp/B086PSMYRN/
The book covers:
1. Not-so-obvious things to be aware of when doing online learning 2. A big list of 100 Awesome Apps with suggestions for their use inonline learning
Book description
2020 marked a definitive year in the world of teaching. For the first time in history, teachers and schools all around the world were forced to quickly apply their skills to online learning as a result of widespread school closures in the wake of the novel coronavirus pandemic. This book is timely and long-awaited, and meets the needs of educators who are required to deliver high-quality teaching via online apps and platforms. This book takes the reader through 100 tried-and-tested online learning platforms, with suggestions as to how each one could be used to enhance teaching or assessment. As a high-school science teacher and a Google Certified Educator himself, Mr Richard James Rogers has first-hand experience of using each platform and speaks from a wealth of involvement rather than from a lofty and disconnected position in elite academia. This is a practical book for those who want to make a difference in their students’ lives, no matter how volatile local circumstances may be.
We welcome you to join the Richard James Rogers online community! Join us on Facebook and Twitter for regular updates, giveaways of Richard’s books, special offers, upcoming events and news.
My PGCE course was a long, dark road of pain. Not only was I new to teaching, and finding it difficult to teach in a way that was engaging and rightly-paced, but the paperwork was tremendous.
Back then, I was required to write out each lesson plan on an A4 piece of paper and have it checked by the main class teacher. I also had to submit the work to my PGCE mentor.
The process was laborious but it did get me thinking about:
How to start my lessons quickly and appropriately.
Where students should sit at each point in the lesson and what equipment they would need.
How to work through the syllabus at an acceptable pace.
How to end each lesson with a stimulating summary.
Nowadays, however, my lesson planning is done in a one-week-per-two-pages diary [this is the planner I use], and supported by departmental curriculum maps (which outline the topics to be covered for the whole year) and Schemes of Work.
It’s less work, and more ‘long-term’ in focus.
Planning is a skill that outstanding teachers have mastered. In this article, I want to share my advice on how to best plan our:
Lessons
Marking
Homework schedule
Events
Free time
Outstanding teaching is supported by outstanding planning – and this goes beyond the simple planning of one’s lessons.
“Simply Brilliant!” – Readers’ Favorite
Let’s now go through each item in the above list together.
Lesson planning
Experience has taught me that time spent planning lessons always reaps rewards. It requires one to spend a good hour or two of non-contact time doing the following:
Looking over the week ahead and scheduling the topics that will be covered on each day
Thinking about when homework will be set, when it will be collected in and when it will be marked
Accounting for meetings, events and any planned (or possible) disruption to one’s timetable
Planning our resource-preparation time
Here’s a video I made about efficient lesson-planning, and in that you will see thelesson plannerthat I use:
For me, I use part of my Sunday morning each week to plan the week ahead. It always pays dividends in terms of:
Reduced stress during the week
Better lessons
Marking
Do we really need to assign so much homework?: If we’re not taking the time to sit with our students to provide high quality feedback, then is that homework assignment we’ve set really that useful?
We need to think carefully about the quantity of marking we are creating for ourselves, and whether or not this is an effective way to enhance the learning of our students.
I believe strongly in the power of planning our marking. Every week I need to know:
When I will set homework, tests and assignments
When I’ll collect in homework, tests and assignments
When I’ll mark it all
How I’ll mark it (in-class strategies, such as a peer and self-assessment, can save us a ton of time)
This is another Sunday morning task of mine – I plan my week’s worth of marking.
Events and free time
As well as planning my work, I also know how important it is to plan my free time.
Knowing that I have a badminton session on a Sunday afternoon, for instance, gives me the motivation to get my work done promptly. Scheduling a Friday night of relaxation gives me a reward for my hard-work during the week.
Conclusion
I believe that productivity has to permeate and infuse into every cell of our bodies. Productivity must be a way of life – not simply a good habit to deploy at work.
By planning everything, we are more likely to implement the things that move us forwards.
In the early part of my career my poor time-management and planning skills left me wasting my weekend time, wasting my mornings and creating undue stress for myself.
Never again. I deserve better. My students deserve better.
We welcome you to join the Richard Rogers online community. Like ourFacebook page and follow us on Twitter for daily updates.
This is one of my favorite pedagogical quotes and I’ve found it to be 100% accurate over the years.
As an International Baccalaureate Diploma chemistry teacher at an international school, I often have to teach topics to my students that are really, really difficult. Furthermore, the students will be examined on these topics at some point in the future, and those grades really mean something: the students will be using them to apply to study at universities all around the world.
“An AMAZING Book!”
A key question I often ask myself is how can I get my students to think deeply about the topics they are learning, so that they remember enough details to get excellent grades on their exams?
I’ve tried lots of different methods over the years, but I think I’ve finally nailed-down a system that works with every difficult topic I teach:
Explore
Question
Teach
Test
Hopefully you’ll see that this is a system that can be applied to your subject area/teaching context too.
Step 1: Explore (Thinking Intensity 2)
Provide the stuff you want the students to learn in multiple formats. Some that you may wish to use could be:
Online videos
Websites
Simulations
Textbooks
Podcasts
Magazine entries
Revision guides
Get the students to work in groups or pairs to produce some kind of creative, collaborative output. Examples include:
Create a Google Slides presentation about…..
Create a stop-motion animation about……
Create a large infographic about…….
Create a digital animation about…..
At the end of this exploration step, the students should present their work to the class in some form. This simple act of articulating what they have learned will cause deep-thinking (and therefore, memory) to take place.
Step 2: Question (Thinking Intensity 3)
Give the students a series of exam-style, challenging questions on the topic to complete under timed conditions. The students can work together on this if you wish, and may use the resources they have for help.
When the time-limit is over, provide the model answers (and make sure you actually have model answers available). Students can go through these answers via peer-assessment, self-assessment or even automated assessment (in the case of online teaching systems, like MyMaths and Educake).
As a teacher, I also like to go through any particularly difficult questions with the students so as to clear up any misconceptions. This is especially true if, for example, nobody in the class can do question 2.
Step 3: Teach (Thinking Intensity 1)
This acts as an incredibly useful review for students after what has been an intense exploration and self-assessment of stuff that was, essentially, self-taught (with a bit of help from the teacher).
Go through the key points of the topic traditionally, perhaps using a slide-based presentation, video, animation or even notes written and explained on the whiteboard.
Make use of a few learning games to spice things up a bit, especially if key vocabulary needs to be learned. Spend time going through common misconceptions: those things that students get wrong year-after-year.
Step 4: Test (Thinking Intensity 4)
Test the content covered using the most difficult questions you can find. Don’t go beyond the syllabus or above what’s been taught (obviously), but use past-paper questions that really do get the students to apply what they’ve learned to unusual contexts.
Prior to the test, you might want to provide questions of similar difficulty (with model answers provided) for the students to go through at home.
Make sure you go through the test afterwards too. Provide the mark scheme and make it really clear where, and how, marks have been lost.
Fluctuations
By fluctuating the intensity of thinking in this way (2,3,1,4) we’re exercising the brain in a similar way to how we exercise the body – gradual increases in intensity, followed by rest, followed by higher intensity.
I’ve found that this model works really well for getting students to understand really difficult topics.
We welcome you to join the Richard Rogers online community. Like ourFacebook page and follow us on Twitter for daily updates.
The Fundamentals of Classroom Management: An online course designed by Richard James Rogers in Partnership with UKEd Academy
I’m very excited to announce that I’ve been busy building an online course that covers all of the fundamental concepts in my widely acclaimed debut book: The Quick Guide to Classroom Management, in partnership with my good friends at UKEd Academy. Details are given below:
Price:£30.00(which includes a copy of my book) or£20.00if you’ve already got a copy of my book (you’ll have to enter a discount code found within the book)
Launch date:October 21st 2019(but you can start the course at anytime)
End of course certificate? – Yes, endorsed by UKEd Academy and Richard James Rogers
Course structure:Videos, quizzes, study notes, reflections and activities
Course schedule:Flexible(work at your own pace)
After successful completion of this course you’ll earn a certificate that will look very impressive on your C.V. and you will gain lots of knowledge, new techniques, tools and skills.
I look forward to mentoring and guiding you through the key concepts that make an excellent teacher, well, excellent!
If you have any questions at all about this exciting course, then please e-mail me atinfo@richardjamesrogers.com
We welcome you to join the Richard Rogers online community. Like ourFacebook page and follow us on Twitter for daily updates.
A dangerous culture has quietly found its way into a large number of American and British schools in the past decade. Like a wolf in sheep’s clothing that seems pretty on the surface but harbors malice within; over-rewarding continues to take hold like a malignancy to this day.
Betty Berdan was an American high-school junior at the time of writing thisexcellent opinion piecein the New York Times. She eloquently summarizes her thoughts on over-rewarding as follows:
Like many other kids my age, I grew up receiving trophy after trophy, medal after medal, ribbon after ribbon for every sports season, science fair and spelling bee I participated in. Today the dozens of trophies, ribbons and medals sit in a corner of my room, collecting dust. They do not mean much to me because I know that identical awards sit in other children’s rooms all over town and probably in millions of other homes across the country.
Rewarding kids with trophies, medals and certificates for absolutely everything they do, including participation in a sports event, seems harmless at first glance: what’s wrong with encouraging kids to take part, right?
My thoughts on this are simple:the real-world doesn’t reward mediocrity, and if school’s are designed to prepare kids for the real world, then they shouldn’t be rewarding mediocrity either.
Your boss doesn’t give you a pay-raise or certificate for turning up to a meeting: it’s a basic expectation. You don’t get instant recognition and brand awareness for starting an online business: you have to slog your guts out and make it happen.
The world is cruel, but it’s especially cruel to high-school graduates who’ve been babied right the way through their schooling and come out the other side believing that they’re entitled to everything: that they’ll receive recognition for doing the bare-minimum.
Some teachers may feel that rewarding everyone, but keeping ‘special rewards for winners’ is a good way to go. But what benefits can be extrapolated from removing first, second and third place prizes at a sporting event, or even removing winner’s trophies completely?
According toAlfie Kohn,author of Punished by Rewards:
A key takeaway here is that awards aren’t bad just because the losers are disappointed; everyone (including the winners) ultimately lose when schooling is turned into a scramble to defeat one’s peers
Really, Alfie? So awards are bad because losers and winners feel bitter? I think school culture has got a lot do with that. In school’s where students are encouraged to celebrate each other’s achievements, and aspire to do their best, overall achievement and attainment increases. A massive study by the University of East Tennessee, for example, found that classroom celebrations of achievement enhanced:
Group solidarity
Sense of belonging
Teacher’s ability to find joy and meaning in teaching
I don’t see much about bitterness there, Alfie.
Here’s another one I pulled-up: Ameta-analysis of 96 different studiesconducted by researchers at the University of Alberta found that (look at the last sentence especially):
…….reward does not decrease intrinsic motivation. When interaction effects are examined, findings show that verbal praise produces an increase in intrinsic motivation. The only negative effect appears when expected tangible rewards are given to individuals simply for doing a task.
This confirms what teachers have known for years (at least those with brains in their heads): that awards have no value when they are given to everyone, but have lots of value when they have to be earned. This coincides with the Four Rules of Praise that I wrote about in 2018 (supporting video below).
Conclusion
Teaching profession, some words of wisdom: Awards and rewards only work to improve motivation, attainment and achievement when the students have had to earn them. Foster a school culture of collective celebration when students achieve success (such as using awards assemblies), and articulate the skills and qualities needed to achieve success to those students who sit and watch the winners, hopefully with smiles on their face and pride in knowing that one of their own made it happen, and they can too.
We welcome you to join the Richard Rogers online community. Like ourFacebook page and follow us on Twitter for daily updates.
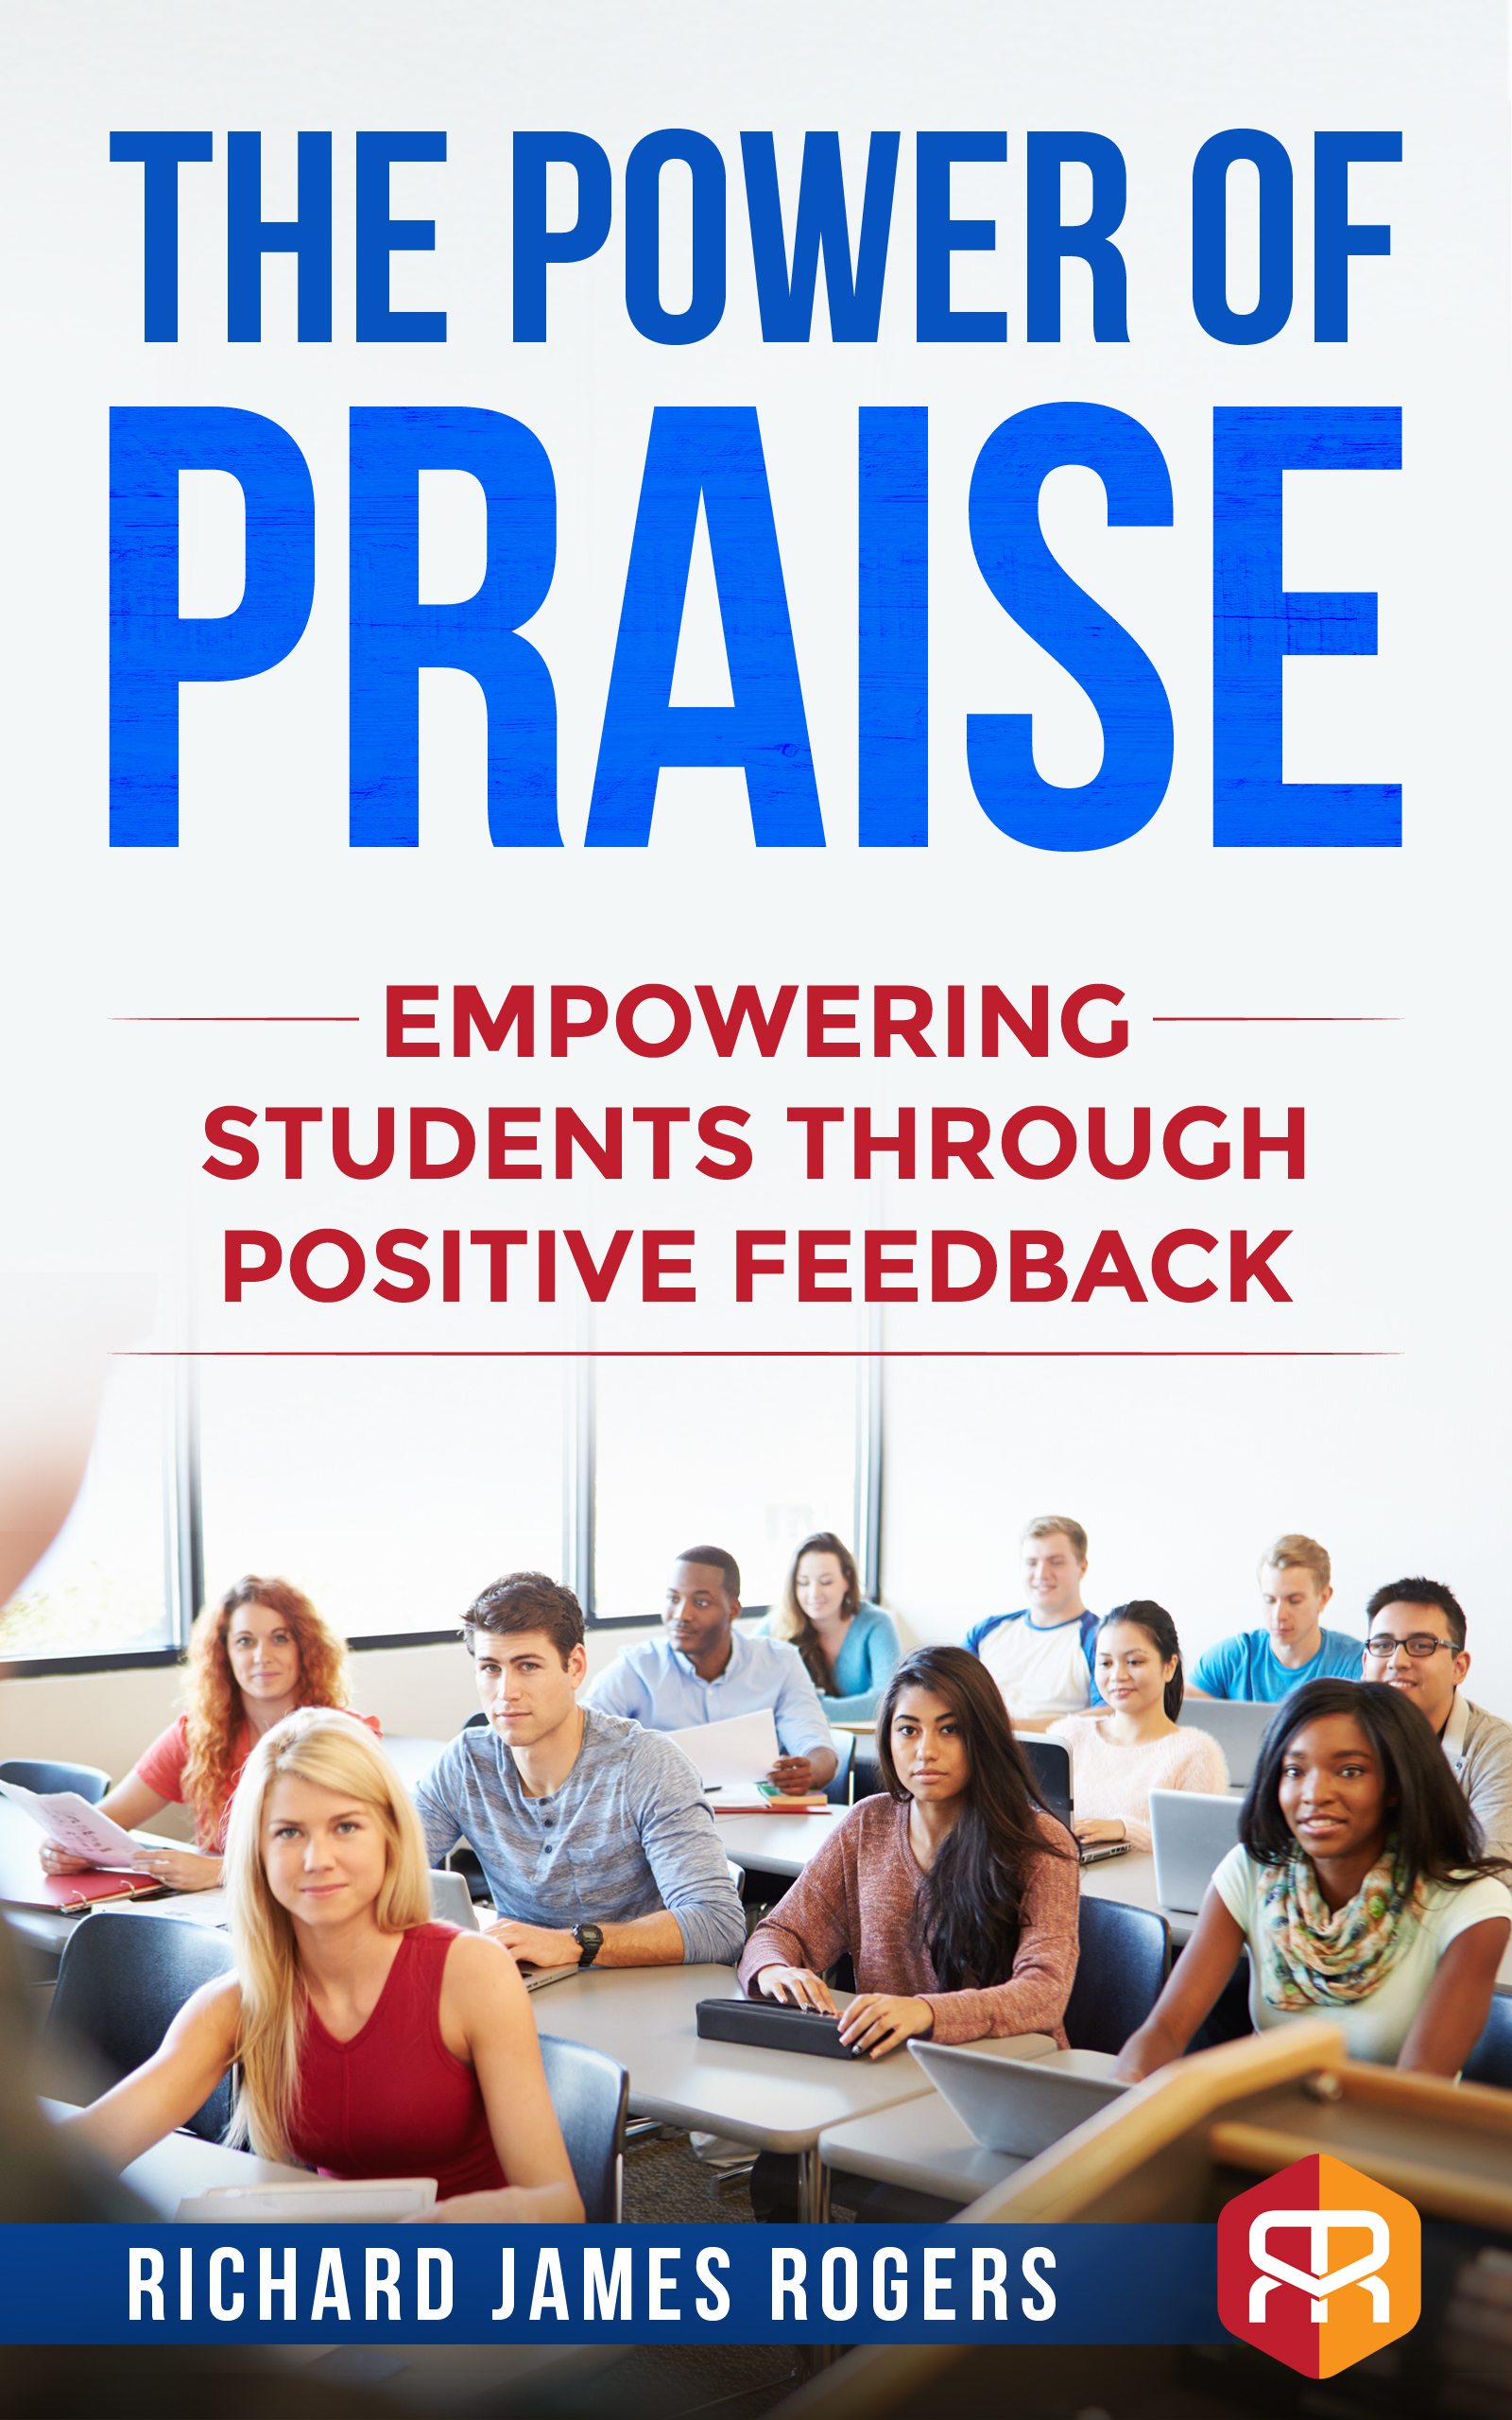
I’m very happy to announce that my second-book, which has (to my shame) been in the pipeline for many years, has finally been published on the Amazon Kindle store. The paperback will be released in mid-September. If you click on the image below, it’ll take you directly to the Amazon sales page.
My new book is split into three sections:
The philosophy of praise (why praise is important and what its effects can be)
The mechanics of praise (how to actually implement the various tactics available)
Ways to accentuate the efficiency of praise (how to ensure that praise and feedback only takes up the time and effort that it needs to)
From the outset I make the point that praise in the form of marking provides acknowledgement for work completed. This is essential, as every student needs to know that their time and effort has been noticed, is being monitored and has been recognized.
The implication of this statement is that quick turn-around of work is necessary so that students understand the reasons behind their feedback, gain empowerment maximally and receive positive reinforcement of the skills, knowledge and concepts that they are currently learning in class.
Teachers (me included) can find it a challenge to provide high-quality feedback in a timely manner, however. This is where praise mechanics and efficiency come into play.
There are a number of techniques that teachers can employ to save time whilst providing excellent feedback. In this new book, you’ll find sections on:
Peer-assessment
Self-assessment
The effective deployment of verbal feedback
Automated assessment – the use of software to test our students
Live marking
Many others
You can purchase my book here if you’d like a good, deep exploration of of a variety of praise-based techniques. As a little teaser for you, however, I’d like to share a particularly powerful technique with you.
‘Diffusive’ and ‘Absorptive’ live – marking
Diffusive live-marking is when the teacher walks around the classroom when the kids are working on a a task, pen-in-hand, and marks student work in real-time (i.e. ‘diffusing’ through the students).
Absorptive live-marking is when the teacher sits at a designated point in the classroom and calls the students to his or her desk. one-at-a-time, and marks work in real-time (i.e. figuratively ‘absorbing’ the students).
Coupled with verbal feedback, both techniques can be incredibly powerful. If you train the students to write “Mr Rogers said that………….(insert feedback here)” in a different color on their work, then you allow the students to process your feedback on a very deep-level, and this builds long-term memory. Obviously, use your name instead of mine!
Eventually, students will remember key mistakes that are repeating in their work and they will act to rectify those (they won’t like writing the same things over and over again).
We welcome you to join the Richard Rogers online community. Like ourFacebook page and follow us on Twitter for daily updates.
Preparing resources for students can be a really massive job: especially when you have the responsibility of getting kids ready for external exams.
They’ll need:
Presentations (usually a series of PowerPoints)
Worksheets
Homework
Exam-style questions
Practical activities (for Science, D.T. and other practical subjects)
Learning activities along the way to make things ‘fun’ and ‘engaging’.
In the olden days I used to source a ton of stuff from the web and make some stuff from scratch. The problems this caused were as follows:
An inconsistent teaching method/approach for each topic
Inconsistent format and detail of resources (some PPTs were excellent. others only skimmed the surface of the topic)
Inconsistent direction and focus of the class (i.e. the ‘road ahead’)
Kids need to be very clear about what they need to learn for their exams, and in what order/topic sequence. So please sit back and relax as I share my consistency-generating tips for exam-level students.
Richard’s new Kindle book. Only $3.99
Share the syllabus with the students on day one
This will really help to make the ‘road ahead’ clear. Some teachers like to make a ‘kid friendly’ version of the syllabus – using language that is more easily understandable. In my experience, however, I find that this isn’t generally necessary – syllabuses tend to be clear enough.
In addition to sharing the syllabus, map out the sequence of topics you will teach for the year ahead and share this with your students too. Some more able and hard-working kids will definitely read ahead, and it’ll help prepare your students for end-of-unit tests too.
Check them out if you want to really understand the importance of this aspect of Curriculum Clarity – her PPTs follow the same format and layout for each topic and are all detailed enough so that a complete course is created.
IB Chemistry is split into distinct topics that follow the Course Guide – there’s a PPT at Mindy Sautel’s site for topics 2.1, 2.2, 3.1, 3.2, etc. Everything is sequenced and clear.
Keep homework and questions consistent and linked to the syllabus
Maybe your syllabus is split into topics A,B,C and D with subtopics for each section. Do you have exam-style questions for topics A1, A2, A3, etc?
Organizing your questions by topic in this way will really build-up the subject knowledge that your students need to pass the final exam.
We welcome you to join the Richard Rogers online community. Like ourFacebook page and follow us on Twitter for daily updates.
I’m now 36-years-old. The years have flown by, and they have taught me that my life and time are both very precious.
As a young and rather gullible NQT at 23-years-old, I was a massive time-waster. I wasted time on almost every nuts-and-bolts aspect of teaching. I wasted time writing reports from scratch. I spent hours creating tests and assessements and homeworks, and then hours marking them because I stupidly forgot to source or create an official mark scheme. I put kids on detention and then realised that I had to supervise those detentions, and that ate into my free time.
Nowadays I have long-since scrapped all of those clumsy behaviours and I now streamline everything I can for maximum effectiveness.
So, grab a cup of tea or coffee and sit back because I’d like to share my new and improved teacher behaviours for maximum effect and efficiency.
Hack #1: Copy, paste and modify school reports
Writing school reports used to be a massive chore for teachers. I still remember receiving hand-written reports when I was a kid – imagine how long those must have taken for my teachers to write!
Well, the cat’s out of the bag now, and I don’t feel ashamed to say that it’s okay to do a bit of copying and pasting with school reports – so long as you always modify the reports to match each student.
Here are the steps to follow:
Write a really good set of original, unique school reports for your students. Save these to your computer somewhere (e.g. on Microsoft Word® or Google Docs®) and be sure to comment on attainment, progress and overall characteristics. This first stage will take considerable time (but it’s time that’s well-invested).
When the next reporting cycle comes around, look at your student data and and use your own judgement to see which students match your old reports you wrote. For example, Jennifer from this reporting cycle might be very similar to Susan, who you taught last year.
Use the ‘Replace’ feature on a word processor (like MS Word) to quickly change names, adjectives, genders and other key terms.
Add some unique descriptors and features for that student. Make sure the report accurately reflects the student you’re writing about.
Highlight the report you’ve just modified so that you know that you’ve used this one (you don’t want to duplicate copies)
Copy and paste the text into your report-writing system at school.
I like to be quite prosaic in my report-writing – it ensures that my reports are accurate and professional. I sometimes use a template to help me.
Create a S.W.A.P. template
Every report should contain these four elements (at the very least):
Strengths
Weaknesses (including targets)
Attainment
Progress
They don’t necessarily have to be in that order, but they should all be present somewhere.
A good template can save you tons of time, and will ensure that your reports are detailed and accurate. I’ve given an example with applications below. Please feel free to copy and paste and use this as you see fit:
x has had adisappointing/steady/good/very goodterm/half-term/year/semester. He/She has shown strengths in a number of areas including……………………….. . This is pleasing, but even further progress could be made by………………………………. x’s most recent recent assessment score was ……………., which indicates to me that……………………….. Progress has been disappointing/steady/good/very good, as exemplified by the fact that…………………
Let’s see this in action below:
Example 1: An excellent student
Joshuahas had avery goodhalf-term. Hehas shown strengths in a number of areas includingmodular arithmetic, definite and indefinite integration and differentiation.This is pleasing, but even further progress could be made bycompleting more of the Higher Level assigned tasks on MyiMaths, as he does have the ability to challenge himself further.Joshua’smost recent assessment score was83%, which indicates to me thathe is completing the necessary revision at home.Progress has beenvery good, as exemplified by the fact thathe has jumped from a level 6 to a level 7 in the space of just seven weeks.
Example 2: An average student
Lisa has had a steadyhalf-term. She has shown strengths in a number of areas including balancing chemical equations and completing laboratory practical work. This is pleasing, but even further progress could be made by completing more practice questions on Quantitative Chemistry and using the model answers as a good guide for improvement.Lisa’s most recent recent assessment score was 54%, which indicates to me that she has a good knowledge of some areas of the subject, but needs to work harder to revise identified weaknesses. Progress has been steady, as exemplified by the fact that Lisa’s assessment scores have been consistently above 50% since the start of the course.
Hack #2: ‘Live’ Marking
I have personally wasted so much of my free time both at school and at home marking student work. Many late nights; many lost weekends. All for nothing.
Well, not completely for nothing – at least now I’ve seen sense and can pass on my experiences to you so that you don’t go through the same pain.
You see, I now know that feedback only works if it is relevant, specific and somewhat emotional. How do we achieve this? – we must mark student work with the students. They have to be involved too.
As soon as I started doing these things, my impact skyrocketed:
Simply walk around the classroom with a colored pen in hand. Tick, flick and mark student work as you walk around.
For larger pieces of work, set the kids on a task and call the students to your desk one-at-a-time. Sit with the student and discuss the work, adding written comments in front of the student along the way. Use praise effectively and remember – praise only works if it is sincere, specific and collective (tell your colleagues and get them to praise the student too).
Use peer-assessment and self-assessment, but don’t do this for everything. Students still need to receive acknowledgement from their teacher.
I’ve written a useful article about peer and self-assessment techniqueshere. Some general advice on giving feedback can be foundhere.
Here’s a video I made about the Four Rules of Praise:
Hack #3: Education Apps
I had the chance to rigorously test out the apps I’m about to show you and, I can tell you: they really do make life easier (and they can do some cool things too!).
Cool Feature #1:You create a slideshow on Nearpod. Your kids login with a code that Nearpod generates (they don’t need to sign up, which saves tons of time) and, boom!: the slideshow will play on every student’s device. When the teacher changes a slide, then the slide will change on the kids’ screens.
“An AMAZING Book!”
You can choose to show the slideshow on a front projector screen/smartboard, or simply walk around the class with your iPad or laptop as you’re instructing the kids.
Cool feature #2:Put polls, questions, quizzes, drawing tasks, videos, 3D objects, web links and audio segments into Nearpod presentations to make the experience fully ‘interactive’.
When I tested Nearpod I thought it was super-cool because I could write an answer (as a student) and it would show on the front-screen as a sticky-note with everyone else’s. Chelsea Donaldson shows this excellent image of what I experienced over at herblog:
As you can see, other kids can click ‘like’ and can comment on the responses, making this an ultra-modern, ‘social-media’ style education tool.
Another feature I loved was ‘Draw it’. It’s similar to ‘collaborate’ (the feature above with the sticky-note answers), but this time the students either draw a picture or annotate a drawing you have shared.
I can see this being great for scientific diagrams and mathematical operations.
Students can use a stylus/Apple Pencil, their finger (if it’s a non-stylus tablet or phone they are using) or even a mouse to draw the picture. Once drawn, the pictures will show up on the teacher’s screen together, and this can be projected if the teacher wishes.
Cool feature 3:Virtual reality is embedded into Nearpod (and I need to learn a lot more about it!).
I don’t understand it fully yet, but Nearpod themselves say that over450 ready-to-runVR lessons are ready on their platform, including college tours, mindfulness and meditation lessons and even tours of ancient China!
Now that sounds cool!
My thoughts about Nearpod
I like apps that are quick, useful and free/cheap to use.
Nearpod ticks all of those boxes.
The features that I tested which were super, super cool include:
Kids log in with a code and your presentation appears on their screens. When you change a slide, the slide changes on their devices!
You can put polls, drawing tasks and questions into your slides and it’s all fully interactive. Kids’ answers will appear on the projector screen for all to see (if you wish), or simply on the teacher’s screen (for private viewing).
I love this app and I look forward to using all of its features with my students.
Cool feature #1:Noteability has allowed me to make the most amazing notes and save tons of paper and paper-notebooks in the process. Just look at these beautiful notes I made during my Science JAWs training a few months ago:
As you can see, you can select a wide variety of colors and make beautiful notes, Mind-Maps®, concept-maps, flow charts, diagrams and more.
I use this feature of Noteability to:
Plan things in my daily life (such as my blog posts, my weekend plans, my fitness plans, etc)
Write shopping lists
Write lesson plans
Take notes in school meetings
Cool feature #2:Noteability allows you to annotate PDFs with the Apple Pencil. This is absolutely brilliant and has allowed me to annotate my IB Diploma Chemistry coursework (Internal Assessment) quickly and clearly before uploading the coursework to the IBIS system.
I can see this feature becoming really useful for schools that want to save paper and for teachers that want to annotate coursework, homework or classwork and then send it back to the student in some way (e.g. by e-mail, through Google Drive or through Google Classroom).
Take a look at this IB Chemistry coursework annotation I recently did with Noteability and the Apple Pencil:
Another way to use this feature is to get the kids to scan their classwork, homework or past-paper answers and then annotate each other’s work with the Apple Pencil. The teacher could also annotate it too:
Cool feature #3:Students can make revision notes, classnotes, homework assignments and submit work all through Noteability. Using the ‘split-screen’ mode on the iPad Pro they can even copy images and charts directly from a web-page they are reading at the same time:
For students, I can see Noteability being using in a range of creative ways:
Making revision notes
Annotating their own work, or each other’s
Creating assignments and presentations (Noteability allows users to copy content from the web seamlessly using ‘split-screen’ mode)
Making notes in class
There is the possibility that tablets may even replace traditional school notebooks in future too – removing the need for 11-year-old kids to carry really heavy bags around school all day (and this has already been linked to back problems).
My thoughts on Noteability
I mentioned this a few blog posts ago but I feel it’s worth a second shout-out.
I like this app because it has basically replaced all of my notebooks, and is an excellent planning, note-taking and annotation tool.
A big drawback of Noteability, at the time of writing, is that it is only compatible with iOS. Not all students use Apple devices, and schools won’t always fork-out money for them. However, I have found that my own personal investment in an iPad Pro, along with Noteability, has enchanced my life in many ways and has benefited some of my students as I have been able to annotate their work better than ever before.
Cool features: Flipgrid is a secure video-commenting/video-conferencing platform. Flipgrid’s mission is to “Empower student voice” and they’ve certainly achieved that with this app.
Basically, the teacher uploads a video of himself/herself asking a question, or posts a question, link, resource or video, and the students respond by taking videos of themselves responding to the material.
It’s super cool!
Once the students have uploaded their videos of themselves, other students can see them and watch them (and comment on them). They can even respond to videos with videos, so it really can get a discussion flowing!
Image courtesy of Flipgrid
Each video a student creates will receive feedback from other students and the class teacher, and the student who made the video can quickly see the feedback they’ve received.
I would recommend all tech-interested educators to check out Jess Bell’s guest blog post over at larryferlazzo.edublogs.org entitled‘Getting Started with Flipgrid’.
My thoughts on Flipgrid
When I tested it it took me a while to figure out how to use it, and what its purpose was.
Once I’d signed up, however, the website directed me to lots of great help and resources. There’s a load of pre-made lessons and students can sign in with a simple pre-generated code (like Kahoot! and Nearpod) which saves tons of time.
Once you’ve signed up (it’s free) and you’re in on Flipgrid, your dashboard will look something like this:
As you can see: it has a very user-friendly interface.
Hack #4: Learning Journals
Shortly after getting my PGCE and completing my NQT year in the UK, I came to Thailand to work as a Chemistry Teacher at an international school in Bangkok. I was lucky enough to have been given a very able and hard-working class of Year 10 students to teach. In fact, the illustrator of this blog and my books: Pop Sutthiya Lertyongphati, was in that class.
I decided to try Learning Journals with these IGCSE Chemistry students. The idea was that they were to buy a special notebook (not their normal class book) and fill it with revision summaries, mind-maps, key words and anything learnt in class each week. I wanted it to be a ‘living journal’, and not just simply a replica of the students’ class notes.
The students mainly took to it verywell. Extracts from Pop’s beautiful Learning Journal are shown below:
Highly-motivated students like Pop would always hand in beautiful notes, every single week. In fact, CfBT inspectors came to that school that year and they said that Pop’s notes were the best they had ever seen!
Wow! That’s quite a statement.
However, some students didn’t take to it that well and I found out why: I wasn’t giving feedback regularly enough. Some weeks I would be too busy with other school things, so I would sometimes (to my shame) collect in the journals and simply give them back the next day with some simple verbal feedback only.
I discovered that when students were given some written feedback on a weekly basis, however small, they was a marked improvement in the quality of the journals I received each week.
Back then, when I realised this at 26 years of age, I would write multiple comments on every page in a student’s journal. This almost killed me when I had 20 journals to mark. I soon gave that up and came up with a better way.
Oh, but did the journals work? Well…that class went on to get 100% A*-C in their Chemistry IGCSEs.
Did the journals help them achieve this? I believe so.
My updated (better) journaling system
I’ve set up a Learning Journal system with my Year 11 IGCSE and Year 12 and 13 IBDP classes. Every Monday they must bring their journals to my room and place them in the right place, as shown below:
Then, after school every Monday I write one and only one post-it note of feedback for each student; which I stick in their journals. This keeps my feedback focused on the essentials and increases my productivity.
An example of what this feedback might look like is given in this reconstruction below:
Students pick up their journals (with post-it note feedback inside) every Tuesday, meaning that they are getting recurring, weekly feedback as well as regular, meaningful homework.
I’ve been using this system successfully for a few years now. The student-sign register system allows me to quickly see who hasn’t completed a journal and the fact that I force myself to get all of the post-it-notes filled in on Monday evening means that I can chase up late journals very quickly.
A little ‘tweak’
I did find that the Monday evenings were becoming quite hard because of all of the journals I was marking. Now, I spread out the days to match my timetable:
Year 11 give me their journals on a Monday
Year 12 on a Wednesday
Year 13 on a Friday
The system allows me to give regular feedback to my students, and it seems to be showing in the progress they are making in tests and assessments.
In addition to this, I’ve turned my Learning Journals into a ‘live-marking’ recurring feedback system: I mark them in class, with the students. It means that I lose no free time, and I am able to give one-to-one feedback to each student that is meaningful and specific.
Learning Journals Conclusion
Journaling is a powerful tool when used correctly
It can be applied to any subject area
It’s great for exam-level classes doing revision
Recurring feedback and meaningful homework come as part of the package
The students can be creative and present their journals in any way they choose (online is an option too)
The feedback process allows the teacher to get to know their students’ strengths and weaknesses very quickly
The Learning Journal is a permanent record that the students can treasure and be proud of
Journaling is not used enough in the teaching profession. I aim to change this.
Hack #5: Self and Peer Assessment
There’s no doubt about it – getting students involved in their own assessment and marking has a wide-variety of benefits.
Take this greatsummaryby Rosario Hernandez at University College Dublin for example, which explains that peer-assessment benefits students in four key ways:
Promotes high quality learning
Contributes to skills development
Furthers personal development
Increases students’ confidence, reduces stress and improves student motivation
That’s quite a convincing list!
Not surprisingly, similar things can be said of self-assessment. This greatoverviewby the University of Sydney advocates for the wide-use of self-assessment with students for the following key reasons:
It encourages student involvement and participation, so it’s great for students who normally find group activities or active class tasks a little uncomfortable
When used in conjunction with group work it can be a great way to assess one’s personal role and contribution in the group experience and learning process
Academic appraisals aside, I’ve found from my personal experience that both self and peer-assessment are absolutely invaluable to the modern practitioner. They save you oodles of time as a teacher and students learn so much from each process.
But how should we use self and peer-assessment?
There are a number of different ways that self and peer-assessment can be used in the classroom. My experience has taught me (the hard way!) that the following tasks work really well:
Making corrections to tests and assessments: When any important test or assessment comes up, I don’t think it is appropriate to have students marking these themselves. They’ll get it wrong, even with a mark scheme to use, and will be overly generous on themselves and their peers (unless they’ve been trained for a period of time – more on that next). However, a great activity is to mark the tests yourself, then give the tests back to the students along with the a printed or online mark scheme. The students could then use a coloured pen to make full and detailed corrections to their test papers. You could turn this into an AfL exercise, with students writing down the question numbers they got wrong on the whiteboard, or on an anonymous piece of paper. You could then go through these questions afterwards to clear up common misconceptions. If you run a regular learning journals system (as I currently do), then students could write down the questions and the model answers in their learning journals. This causes very deep-learning to take place and is great for building long-term memory!
Assessing homework, classwork and regular assignments: A great time-saver for teachers. Just make sure the kids have access to the model answers. Don’t forget to collect the work in too – you need to know that the kids actually did the work you asked them to do.
Past-papers: Exam-level students really need to become familiar with the official mark schemes provided by exam boards. They need to become comfortable with key vocabulary, language and command terms. Provide exam-level students with regular past-papers to do as homework. Provide mark schemes too, so that they can self and peer-assess their work in class later. For older students (e.g. ‘AS’ – Level, SAT and IBDP learners) I’ll sometimes give them past papers and mark schemes to take home. Their task is to complete the past-papers under timed conditions and mark them using the mark schemes. The student then hands me the papers completed and marked (this is essential – I need to know that they have completed the assignment). I then check the papers for common misconceptions and target those in class.
Technological means: There a number of ways in which technology can assist in the peer and self-assessment process.Google formsare great; as are online quizzes provided by trusted third parties (e.g.BBC BitesizeandMyiMaths) and online quizzes that teachers can build by themselves (e.g.Quizlets). Make use of these and others (e.g.Kahoot– great for getting kids to use their mobile devices), as they are really interactive and can offer a nice break from traditional methods.
Training students to assess themselves
This is a gradual process and basically involves exposing students to exam-style questions and past-papers; along with their mark schemes, over a prolonged period of time. The process is straightforward but can be monotonous: provide past-papers as homework, classwork, projects and even through a special past-paper ECA club (which I’m currently doing with my IGCSE and IBDP students – it’s very effective).
There are a number of creative ways to train students up in proper exam-technique:
Cut up the questions and answers to past-papers and hand them to students one-at-a-time. They can only come and get the next question when they’ve effectively answered and marked the previous one.
Give students the answers to questions and get them to write the questions! Use the same method as the previous bullet-point above, or set up a large display and get students to put their answers on post-it notes which they can stick to the display.
Get a big container filled with cut-up exam questions. Students have to pick out questions from the container in pairs or threes, and work on them. No two groups should have the same question.
Students can make revision videos, websites and even stop-motion animations that contain exam-style questions and answers.
We welcome you to join the Richard Rogers online community. Like ourFacebookpage and follow us onTwitterfor daily updates.